Showing posts with label Tree. Show all posts

Friday, January 22, 2021

Tree Diseases on Bark

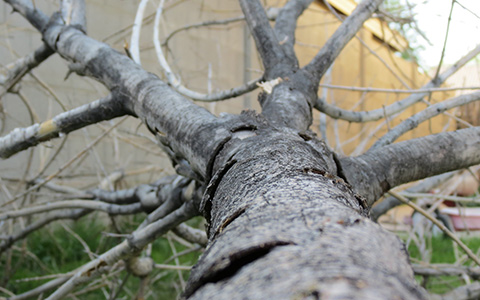
Canker disease swelling and girdling tree trunk

Prevent diseases on your tree’s bark from killing it. Knowing what type of disease is growing on or in your tree will help you take appropriate measures to treat it.

72tree.com gathered information on diseases that affect or appear on tree bark, how severe they are, and what actions are needed to prevent the disease from spreading.

Tree Bark Diseases

Tree bark completely covers a tree’s trunk, branches, stems, and twigs. It could be seen as a protective skin that repels insect infestations, shields against pathogens, and resists physical damage. Frequently, however, a stressed tree will likely develop one of the following:

Cankers on Trees

Cankers are dead areas of bark on a tree’s trunk or branch. Multiple factors can cause bark death, like damage caused by an impact, bacteria, or fungi. Pathogens such as bacteria or fungi are usually unable to penetrate healthy bark, but if the tree is stressed or the bark is damaged, infection is more likely. Consider the following types of cankers:

Wound Canker – These cankers, sometimes referred to as annual cankers, are most common at or near the base of a tree. They are typically caused by a lawnmower, vehicle, and/or maintenance equipment strikes or repeated abrasion.

Cankers resulting from impact wounds are severe threats that need to be prevented. Allowing conditions for these wounds to persist can result in the girdling and death of the tree.

Prevention: Create a safety zone using organic mulch or gravel around the tree.

Tip: Existing wounds should be carefully trimmed (without widening or deepening the wound), so the tree can properly seal the wound. Point out these wounds/repairs to your tree professional.

Perennial Canker or Cytospora Canker (Target-Shaped) – This canker is one of the more common diseases of shade and fruit trees. It is caused by one of several Cytospora fungi (Nectria, Strumella, Eutypella, etc.) and attacks multiple hosts, including:

• Apple (Malus domestica)
• Apricot (Prunus armeniaca)
• Ash (Fraxinus)
• Aspen (Populus tremuloides)
• Birch (Betula)
• Beeches (Fagus)
• Cherry (Prunus avium)
• Elm (Ulmus)
• Hickories (Carya)
• Maples (Acer)
• Peach (Prunus persica)
• Poplars (Populus)
• Walnuts (Juglans)
• Willow (Salix)

Cytospora infections can occur via bark wounds, at junctions of dead and live branches, or at poorly cut pruning wounds. The fungi slowly grow through bark during the tree’s dormancy (late fall and winter). Then, in the growing season, the host trees respond by compartmentalizing the affected areas. This alternating growth of the fungus and the tree forms a distinct elongated, target-like appearance.

Identification: These cankers will appear sunken on branches or trunks and present the following:

• Colors vary from off-brown to gray shades
• Black fungal structures (pycnidia) embedded in small bumps around the wound
• Brownish to orangish masses of spores being extruded from pycnidia
• Oozing sap and/or a wet appearance

Tip: These cankers slowly expand over time and can eventually girdle the branch or the whole tree (when located on the trunk). Ask a professional tree service to evaluate your tree and recommend a course of action.

Diffuse Canker – With these highly lethal cankers, necrosis spreads so quickly that the host can’t compartmentalize the area fast enough to stop its progression. The differences between these and other cankers are:

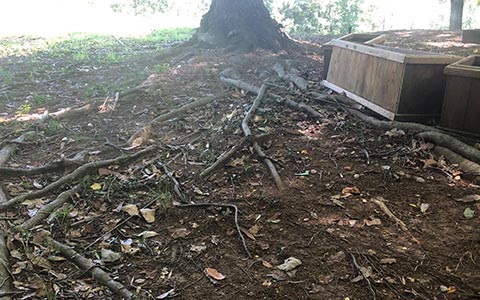
Necrotic diffuse canker on tree trunk killing bark

• No callus rings are formed, the affected area appears dark, sunken, and often moist
• Diffuse cankers continue expanding during the growing season
• When these cankers occur on a tree’s trunk, the tree will likely die

Some of the pathogens responsible for diffuse cankers are:

• Phytophthora dieback
• Cytospora canker
• Botryosphaeria canker
• Hypoxylon canker
• Chestnut blight

Identification: Diffuse cankers appear as sunken, dark areas similar to other cankers, but with no callus rings. It is common to see sap oozing from these cankers.

Note: Diffuse cankers move fast enough to completely girdle and kill their hosts in a single growing season.

Managing Pathogen-Driven Canker Diseases – As with nearly all tree problems, prevention is easier and less costly than treatment. Consider the following:

• Properly prune your tree (only in dry weather)
• Sanitize all pruning equipment with 10% bleach or 70% alcohol before and after each tree
• Remove and destroy any dead or infected material
• Prevent tree wounds (mechanical and environmental)
• Soil should be well-drained
• Improve tree health (water, fertilize, prune, and mulch)
• Apply a preventative chemical treatment to un-infected trees

Tip: Have your trees inspected annually by a professional tree service. Besides early detection of disease, you may identify other stressors that increase your tree’s susceptibility to developing cankers.

Mushrooms on Tree Bark

When you see mushrooms growing on a tree, be concerned. Mushrooms are the fruiting structures of fungi. For them to appear, the fungi must be well-developed and have caused extensive decay within the tree. Consider the following:

Mushrooms on a Tree Branch – Carefully prune the branch from the tree and destroy (burn) it. Avoid spreading pathogens from one tree to the next by sanitizing your equipment with 10% bleach or 70% alcohol before and after working on infected trees.

After removing all visibly affected limbs or branches, monitor your tree over the next growing season and have it thoroughly inspected for any other potential issues (decay-causing fungi can quickly spread throughout a tree).

Mushrooms on a Tree Trunk – Call a professional tree service as quickly as possible. Your tree’s trunk is likely suffering from extensive internal decay and needs removal.
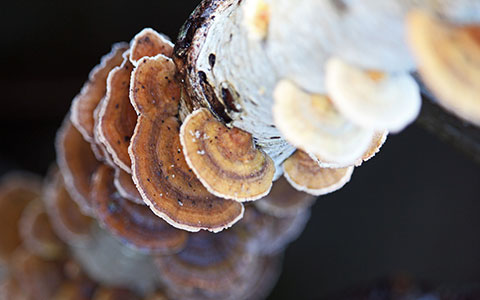
Mushrooms growing through birch tree bark signaling internal decay

Mushrooms on a Tree’s Root Flare – Again, this is an urgent scenario. When mushrooms grow from the root flare, there is likely significant decay within the tree’s roots, potentially destabilizing the tree when winds and storms come through. The tree will likely require emergency removal.

Treatment: When dealing with mushrooms on your tree, you will be limited to removing affected limbs and branches. For this, prevention is easier and less costly than treatment. Consider the following:

• Properly prune your tree (3 cut method)
• Sanitize all pruning equipment with 10% bleach or 70% alcohol before and after each tree
• Remove and destroy (burn) any dead or infected material
• Prevent mechanical tree wounds
• Prepare your trees for severe weather events
• Soil should be well-drained to avoid root rot
• Improve tree health (water, fertilize, prune, and mulch)
• Apply a preventative chemical treatment to un-infected trees

Tip: Avoid disturbing these mushrooms. Trying to remove them can release billions of microscopic spores into the air, potentially spreading the disease to other trees, shrubs, and plants.

Tree Diseases

In this article, you discovered information about the diseases that affect and appear on tree bark, the damage they cause, and how to prevent them.

By taking swift action to treat or remove a diseased tree, you are protecting your property and surrounding trees.

When you ignore diseases appearing on tree bark, you risk the sudden death or destabilization of the tree and the expensive damages it can cause when it falls.

Sources:
uaex.edu/environment-nature/forestry/health/treecankers.pdf
extension.usu.edu/pests/ipm/notes_ag/fruit-cytospora
extension.colostate.edu/topic-areas/yard-garden/cytospora-canker-2-937/

This article was first published on: http://www.72tree.com/tree-diseases-on-bark/

Tuesday, December 15, 2020

Tree Root Rot Causes, Symptoms, and Treatments

Root rot disease causes and identification

Don’t let root rot cause your trees to suddenly decline, die, and fall. Knowing how to identify root rot symptoms will help you save your tree or take action before it causes catastrophic property damages.

72tree.com gathered information on the causes of root rot in trees, how to recognize its symptoms, and what treatments you can use to stop or prevent it.

Tree Root Rot Causes

When root rot attacks a tree, the flow of water and nutrients from the roots to the crown is either impeded, or the invading pathogen is carried throughout the tree, killing its host. The following are several of those pathogens:

Rhizoctonia (this fungal pathogen adversely affects younger hosts, older trees are found to be more resistant)

Pythium (this fungus of the Pythiaceae family has 140 known species, most of which are now classified as parasites)

Rhododendron Root Rot (Phytophthora cactorum and Phytophthora cinnamomi were first thought to only survive in subtropical countries but is now known to thrive in cooler countries)

Fusarium (found worldwide, some of this pathogen’s species can adversely affect humans when infected crops are consumed)

Rosellinia necatrix (Dematophora necatrix, Hypoxylon necatrix, and Pleurographium necator, known as one of the most devastating plant fungal diseases, affecting several fruit tree and crop species)

Honey Fungi, Shoestring Root Rot, or Openky (Armillaria frequently occurs in hardwoods and pines)

Texas Root Rot (Phymatotrichopsis, Phymatotrichum, Cotton, or Ozonium root rot occurs more frequently in Mexico and the southwestern United States, causing sudden wilt and death)

Note: Fungal spores naturally occur and lie dormant in soil. These spores only begin reproducing when conditions support it. Such conditions include compacted soil, poorly-drained soil, and overwatering. As the fungi reproduce, tree roots provide a prime source of nutrients, allowing them to spread quickly.

Symptoms of Tree Root Rot

Root rot disease symptoms and treatment

Most visible symptoms of root rot strikingly resemble the signs of an advanced pest infestation, making an accurate diagnosis more difficult. The most common, above ground, symptoms of root rot include:

• Gradual or sudden decline without a detectible reason
• Severely stunted or poor growth patterns
• Smaller, chlorotic leaves or needles (new growth)
• Wilted, yellowed, or browned leaves or needles
• Dieback
• Severe canopy thinning
• Stress crops (abnormally large amount of fruit/seeds)
• Fungal fruiting structures (mushrooms) found on the root flare or growing from surface roots
• Once in the xylem and phloem (cambium), cankers or sunken dead areas may appear on branches or the trunk of the host

A more accurate way to diagnose root rot is to dig to the roots to see if decay is present. Care should be taken when exposing roots to avoid inflicting further harm to the tree.

Note: Anthracnose is another group of fungal pathogens that cause similar above-ground tree damage but are not typically associated with root rot. You can find further information about anthracnose at 72tree.com/symptoms-of-anthracnose/

Tip: Hire an ISA certified arborist to inspect and accurately diagnose the cause(s) of the symptoms you have identified.

Tree Root Rot Treatment

Trees can sometimes be saved early on by pruning out infected roots. If a tree is in an advanced state of decline, the recommended way to control root rot diseases from spreading is to entirely remove it.

Chemical treatments that include propiconazole, chloropicrin, fosetyl-aluminum, or methyl bromide, among others, won’t completely cure or remove the disease but can reduce the infection level. These treatments are applied in and around the root plate of infected trees and especially in holes left after infected trees, and their stumps have been removed.

Note: The application of chemical treatments on your trees (for any reason) should be performed as directed on the product labeling and closely monitored by a certified arborist.

Root Rot Prevention for Trees

Root rot disease protection for surface roots soil and overwatering

Trees have adapted over millennia to protect themselves against infection and illness. They are efficient at protecting themselves when healthy, and you can further assist them in resisting root rot by:

• Avoiding overwatering
• Ensuring proper water drainage by amending/enriching soil structure
• Preventing soil compaction on or around the root plate
• Protecting surface roots and trunks from mechanical and/or equipment damage
• Immediately addressing storm damage and/or soil erosion
• Removing unsalvageable trees from your property
• Planting disease-resistant species

Tip: You can also help trees fight fungal attacks by promoting their health. These are some of the things you can do to improve their health:

• Seasonal pruning
• Seasonally applying and refreshing organic mulch
• Deep watering (especially during drought conditions)
• Pre-growing season fertilization
• Annual tree inspections by a certified arborist

Note: The importance of annual tree inspections cannot be overstated. The ability to detect problems in their beginning stages offers more options to eliminate existing problems and take measures to prevent issues throughout the tree’s growing season.

Tree Root Rot

In this article, you discovered valuable information about the causes of tree root rot, recognizing its symptoms, and how to treat it or prevent it.

Taking swift action when root rot is suspected in your trees will increase your chances of saving them and preventing further infection.

Ignoring the signs of root rot will render your tree unsalvageable, invite other disease and infestation, and potentially cause catastrophic property damage when your tree destabilizes and falls.

Sources:
extension.umd.edu/hgic/topics/root-rots-trees-and-shrubs
ceventura.ucanr.edu/Com_Ag/Subtropical/Avocado_Handbook/Diseases/Root_rot,_how_to_spot_it_and_what_to_do_about_it/
forestpathology.org/root-diseases/
extension.psu.edu/rhizoctonia
hyg.ipm.illinois.edu/pastpest/199922c.html

This article was first published on: http://www.72tree.com/tree-root-rot-causes-symptoms-treatments/

Thursday, September 17, 2020

Metallic Wood-Boring Beetles Damaging Your Trees

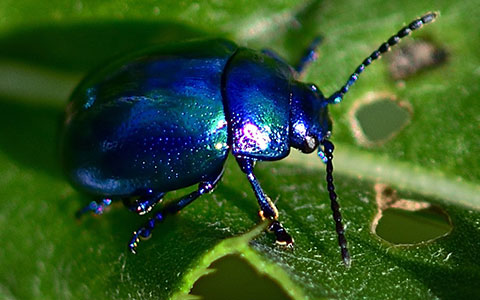
Buprestidae jewel beetle with metallic golden appearance

Prevent your trees from dying when metallic wood-boring beetles infest your area. By knowing how to identify these destructive beetles, you can take action to protect and treat your trees.

72tree.com assembled the following information on metallic wood-boring beetles (jewel beetles), the damage they cause to trees, how to protect your trees, and who to call when you identify their presence.

Metallic Wood-Boring Beetles (Buprestidae) – Jewel Beetles

Jewel beetles or metallic wood-boring beetles are members of the Buprestidae family of beetles, consisting of over 15,000 known species. The larvae of this immense beetle family are known as flathead borers. These beetles possess the following traits:

Appearance – Beetles have six legs and short antennae. Nearly all adult jewel beetles will have some metallic coloration on their body. In contrast, the brightest coloration typically appears under the wing covers (elytra) or on the insect’s underside.

Size – These beetles are generally cylindrical or elongated to oval, with lengths from .12 to 3.15 in; most species are under .80in.

Feeding Habits – Adult beetles of the Buprestidae family feed on their host tree’s foliage, causing little damage to the tree.

The larvae of these beetles burrow through the bark, roots, and stems of multiple species of trees and woody plants to reach the cambium (water and nutrient delivery system of the tree).

Some of the more well-known jewel beetles include:

•Emerald Ash Borer (Agrilus planipennis)
•Golden Buprestid (Buprestis aurulenta)
•Bronze Birch Borer (Agrilus anxius)
•Red-legged Buprestis (Buprestis rufipes)
•Flathead Apple Tree Borer (Chrysobothris femorata)
•Anthaxia (Anthaxia)
•Oak Splendor Beetle (Agrilus biguttatus)
•Eurythyrea austriaca (Linnaeus, 1767)

Note: Scientists at the Georgia Institute of Technology in Atlanta uncovered that jewel beetle color results from light-reflecting properties of the cells comprising their external skeletons. This research suggests that a jewel beetle’s color results from its physical structure (cell alignment) rather than pigment’s light-absorbing properties.

For important information about the emerald ash borer, read 72tree.com/emerald-ash-borer-tree-damage/

Agrilus planipennis emerald ash borer eab

Metallic Wood-boring Beetle Life Cycle

As with most beetle species, their life cycle can be separated into 3 distinct phases, including:

Adult – In spring and summer, adult beetles emerge from their host and feed on its foliage while searching for a mate. Adult jewel beetles are typically short-lived, living only for a few weeks.

Egg – Females lay eggs in crevices in the bark of the same or a nearby tree.

Larva – After hatching, larvae bore into the host until reaching the nutrient-rich cambium of the host tree, where it feeds, grows, and pupates.

Most species have one generation per year or take multiple years to develop. However, some species may produce multiple generations per year.

Metallic Wood-Boring Beetle Infestation Identification

While visual confirmation of adult beetles is best, the following symptoms indicate that a metallic wood-boring beetle infestation is occurring:

•Partially consumed foliage (Leaf notches)
•Chlorosis of foliage in sections of the crown
•Dieback of foliage and stems
•Frass (sawdust) found on the bark from burrowing activities
•D-shaped exit holes in tree bark
•Bulging or vertical splits in the bark (over larval galleries)
•Suckers and water sprouts growing in the crown, on the trunk, and/or from the roots
•Woodpecker damage (woodpeckers hunt beetle larvae)
•Squirrel activity (some squirrel species feed on beetle larvae)
•Adults found in traps

Combined, the beetle’s different stages’ feeding habits will leave a tree with damaged, wilting foliage, and in rapid decline.

As larvae continue to feed, they channel through their host’s cambium layer in a zigzag or ribbon pattern. This feeding ultimately leads to a partial or total girdling of the host, resulting in hydraulic failure and death.

Buprestidae larva consuming ash tree cambium

Affected Tree Species – Some tree species especially susceptible to wood-boring beetles in the Buprestidae family include:

•Pine (Pinus)
•Spruce (Picea)
•Fir (Abies)
•Hemlock (Tsuga canadensis)
•Ash (Fraxinus)
•Beech (Fagus)
•Hazelnut (Corylus)
•Apple (Malus domestica)

Generally, Buprestidae prefer attacking trees and woody plants in decline or dying. However, a number of the species will attack “green,” flourishing specimens. An example of this is the emerald ash borer (EAB), which has decimated the ash tree population in many parts of the US and continues on the move.

Note: Many wood-boring beetle species seek, attack, and infest specific tree families like the emerald ash borer that attacks those species within the ash family.

Metallic Wood-Boring Beetle (Buprestidae) Control and Prevention

Metallic wood boring beetle adult consumes tree foliage

Due to their larvae’s hidden feeding activities, preventing a metallic wood-boring beetle infestation is not always possible. However, the following practices will help reduce the risk of an infestation:

•Select well-adapted species of trees not commonly attacked by wood borers in your area.
•Choose and prepare a suitable planting site to avoid tree stress, freeze damage, sunscald, windburn, and other stressors.
•Use proper watering and fertilization methods.
•Use proper seasonal pruning practices (winter/dormant season).
•Avoid mechanical injury to tree trunks from lawnmowers construction.

Your trees’ care includes the safe removal and destruction of infested, diseased, and dying trees from your property and surrounding areas.

Most of the time, wood-boring insects are secondary invaders (successfully attacking a tree already in decline). For a tree, the first line of defense against any infestation is to keep them healthy. Proper care of trees and woody plants discourages many borer pests. Good sap flow from healthy, vigorous trees, for example, defends the plant from damage by many borer pests.

If you have confirmed a boring insect infestation on or near your property, immediately contact an ISA certified arborist to evaluate your property’s risk and recommend a course of action.

Note: If you are inclined to use chemical treatments on your trees or as a ground soak, allow a professional to apply it. To chemically stop or prevent a boring insect infestation, such products must be applied correctly and at the right time.

Jewel Beetles (Buprestidae)

In this article, you discovered essential information about metallic wood-boring beetles, their appearance and life cycle, how to identify an infestation, and how to prevent or control these deadly beetles.

By taking swift action to prevent or control a jewel beetle infestation, you are helping all of the trees on and around your property.

When you allow a wood-boring beetle infestation to go unchecked, you can be responsible for devastating infestations spreading far beyond your property.

Sources:
texasinsects.tamu.edu/woodborer-metallic-woodboring-beetle/
extension2.missouri.edu/g7422
fs.usda.gov/Internet/FSE_DOCUMENTS/stelprdb5320268.pdf
nsf.gov/news/news_summ.jsp?cntn_id=115304

This article was first published on: http://www.72tree.com/metallic-wood-boring-beetles/

Tuesday, August 18, 2020

How To Remove a Tree Stump Without a Grinder

Exposing tree roots to cut them and remove the stump

Avoid spending hundreds of dollars hiring a firm or renting a grinder to remove your tree stump. By knowing how to safely remove a tree stump, you can regain your landscape and save money.

72tree.com assembled the following information on methods for removing a tree stump without a grinder and crucial safety measures to observe.

Manual Tree Stump Removal

You can remove small and medium-sized stumps yourself with a few tools, some ingenuity, and muscle. When it comes to more massive stumps, you may want to get the help of a friend or relative to speed up the job and help with the heavy lifting.

Project Time: Manually removing your stump could take as little as 4 hours or up to 12, hours depending on the root ball’s number of roots and depth.

Removal Time: 4 to 12 hours

Tools, Protective Gear, and Costs:

•A sturdy and sharp shovel $15 to $35

•A mattock (similar to a pick-ax) $20 to $30

•An ax $25 to $45

•A steel 17Lb+ digging bar $30 to $40

•A bow saw $12 to $50

•Sturdy steel-toed boots $50 to $100

•Well-fitting work gloves $5 to $25

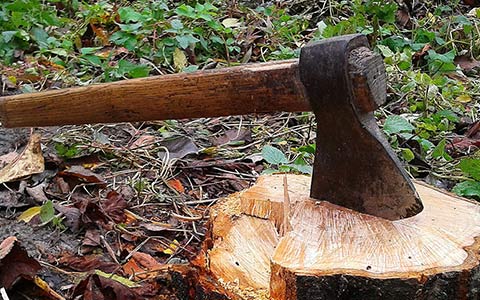
Using an ax to sever roots from a tree stump and reduce its mass

Your work gloves should snugly fit your hands. Loose gloves will move around, rub the skin, and cause blisters (defeating the purpose of wearing them).

Removing The Stump

1. Use the mattock, digging bar, and shovel to clear as much of the soil from around the stump and roots. Dig deep and wide to gain access to as many of the roots as possible. The larger the stump, the more soil you will need to remove.

2. Use the bow saw, mattock, and an ax to chop your way through the roots. When wielding an ax, take care to avoid over-chopping into the soil; this will quickly dull the blade.

3. As you cut roots away from the stump, cut them a second time to remove them from your work area.

4. Work your way around and under the root ball. Some species will grow a taproot, and this root will require some effort to sever. The more mature the tree, the more substantial the taproot will be. Dig deep and wide to gain as much access to this root as possible.

5. Once the stump is free, drag it out of the hole and fill in the void. (it will take more soil to fill in the hole than you removed from it).

Note: If you are not comfortable or knowledgeable using an ax, DO NOT use one. This tool can inflict severe harm if misused, use your mattock and/or bow saw in its place.

Tip: You can save a lot of time using a pressure washer to clear soil away from roots. Do this in sections and let the excess water soak into the ground. You can also dig a trench to guide water and soil away from your work area as you blast through the soil.

Chemical Tree Stump Removal

Just because there is no trunk or canopy, your stump may still be alive. Other trees in close proximity may be sharing water and sugars through their root systems, or your stump’s roots may have enough stored water and nutrients to attempt a comeback.

If multiple trees are connected by roots, the use of harsh chemicals on your stump may have adverse effects on the trees helping it to stay alive. Read more about killing tree stumps at 72tree.com/how-to-kill-stop-tree-stumps-growing-back/

You can remove medium and large-sized stumps chemically. While this process is much slower than manually removing the stump, it will save you from digging up your yard.

Project Time: Your stump’s height and diameter are determining factors for this project. It can be done in 1 hour and last as much as 4 hours.

Removal Time: 6 months to 1 year

Tools, Protective Gear, and Costs:

•A chainsaw (if you need to lower the height of the stump) $60 to $250

•A bow saw $12 to $50

•A drill and large boring bit (use the largest bit you can find) $70 to $200

•Plastic tarp $4 to $18

•Potassium-nitrate stump remover granules or high-nitrogen fertilizer $15 to $25

•Organic mulch $15 to $25 (free if you compost)

•Sturdy steel-toed boots (if using a chainsaw) $50 to $100

•Well-fitting work gloves $5 to $25

Using a chainsaw to reduce the height of a tree stump before removal

A note about the removal time: This process relies on the breaking down of organic matter and relies on warmth and moisture. In cooler climates, removal time may exceed 1 year while in warmer climates, this time may be less than 6 months.

Removing The Stump

1. Use your chainsaw or bow saw to lower the height of the stump. The lower to the ground, the more efficient this process will be.

2. Dill several deep holes in the stump. Use the widest bit available to you and drill the holes close together.

3. Fill each hole with water and your remover granules or fertilizer (don’t be shy, pour it in).

4. Use a soaker hose to saturate the soil surrounding the stump and apply a 3 to 6-inch layer of organic mulch over and around the stump.

5. Cover the stump and mulched area with a tarp to further retain the moisture.

6. Secure the tarp by staking it, covering it with a thick layer of organic mulch, and placing heavy objects (rocks and/or potted plants) on it.

7. Every 2 to 3 weeks, remove the tarp, repeat steps 3 and 4, and replace the tarp.

Under optimal conditions, the stump may soften within 3 to 4 months. It can then be broken up with an ax, retreated, and completely buried to further decay underground.

Note: Protect yourself with gloves, protective glasses, and clothing when using or dispersing chemicals. Wash your hands and any exposed body parts thoroughly after completing this job.

Tip: When having a tree removed, request that the tree be cut as close to the ground as possible. By doing this, you will save a lot of time when chemically removing your stump.

Caution: While other, more caustic agents like muriatic acid can be used to chemically remove a stump, they bring severe health hazards with them. Many acids do not require physical contact to cause harm, inhaling their vapors can cause significant respiratory damage. Avoid using such chemicals to preserve the health of your loved ones and surrounding wildlife.

Tree Stump Removal by Fire

You can remove medium and large-sized stumps by burning them. Before embarking on this method, verify that there are no municipal restrictions or forbiddance by HOA rules on burning out tree stumps.

Project Time: Depending on the freshness of your stump, this project can be done in 1 hour and last as much as 2 hours.

Removal Time: 1 day

Tools, Protective Gear, and Costs:

•A drill and large boring bit (use the largest bit you can find) $70 to $200

•A sturdy and sharp shovel $15 to $35

•Kerosine $2.70 to $3.30 per gallon (pricing varies with fuel market values)

The more time your tree stump has had to dry out, the more effective this method will be. However, stump removal by fire can be used at any time.

1. Start by digging a trench around your stump 4 to 6-inches deep and 10 to 12-inches wide. This will remove grass and debris that might ignite.

2. Drill several holes as wide and as deep as you can into the stump, the more, the better. Using a hammer and chisel, bore out a deep hole 3 to 4-inches wide in the center of the stump.

3. Pour kerosine into all of the holes and let the stump soak it up. Repeat this step several (3 to 4) times before lighting the stump on fire.

4. When you are ready to light the stump, apply kerosine once more. The larger, center hole should be wet with kerosene and filled with charcoal to intensify the heat. Ignite the stump from a safe distance.

5. Let the stump burn completely before disturbing it.

6. Anything left after this method should be easily broken apart and buried where the stump once was.

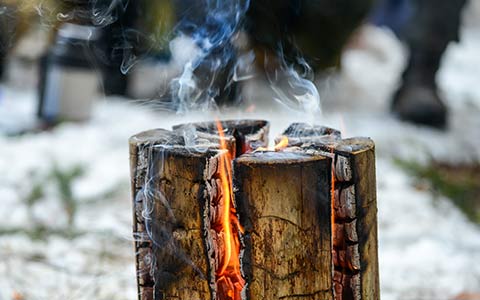
Tree stump removal by fire completely burning it

Tip: Keep a fire extinguisher and water hose close by when burning a stump. If winds pick up, embers may be blown to surrounding structures, use the hose to extinguish the embers.

Caution: Kerosine floats on water. If you must extinguish the fire, use a fire extinguisher on the stump. The use of water may carry lit kerosine spraying in all directions.

Tree Stump Removal

Along with the options presented in this article, come specific hazards that should be addressed when attempting to remove a tree stump. If, at any juncture, you feel that you cannot safely remove your tree stump, stop what you are doing, and call a professional tree service to remove the stump for you.

How To Remove a Tree Stump

In this article, you discovered multiple methods for removing a tree stump without using a stump grinder and crucial tips to speed up the job and keep you safe.

By following some simple instructions and properly using your tools, you can remove your tree stump without the cost or mess of using a stump grinder.

Improperly trying to remove a tree stump may result in catastrophic physical injuries leading to costly medical bills and health consequences.

Sources:
extension.sdstate.edu/how-remove-stump
extension.illinois.edu/blogs/rhonda-ferrees-ilriverhort/2014-06-20-removing-tree-stumps
warnell.uga.edu/sites/default/files/publications/Stump%20Removal%20pub_14-8.pdf

This article was first published on: http://www.72tree.com/how-to-remove-a-tree-stump-without-a-grinder/

Monday, April 20, 2020

Invasive Tree Species

Tree fungi living off of decomposing heartwood producing mushroom conks

That fungus growing on your tree could kill it and turn it into an extreme hazard. By knowing how to deal with tree fungi, you can help your tree thrive for decades.

72tree.com gathered information on identifying harmful tree fungi, how to get rid of it, and what you can do to prevent it.

How To Treat Tree Fungus

Before you start dowsing your tree with fungicides and other chemical mixtures, you need to identify what type of fungus is growing on your tree and if it can be removed safely.

Mushroom Conks – If you have mushroom conks growing out of your tree trunk, it is a sign that the fungi at work have already penetrated the tree’s defenses and are decaying the heartwood of the tree.

For these mushroom conks to appear, there must be decaying wood within the tree to feed the fungus. This type of inner decay is known as heart rot.

When mushrooms grow from the root flare or in abundance on surface roots, you can be certain that the root system of the tree has been compromised and requires immediate attention.

Treatment: Do not try to remove mushroom conks from a tree, you may inadvertently release billions of spores that can infect surrounding trees and plants. Call a professional tree service to evaluate the extent of the damage to the tree and recommend a course of action.

Lichens – A lichen, or lichenized fungus, is two organisms functioning as one. Lichens comprise a fungus in a symbiotic relationship with an alga and typically appear as a flat rounded leafy structure attached to the bark of a tree.

Tree fungi comprised of a fungus and an alga and harmless to trees

Lichens may appear harmful but are superficial, cosmetic eyesores at best. These organisms do not possess roots and rarely cause any damage to the organism they attach themselves to.

Treatment: If you wish, most lichen species can be eliminated from a tree with a mixture of 6 tablespoons of liquid copper sulfate mixed with 1 gallon of water applied during the tree’s dormant season. When applying this mixture, cover the lichen to the point of runoff.

Before using chemicals to control lichens, read the instructions printed on the label. By following the manufacturer’s recommended directions, you can increase the chemical’s effectiveness while preventing injury to the tree.

Fire Blight – Fire Blight can be caused by bacterial and/or fungal infections. It causes twigs and branches to appear water-soaked, then dark, and finally dry and cracked. Twigs and branches die from the terminal end and take on a burned appearance. Branches may bend or curl, commonly referred to as “shepherd’s crook.” As leaves and fruit die, they remain on the branches.

Treatment: Prune out infected branches (at least 8 inches below the damage) during the spring and summer. Do not prune while the branches are wet, as blight is highly transmissible via splashing water. Sterilize all pruning equipment before and after use on an infected tree.

Chemical control of blight is not always effective and should be used as a preventative measure in healthy trees.

Read more about fire blight prevention at 72tree.com/preventing-fire-blight-tree-disease/

Cankers – Cankers are dead, fungus-infected portions of tree bark on the branches or the trunk. They may appear as dark, open, seething wounds, or sunken, darkened, “wet” areas of bark. Most plant pathogens cannot penetrate tree bark directly. Still, they will colonize bark wounded by wildlife, poor maintenance, or mechanical injury.

Canker diseases can cause extensive damage to trees when they kill enough of the bark to girdle a branch or trunk. The fungus causing the canker is also capable of spreading throughout the tree, by way of the xylem and phloem, eventually appearing in other areas of the tree.

Canker causing tree fungi on tree trunks and branches

Treatment: For cankers found on twigs, and branches, prune the affected twig or branch from the tree. While normal pruning activities should be restricted to the tree’s dormant season, cankers are considered urgent. They can be pruned off the tree at any time of the year.

Note: Sterilize your pruning equipment before and after use on an infected tree. By doing so, you can prevent introducing another pathogen to the already sickened tree, and carrying the illness to another healthy tree.

For small cankers on tree trunks, tracing may help to reduce damage and slow its spread. Cut outside the cankered area into healthy bark, shaping the cut as an ellipse (this will allow the tree to compartmentalize the entire wound over time). Care should be taken to avoid infection of the fresh wound with canker or other pathogens.

For larger cankers on the trunk of a tree, call a professional tree service to evaluate the extent of the damage and recommend a course of action to either treat and save the tree or remove it.

Read more about heart rot and other diseases at 72tree.com/5-tree-pests-diseases-avoid-spring/

Tree Fungus Prevention

Trees have evolved over thousands of years to protect themselves against illness and infestations. They are highly efficient at protecting themselves when they are healthy and thriving. You can aide your tree by:

• Carefully apply fungicides during dry weather and before fungal growth
• Making sure pruning activities are done timely and with sterilized equipment
• Promoting its health throughout the growing season
• Using insecticides to prevent insect infestations
• Removing suckers from surface roots
• Preventing soil compaction on or around the root plate
• Immediately addressing storm damage
• Addressing or removing troubled trees from or around your property

Tip: You can help trees fight fungal attacks and heal themselves by promoting their health. These are some of the things you can do to improve the health of your tree:

• Seasonal Pruning
• Annual Tree Inspections
• Organic Mulch
• Deep Watering (without overwatering)
• Fertilization
• Protect Surface Roots and Trunk from Damage

Tree fungi removal by aggressive pruning

The importance of an annual tree inspection cannot be overstated. Detecting problems in their beginning stages helps you eliminate the existing problems and prevent potential issues throughout the growing season.

Killing Tree Fungus

In this article, you discovered the different fungi that can attack and harm your tree, how to treat it, and prevent it.

By taking swift action to remove fungus-infected parts of a tree and use measures to stop future infections, you are extending the life of your tree, and preventing it from becoming a threat to your property and wellbeing.

When you ignore the signs of fungal infections on your tree, you risk the tree dying and causing catastrophic damages when it eventually succumbs and falls.

Sources:
herbarium.usu.edu/fun-with-fungi/lichens
plantclinic.cornell.edu/factsheets/treecankers.pdf
vegcropshotline.org/article/10-useful-rules-for-fungicide-application/
extension.uga.edu/publications/detail.html?number=C871&title=Fireblight:%20Symptoms,%20Causes,%20and%20Treatment

This article was first published on: http://www.72tree.com/how-to-get-rid-of-tree-fungi/

Monday, February 24, 2020

When Should I Cut Down A Tree on My Property?

Cut down a dying or dead tree on my property

Does your tree look sick or like it’s going to fall? By knowing the signs of a hazardous tree on your property, you can take action to prevent catastrophic damages and losses.

72tree.com gathered information on the signs of a dead, dying, or dangerous tree, and whether or not it should be removed.

When Is Tree Removal Necessary?

You may need to remove your tree if it:

• Is dead or dying
• Is Rotting or hollow
• Has invasive or destructive roots
• Has been infested and poses a threat to surrounding trees
• Is diseased and could infect other trees or plants
• Poses an imminent threat to people, structures, or vehicles

Trees go through many phases as they mature. When any irregularities are detected, you should contact a professional tree service immediately. Have the tree professionally evaluated and make an informed decision on whether or not to remove the tree.

Is My Tree Dead or Dying?

The answer to that question is: Possibly. A deciduous tree may look dead, when in fact, it may only be dormant. Consider the following when evaluating your tree:

Deciduous Trees – A deciduous tree is one that loses its leaves in the fall and goes into a state of dormancy until the end of the winter season. These trees may look dead while in dormancy but are likely very much alive.

Cut down a deciduous tree on my property when it is dying diseased or dead

You can confirm this by performing a “scratch test” on a smaller branch or twig. If the twig is dead, it will be dry and brittle underneath the bark. A live one will have a shade of green and be moist under the bark.

Evergreen Trees – An evergreen tree maintains its foliage throughout the year. If you notice an excessive loss of foliage or the discoloration of a large portion of the tree, there may be root, sun, or wind damage.

Cut down a diseased evergreen tree on my property

The following are signs of trouble for any tree and should be evaluated by a certified arborist immediately:

• The unusual or untimely loss of foliage
• Sections of the tree failing to leaf out in the spring
• Discoloration or wilting of a section of the tree crown
• New foliage is stunted, wilted, or discolored
• Mushroom conks are growing on the trunk or on surface roots
• Sprouts or suckers growing from the roots of the tree
• Entry or exit holes from boring insects
• Dead branches in the crown
• Sudden shedding of branches
• Your tree has begun to lean
• Neighboring trees are dying suddenly
• Mold or mildew has grown on a significant portion of the foliage
• There is significant damage to foliage from an insect infestation
• Your tree was struck by lightning
• Large portions of bark have been damaged or fallen off the trunk
• A severe storm has stripped your tree of foliage and damaged multiple branches

Cut down a storm damaged tree on my property

Through the life of a tree, it will face many health threats. In most cases, it can overcome those threats and continue thriving. However, when the tree is confronted by multiple threats, its health may decline, allowing some of those threats to damage it severely enough to kill it.

Many of the above signs can be mitigated or completely avoided when detected in their earliest stages. You can accomplish this by having an annual inspection performed on your tree(s) in late winter or early spring.

Read more about identifying tree diseases and trouble at 72tree.com/signs-diseased-tree-dieback-suckers-water-sprouts/

Removing Nuisance Trees from Your Property

Some tree species can become a tremendous nuisance as they mature and thrive. Some of the problems they may cause include:

• Interfering with power lines
• Branches overhanging your house, garage, or neighbor’s property
• Invasive roots breaking foundations, invading septic tanks, or buckling concrete
• Large roots growing along the ground surface
• The tree is self-pruning and begins to shed large limbs (eucalyptus trees do this frequently)

Invasive root systems like those of the aspen species can cause massive amounts of damage in a short amount of time. Read more about invasive root problems at 72tree.com/tree-roots-buckling-concrete-driveway/

In cases where a tree is near or on your property line, arguments and disputes may occur between neighbors. Before taking any action, you will need to determine ownership and/or responsibility of that tree. Read 72tree.com/who-is-responsible-overhanging-tree-branches/ to learn how this is determined.

Do I Need A Tree Removal Permit

Cities and municipalities across the country have tree ordinances in place to protect or preserve their trees. That said, there are cases in which dead trees or trees that pose an imminent threat of falling can be removed immediately and without a permit. However, you will likely be required to document the hazard and the need for removal fully. A certified arborist’s report, in some municipalities, may also be required.

Cut down a dead dying diseased or infested tree on my property with a removal permit

You can hire our arborist, or search for an arborist or verify one’s credentials by visiting treesaregood.org/findanarborist/arboristsearch

Special Trees – Some tree species are vigorously protected in some municipalities, and their removal, for any reason without permission, may result in steep fines, recompense, and even planting new trees of the same or predetermined species, as defined by the tree ordinance. These reasons may include:

• Historical significance
• Age
• Size
• Rare or protected species
• Wildlife refuge
• Trees with a specific diameter at breast height (DBH)

Whenever you have a tree that needs to be removed (for any reason), consult your city’s codes and ordinances to determine whether you need a permit or not. The following may help as well:

• Visit your city’s website and search for tree removal permit information
• Call your city’s arborist or Forestry department
• Hire a professional tree service that can acquire the appropriate permits and do the job.

When it comes to trees, medium and large trees should always be handled by professionals. If you try to cut such a tree down without the proper knowledge and equipment, you may be placing your property and your life in jeopardy.

Removing Trees from Your Property

In this article, you discovered how to determine when a tree is dead, dying, has become a hazard, and if it should be removed.

By taking action when you detect a tree illness, infestation, or damage, you are preserving the safety of your property.

When you delay taking care of sick or wounded trees, you are leaving an open invitation for catastrophic events that can destroy your property and threaten the well-being of you and your loved ones.

Sources:
extension.umd.edu/hgic/topics/how-do-you-decide-when-remove-tree
extension.umn.edu/solve-problem/plant-diseases#tree-and-shrub-diseases-1872363
entomology.ca.uky.edu/ent43
myminnesotawoods.umn.edu/wp-content/uploads/2014/06/MNLawTrees-NuisanceTrees.pdf

This article was first published on: http://www.72tree.com/when-cut-down-tree-my-property/

Monday, January 27, 2020

How To Kill and Stop Tree Stumps from Growing Back

Kill and stop tree stumps from growing sprouts and new trees

Is the tree you cut down trying to grow back from the stump? Many times, when trees get cut down, the stump and roots will continue to send out new growth. Knowing why they do this and what to do with it once the tree is gone can save you loads of time, effort, and money.

72tree.com assembled the following information on why trees grow back after being cut down, how to kill a tree stump, and remove it.

Do Trees Grow Back After Being Cut Down

Yes, they can. That’s why it’s essential to be knowledgeable about tree growth when you need to remove one permanently.

Cut trees with enough stored sugars and nutrients in their roots can produce sprouts from the roots and trunk as a measure of survival and reproduction. The following species will commonly sprout after being cut down:

• Poplars
• Maples
• Lindens
• Boxelder
• Red Oak
• Willows
• Beech
• Ash

When this survival mechanism is triggered, single, or multiple sprouts may appear. If left unabated, these sprouts will grow into trees without having grown a stable root plate, and likely pose a much more immense falling hazard than the original tree.

How to Stop Tree Stumps and Roots from Sprouting

Before you select a method to kill or remove a tree stump, evaluate the potential impact on the environment and immediate surroundings. The following are methods to eliminate tree stumps from sprouting:

Kill and stop cut tree stumps from growing back

Use Fertilizer for Rapid Decay – To accelerate the decaying process of the stump, do the following:

• Cut the stump to soil level
• Drill half-inch to inch-wide holes six to eight inches deep into the stump and aerial roots
• Apply a slow-release fertilizer to the holes and over the stump
• Cover and “mound” with soil

With little to no impact on the environment, this method is highly effective but takes several months to decompose the stump fully.

Note: In this and the following methods, areal roots are the large protruding “anchor” roots at the base of the stump.

Using Epsom or Rock Salt to Kill It – This process is one of the more economical, but takes several months to kill the stump. Apply this method by:

• Acquiring enough Epsom or rock salt to fill several deep holes and cavities in the stump
• Drill half-inch to inch-wide holes six to eight inches deep into the stump and aerial roots
• Pack the holes and any cavities with salt
• Use hot wax or another water-proof sealant to seal the holes and cover the cavities
• Secure a dark plastic tarp or trash bag over and around the stump to keep rain and sunlight out

In six to ten weeks, your tree stump should be dead and breaking apart.

Tip: While table salt will produce similar results, it is very harmful to the soil in the vicinity of the stump. Use only 100% Epsom or rock salt with no added ingredients.

Cover The Stump To Kill It – You can slowly kill your tree stump with this method, and it’s free.

• Secure a dark plastic tarp or trash bag over and around the stump to keep rain and sunlight out

Without adding any chemicals or salt, this method will take up to six months for the stump to die and start to decay.

While the tree is covered, there should be no growth. However, if sprouts do appear while the stump is still alive, cut them off.

Burn The Stump – Burning the stump is an effective way to remove it after it has died. The following steps will help you safely burn and remove your tree stump:

Kill and stop tree stumps from growing back using fire

• Drill several half-inch to inch-wide holes six to eight inches deep into the stump and aerial roots. The deeper you can drill into the stump will ensure that it burns to the roots.
• Pour enough kerosene into the holes to thoroughly saturate the stump.
• Build a fire on top of the stump by placing scrap wood, twigs, and small logs on it. As the fire burns down, add more wood as necessary to keep the fire ablaze.
• When the stump has burned away, remove the ashes and replace them with soil.

As with any controlled burn, never leave it unattended. Keep a hose or fire extinguisher on hand in case the fire gets out of hand or begins to spread.

NOTE: Before using this method, consult your municipal ordinances to ensure that your controlled burn is legal, for more information call 411.

Tip: Turn the stump burning into a “bonfire” and invite friends and family over for an outside gathering.

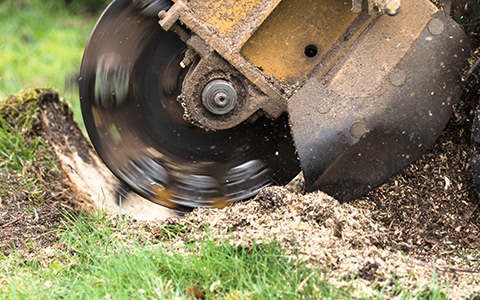
Grinding a tree stump to kill and stop the tree from growing back

Grind The Stump – Grinding the stump allows you to chop it up and remove it immediately. This method requires protective clothing and equipment and some knowledge of machinery operation and safety. The following steps will help you safely remove your tree stump:

• Use a chainsaw to cut the stump as close to the ground as possible, leaving a level surface
• Grind the stump and any areal roots until fully ground up
• Remove the wood chips (use them for mulch or discard them)
• Fill the hole with fresh soil

Keep children and pets at a safe distance while the stump grinder is in use.

Note: Before operating this or any other machinery, refer to the operating manual to ensure its proper and safe use. There may be safety features that you are not aware of on the machine.

Call A Professional Tree Service – Take all of the stress, equipment, time, and chemicals out of the process by calling a professional tree service to come out and remove your tree stump. They have specialized equipment and experience to remove your tree stump quickly and safely.

Stop Your Tree Stump from Growing Back

In this article, you discovered why trees continue sending up sprouts after being cut down, how to kill a tree stump, and how to completely remove one.

By killing and removing your tree stump, you are preventing sprouts from growing and creating a hazard to surrounding structures and people.

Allowing a tree to re-grow in this manner is significantly dangerous. These new trees grow without establishing a firm root plate and may topple as they increase in size without warning.

Sources:
umass.edu/urbantree/factsheets/26killastump.html
ucanr.edu/blogs/blogcore/postdetail.cfm?postnum=20662
warnell.uga.edu/sites/default/files/publications/Stump%20Removal%20pub_14-8.pdf

This article was first published on: http://www.72tree.com/how-to-kill-stop-tree-stumps-growing-back/

Monday, November 25, 2019

Common Maple Tree Diseases, Symptoms, Treatment, and Prevention

Stop your maple tree from needlessly dying. If caught in time, diseases that attack maples can be treated with success.

72tree.com of Alpharetta Ga, assembled the following list of diseases that affect maple trees, how to identify, treat, and prevent them.

Why do My Maple Tree Leaves Have Spots?

One of the easiest ways to detect maple tree diseases is through irregularities in shape or size, spots, and/or blemishes on the tree’s foliage.

The following diseases may cause spots to appear on your maple tree’s foliage:

Leaf Spot (Phyllosticta minima) – This fungal infection causes round spots about a quarter of an inch in diameter to appear on leaves. These spots will have a pronounced purple border and blackish dots in the center of the spot (fungal fruiting structures).

Treatment: Before fall, prune dead twigs, stems, and branches. Collect all clippings and destroy them (burning them is highly recommended) to prevent the spread of the fungus.

Have the tree evaluated to determine the extent of the infection and whether further action like using fungicides should be taken to protect your tree and surrounding landscape.

Maple tree infected with leaf spot phyllosticta minima disease

NOTE: Sanitize all equipment, including gloves and protective clothing that come in contact with an infected tree and its foliage.

Anthracnose (Aureobasidium apocryptum or Discula – Gloeosporium) – Anthracnose is a fungal infection that causes purple or brown streaks to occur alongside and between leaf veins. In some maple species, drought and heat stress can produce similar symptoms. You can confirm an anthracnose infection by locating small, brown fungal fruiting structures near the veins of affected leaves.

Treatment: The same measures and precautions for leaf spot should be used in the treatment of anthracnose.

NOTE: Anthracnose can lead to severe defoliation during a wet spring season.

Root Rot (Fomes fomentarius, Ganoderma lucidum, or Laetiporus sulfureus) – Once a fungal infection embeds itself in the trunk or the roots of a maple tree, there are three types of symptoms to watch for:

• Foliage in the entire crown or a section of it may suffer from chlorosis, wilt, die and eventually fall. This happens as the fungi cause hydraulic failure within the roots, trunk, and branches.

• Fungal fruiting structures (mushroom conks) will appear from late spring to mid-fall. For these structures to form, there must be rotting organic material within the tree.

Maple tree root rot with mushroom conks diseased and dying

• Large black ants known as carpenter ants will make a nest for their colony within trees that suffer from heart rot. These ants do not burrow through heartwood, they remove the tissues rotting and softened from the infection.

Treatment: Once root rot or heart rot has been confirmed, have the tree professionally removed as quickly as possible.

NOTE: The presence of carpenter ants and fungal fruiting structures only occur after significant damage has been done to the tree. When the affected tree is within striking distance of your home, places where people congregate, or other structures and vehicles, the situation should be treated as an emergency.

Galls – These spots are irregular growths or swellings that occur from a reaction to tissue feeding or egg-laying by various species of mites and insects (commonly mistaken for fungal infection).

Maple tree disease galls formed on the top side of a leaf

Galls appear in various ways. Each mite or insect species produces a distinctive gall shape and can range from wart-like bumps to felt-like patches to spindle-shaped protrusions. Galls develop in the spring, and once formed, the pest remains protected within the structure. Arborists can often identify which mite or insect has infested your tree by the shape and appearance of the galls.

Treatment: Leaf galls are relatively innocuous and rarely result in any long term damage to the tree. Applications of pesticides are relatively ineffective, as the pests are protected within the gall structure.

The most effective manner of gall removal is to handpick and destroy affected foliage before exit holes form and allow the pest(s) to move on. If the presence of galls is overwhelming, hire a professional tree service to evaluate the situation and recommend a course of action.

Maple Tree Disease Prevention

Maple tree disease prevention begins with good tree care practices. The healthier your tree is, the more vigorously it can fight back against diseases and infestations.

However, when the tree’s defenses fail, here are steps to prevent the disease or infestation from infecting surrounding trees:

• Prune affected limbs (before leaf-drop)
• Burn all pruned limbs and foliage
• Always sanitize pruning equipment after use on an infected tree
• Avoid tracking soil from around infected trees to areas around uninfected trees (many fungi and other pathogens thrive in the soil). Clean boots, protective clothing, tools, and equipment before leaving an infested area
• Replant resistant species after tree removal
• Avoid planting maple trees in areas with a history of tree diseases
• Have annual tree inspections and soil testing performed to detect any issues early on.

Black Spots on Maple Leaves

In this article, you discovered how to identify diseases that cause spots on maple tree leaves, how to treat them, and how to prevent them.

Prevent the decline of your maple tree by knowing what to do when a fungus or pathogen begins showing signs of infection.

Your choice to ignore signs that your tree is diseased or in decline can result in catastrophic fungal outbreaks to your landscape, or costly damages to your property when the tree falls.

Sources:
extension.psu.edu/maple-diseases
hgic.clemson.edu/factsheet/maple-diseases-insect-pests/
pnwhandbooks.org/plantdisease/host-disease/maple-acer-spp-verticillium-wilt

This article was first published on: http://www.72tree.com/maple-tree-diseases-symptoms-treatment-prevention/

Monday, October 21, 2019

Who is Responsible for Overhanging Tree Branches

Overhanging and interfering tree branches over your property line

Don’t accept liability for a tree or its overhanging branches without clarifying responsibility. Once you know how to determine responsibility for a tree and its overhanging branches, you can better reach fair solutions with your neighbors during a tree dispute.

72tree.com gathered the following information on determining who owns and is responsible for a tree’s overhanging branches, and what actions to take.

Trees and Your Property Line

Whether you find yourself on the giving or receiving end of an overhanging tree complaint, it is essential to know who owns the tree in question.

When you purchased your property, you were likely required to get a property survey. If many years have elapsed or there is difficulty determining where the property line is, have a new survey conducted with the surveyor physically marking the property line.

All trees growing on your property with their trunks inside your property line are your responsibility.

In the rare case that a tree is growing directly on the property line, ownership and responsibility of that tree are equally shared between you and your neighbor.

Overhanging Tree Branches

As a tree grows upward, it also grows outward. Over time, some of those branches can grow past your property line overhanging your neighbor’s yard or home. The responsibilities of each property owner are typically as follows:

Overhanging and interfering tree branches responsibility

Owner of the Tree – You are responsible for the overall care of the tree, including:

• Watering, mulching, and fertilizing
• Staking or anchoring if the tree becomes unstable or is leaning
• Trimming or pruning the canopy (up to your property line)
• Detecting and treating illnesses and insect infestations. Learn more about tree health problems and solutions at 72tree.com/9-common-tree-health-problems-solutions/

If your tree succumbs to disease, infestation, or dies for any reason, the responsibility to remove the tree is yours. You could be held responsible for the damages it may cause if it should fall.

The Neighbor – Your neighbor is responsible for the following:

• The trimming or pruning of overhanging branches up to their property line*
• Cleaning fallen leaves, needles, twigs and other debris from the overhanging branches

Your neighbor should also make any concerns or complaints about potential hazards from the tree known to you.

If your neighbor documents this communication or files a complaint with the town, and you do nothing, you may be held liable for damages caused by any portion of the tree falling on your neighbor’s property.

*All trimming or pruning activities must be done in a way that promotes the health of the tree. If your neighbor’s actions result in the declining health or death of the tree, they may be held liable for the cost of the replacement of that tree.

Your Tree Falls on Your Neighbor’s Property

If your tree or a portion of the tree should fall on your neighbor’s property, the health of the tree when it fell is vital in determining responsibility.

Tree fallen over onto neighboring property

Healthy Tree – If the tree was healthy and well maintained with no signs of decay or infestation, the removal and any damages caused by the tree will be your neighbor’s responsibility.

The majority of homeowners insurance providers will cover such a claim.

Diseased or Dying Tree – If your tree had clear signs of disease, infestation, rot, or your neighbor filed a complaint about the hazard, you could be held liable for all damages caused by the falling tree.

Protect yourself and your neighbors by hiring a trusted tree service to perform annual inspections of your trees. These inspections allow them to detect any potential trouble and recommend a course of action.

Learn more about what to do when a neighbor’s tree falls on your house at 72tree.com/my-neighbors-tree-fell-on-my-house-now-what/

View Obstruction Ordinances

Throughout the United States, there are a few cities with “view ordinances.” These ordinances state the importance of the view to the value of the property.

If your tree reaches a height that obstructs a neighbor’s view (in a city with such ordinances), you may be ordered to reduce the height of the tree or remove it.

Before planting new trees on your property, it is worth the time and effort to research your city’s laws for these specific ordinances. Once you know the limitations imposed by these ordinances, you can select the appropriate species to plant.

Overhanging Tree Responsibility

In this article, you discovered how tree ownership is determined, what you are responsible for when trees overhang a neighbor’s property, and their responsibilities.

By properly caring for your trees and having them inspected annually, you can detect potential issues early and get them resolved before turning into a problem or dispute.

If you choose to neglect the health of your tree(s), you can be held liable for all damages caused by that tree falling on your neighbor’s property or house.

NOTE: Cities, municipalities, and towns have ordinances that may vary from the information presented in this article. It is always recommended that you search for your city’s tree ordinances to fully inform yourself.

Sources:
http://agrisk.umd.edu/blog/frequently-asked-questions-can-i-cut-my-neighbors-tree-back-from-our-property-line
hg.org/legal-articles/neighbor-s-right-to-build-36677
extension.tennessee.edu/publications/Documents/SP687.pdf
secure.caes.uga.edu/extension/publications/files/pdf/C%201099_1.PDF

This article was first published on: http://www.72tree.com/who-is-responsible-overhanging-tree-branches/

Monday, August 26, 2019

How to Fix Exposed Tree Roots

Exposed tree roots damaging ladscape and hardscape features

Are ugly surface roots buckling your concrete driveway or stopping you from mowing your lawn? Before you get frustrated and cut them out, there are some things you need to know.

72tree.com gathered the following information on how to handle surface roots without compromising the health of your tree.

Why Do Tree Roots Surface

While some roots grow deep in the ground, the majority of them spread out from the trunk within the first 4 to 12 inches of soil. As the tree ages, several factors may bring them to the surface:

Erosion – Over time, the top layers of soil may be washed away, lowering the ground level, subsequently exposing tree roots.

Soil Compaction – As tree roots spread out, they seek moist aerated soil to derive water and nutrients. When they run into compacted soil, they will turn downward or upward, and in many cases will grow along or just beneath ground level.

Natural Growth – The same way a tree trunk and limbs increase their girth with age, so do roots. Since the majority of tree roots grow within the first few inches of soil, they tend to break the surface as they thicken.

Species – Some trees grow this way. Species such as maples, poplars, and willows tend to grow surface roots.

As annoying as it may be, surface roots are a common landscape problem that can cause significant and costly damage.

Surface Root Problems

When tree roots surface, there are many potential issues they bring with them. Those issues may include:

Disease, Infestation, and Rot – Surface roots are highly susceptible to being injured or damaged by landscaping equipment, foot traffic, or wildlife. Damaged surface roots are easily infected by disease, or infested by insects and can carry harmful pathogens to the trunk and branches of the tree.

Damaged Driveway or Sidewalk – As these roots thicken and surface, the ones that have grown under sidewalks, driveways, and foundations will eventually exert enough pressure to raise or break them.

Read more on how tree roots can buckle a driveway and what to do at 72tree.com/tree-roots-buckling-concrete-driveway/

Damaged Landscape Equipment – Lawnmowers and other mechanical equipment can be severely damaged when making contact with surfaced tree roots.

Abnormal Growth – Where Tree roots surface, any grass or plant life surrounding those roots may become sparse or die.

Trip Hazard – When surface roots are further exposed by erosion, they may become a severe trip hazard when navigating your landscape.

Exposed tree roots become landscape trip hazards

Surface Root Solutions

While cutting the roots away may seem to be the best alternative, it is not. Cutting away roots (like damaging them) leaves the tree highly susceptible to deadly diseases and infestation.

The following are ways to resolve surface root issues without causing severe damage to the tree:

Mulch – At the first sign of roots breaking the surface, lay down a 2 to 3-inch layer of organic mulch. Mulch will help the soil retain moisture, and over time may redirect the roots to grow downward.

Soil Replacement – In cases of erosion exposing roots, lay down a 3 to 4-inch layer of soil to replace what was eroded. To prevent further erosion, you can mulch the area around the tree, seed the new soil with grass, or lay down sod.

Plant Plants – Where erosion is not the problem, one solution may be planting the area with taller ground cover or plants that won’t need mowing. As you create this “tree root garden,” take care to avoid damaging the roots while planting.

Exposed tree roots covered and protected by mulch and plants

If you are still inclined to have the roots removed, hire an arborist to do this for you. Depending on the damage that may have already occurred, and type of roots that will be removed, it may be suggested to remove the tree.

Surface Root Prevention

Avoid the inconvenience of surface roots by taking action before they come to the surface:

Planting Location – Each tree species has a preferred type of soil, light, and nutrients for healthy growth. By planting trees in optimal conditions for their species, roots will be less likely to surface as the tree ages.

Soil – The soil type, moisture level, nutrient content, and pH level affect how tree roots grow. Deep watering, seasonal fertilizing, and annual pH level adjustments will encourage tree roots to grow deeper.

Species – As mentioned earlier, some tree species are prone to grow surface roots. When selecting trees for your landscape or yard, be sure to ask about the tree’s growth patterns, and do your research on the species needs for optimal growing conditions.

Read more about tree planting and care at 72tree.com/tree-planting-guide/

Exposed Tree Root Solutions

Don’t let gnarly surface roots discourage you from having a beautiful landscape. There are ways to incorporate them in your design without fatally wounding your tree.

In this article, you discovered why tree roots come to the surface, the problems they can cause, and measures you can take to solve and prevent them.

Your mishandling or damaging of surface roots can lead to the health decline and death of your tree. Before you cut roots away, call a professional to evaluate the situation and offer alternatives to save your landscape and your tree.

Sources:
https://extension.umd.edu/hgic/topics/surface-roots
https://www.purdue.edu/hla/sites/yardandgarden/when-tree-roots-surface/

This article was first published on: http://www.72tree.com/how-to-fix-exposed-tree-roots/

Monday, September 24, 2018

My Neighbor’s Tree Fell on My House, Now What?

Neighbors tree fell on my house Alpharetta Ga

When your neighbor’s 100-foot tree crashes down onto your house, there is much to be done to get life and your home back to normal. When the adrenaline and nerves settle, you’ll need to know what to do next to quickly and safely resolve the situation.

Within greater Atlanta, trees fall pretty frequently. When one lands on a house, immediate action must be taken to prevent further damage and determine who is responsible.

Neighbor’s trees that have fallen on homes is something 72 Tree service has had more than 45 years of experience in mitigating, and in this article lay out exactly the steps and factors you should consider.

What To Do When Your Neighbor’s Tree Falls on Your House

Similar to a fire or flood, it should be treated as an emergency when a tree crashes down on your home. Fast action is required, and the following steps will help you keep everyone safe while getting your home and life back to normal:

1 – Evacuate the property! Get everyone (including pets) out of the house. Gas, water lines, and electrical systems can be severely damaged creating a fire, explosion, or electrocution hazard.

If the tree damaged any vital home systems, and it is not safe to return to the home, get your loved ones to a safe location until after the repairs.

2 – Call 9-1-1 or Respective Emergency Services, to report the incident if your neighbor’s tree:

• Inflicted any injuries or caused any fatalities

• Crossed power lines or damaged utilities before falling on your home, or

• Threatens pedestrians or is blocking the flow of traffic

In such cases, an emergency dispatcher is able to mobilize Medical Services, utilities, a power company unit, or other necessary departments to ensure your and the public’s safety.

Visit 72tree.com/power-line-interfering-trees-city-alpharetta-ga-ordinance/ for non-emergent interfering power lines.

3 – Turn the power off immediately if you smell gas, or water is coming through the roof or from broken pipes. Next locate and turn off the gas and/or water main.

This is a dangerous situation because a spark can cause an explosion from a gas leak, or you could be electrocuted if water comes in contact with live electrical wires.

4 – Document everything that is taking place! Take pictures of the tree and all related damages. This will help you in supporting your case and recovering your settlement when filing an insurance claim.

5 – Contact your homeowner’s insurance provider to report the situation, and follow their instructions (not doing so will potentially void your policy).

6 – Contract a 24-hour emergency tree removal company and certified arborist to remove the tree, and assess whether or not the tree was diseased, dead or dying before it fell.

Depending on the location of the fallen tree and degree of difficulty in accessing it, be sure to contract a tree service that has the skills, experience, tools and equipment (bucket truck, crane, etc.) to get the job done efficiently and safely.

Watch this Roswell removal team to see the correct process of using a crane to remove a fallen tree.

7 – Contract a 24-hour roofing company to inspect damages, tarp, and repair or replace your roof.

8 – Contract a 24-hour plumber if you have any visible leaks or broken pipes that must be repaired. Otherwise, during regular hours contact a plumber to examine your home’s plumbing system for any unseen or concerning collateral damage.

This is an essential step. The jolt of a tree crashing into your home has the potential to disturb and damage the plumbing throughout, and even on the opposite side of the house.

9 – Contract a 24-hour emergency water removal company if water is flooding your home from a storm or broken pipe(s). It is a top priority to cleanup and extract any water from causing further structural damage, or causing a future issue with mold.

What You Need To Know If Your Neighbor’s Tree Falls on Your House

Your House – When your neighbor’s tree falls on your house, there will be apparent damages to the landing area. This type of impact will typically result in hidden structural, electrical, and plumbing problems throughout the house.

Your Neighbor’s Tree – The state of the tree before it fell is of the utmost importance, and the following scenarios will illustrate why:

Scenario #1 (Your Liability) – If your neighbor’s tree was healthy and thriving when it was uprooted, broken, or blown over by severe weather, it is your own homeowner’s insurance policy that will cover damages to your home.

Scenario #2 (Their Liability) – If it is determined and documented by a certified arborist that your neighbor’s tree was diseased, dying, or dead when the event occurred, your neighbor may be held fully responsible for all damages when the following conditions are true:

• In the State of Georgia, the tree owner can be held liable for damages and injuries resulting from the tree’s falling, only if he or she had preexisting knowledge of the tree being dead, dying, or diseased. If there were no apparent reasons for concern (no visible signs of trouble) or no documentation stating otherwise, the tree owner (your neighbor) could not be considered at fault.

• When it can be proven in written form that an arborist, neighbor, tenant, city employee, or other third party identified and reported to the neighbor the existence of a problem before the tree fell, this constitutes preexisting knowledge on the part of the tree owner.

Adjacent Trees – When a tree is uprooted during a storm, be cautious of the trees close to it. Trees growing close together will often rely on each other’s roots to anchor themselves, and when one of those trees falls, the trees around it may become destabilized and fall as well.

Neighbors trees fell on my house in Alpharetta Georgia

The Insurance Company – Some insurance policies can be complicated and confusing, but if the tree damaged a structure on your property – once you have met your deductible and have not exhausted the total coverage limits of your policy – your insurance provider may be liable to pay for damages up to your coverage limits.

The emergency removal company you contract should specialize in large loss claims, and support your efforts in working with your insurance company. 72 Tree has successfully mitigated insurance claims for over 45 years, working with most platinum insurance companies and insurance adjusters to quickly return your life and home to normal.

Your Home, Emergency Tree Removal, Insurance, and Repairs

Knowing what to do when your neighbor’s tree falls on your home will help you focus on what needs to get done vs. who is to blame. Being able to mobilize the right services quickly will help keep stress levels under control, and allow you to get on track to returning life to normal.

Once your neighbor’s tree (or any tree for that matter) falls on your home, fast action is essential. Move your loved ones to a safe location, call 9-1-1 if needed, and contact your homeowner’s insurance provider. Then, contract a trusted emergency tree removal company, a roofing company with a contractor that can inspect the home’s entire physical structure for collateral damages, and a plumber to look for and repair any pipe ruptures or hidden leaks from the impact.

When your neighbor’s tree falls on your home, protect yourself and your assets by taking swift action. Delays or procrastination can become costly problems, potentially voiding your homeowner’s insurance policy while exacerbating damages to your home and property.

Sources:
https://secure.caes.uga.edu/extension/publications/files/pdf/C%201099_1.PDF

This article was first published on: http://www.72tree.com/my-neighbors-tree-fell-on-my-house-now-what/