Prevent your trees from dying when they should be coming out of dormancy and thriving. Knowing how to care for your trees in the spring will keep them healthy and thriving.
72tree.com assembled the following tips to help you get your trees ready for the spring growing season.
1. Inspect Your Trees
The beginning of spring is the optimal time to inspect your trees. Your deciduous trees will sill be leafless, and your evergreens, well, should be green. During your inspection, look for the following:
• Cankers (dead sections of bark on branches or tree trunks)
• Oozing sap (trees eject sap to cover and protect wounds)
• Signs of infestation (adult beetle exit holes)
• Signs of disease (blackened and curled twigs)
• Structure (odd, crossed, or unwanted growth patterns)
• Prior pruning wounds (showing decay, fungal growth, excessive sap discharge)
• Suckers (these are offshoots from the trunk, branches, and roots that indicate stress and can be signs of a diseased tree)
Tip: Eliminate doubts and potential misdiagnoses by hiring an ISA certified arborist to check your trees, shrubs, and plants.
2. Prune Dead Wood

Winter is the best time to prune trees. However, the very beginning of spring offers you a visual indication of wood that needs to be removed. Consider the following:
• Prune out dead branches and twigs (use the “scratch test” green/moist beneath the bark – it’s alive. Brown/dry beneath the bark – prune it off.)
• Carefully prune diseased limbs or branches (look for cankers or discolored bark)
• Remove undesired growth (crossed branches and shape altering growth)
• Prune off and sprouting suckers (these anomalous growths take tremendous energy from the rest of the tree)
When your tree starts to leaf out or bloom, cease all pruning activity. The tree’s energy (stored water and nutrients) is being used for growth.
Note: Make your pruning cut 12-inches toward the trunk from where the limb’s diseased portion begins. If the disease is within 36-inches of the trunk, remove the entire limb.
Tip: Sanitize your pruning equipment (including your gloves) before and after working on a diseased tree.
Visit the link for further information and tree pruning techniques.
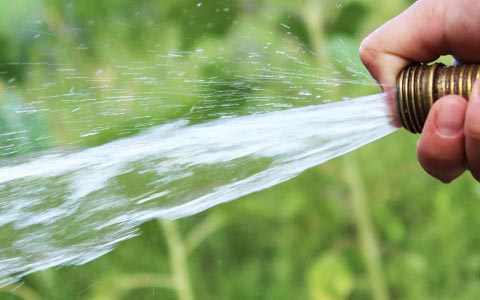
3. Provide Water for Your Trees

Out of everything a tree requires for healthy growth, water is the most important. Too little, and the tree will suffer hydraulic failure. Too much, and roots may become diseased, quickly killing the tree. Take the following into account:
• Soil around the tree should be well-drained (doesn’t pool up and stay)
• Soil should be consistently moist to the touch (not wet)
• Avoid all overhead watering or practices that splash water (splashing water is a primary vector for disease transmission)
• Water your tree 2 to 3 times per week
• Deep water your tree once weekly (let the water soak to a depth of 12 to 15-inches, this encourages roots to grow deep)
• Use soaker hoses or buckets to irrigate your trees (buckets with holes drilled in the bottom are great for deep waterings)
Tip: Increase watering frequency during times of drought and decrease it in unusually wet times.
4. Mulch Your Trees and Gardens

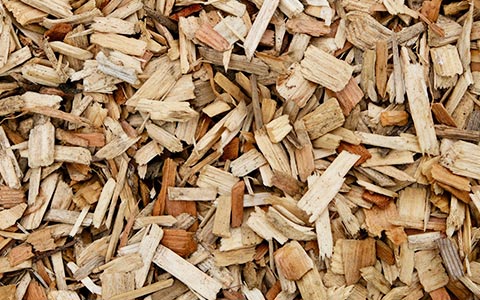
Applying organic mulch to your trees and garden helps regulate both soil temperature and moisture. Here’s how to do it right:
• Apply a 3 to 6-inch layer of mulch to the entire area within the dripline of your trees (needles, wood chips, or compost)
• Keep mulch pulled back 2 to 3-inches from the tree trunk (this avoids excess moisture and insect trouble around the root flare)
• When the mulch compresses, fluff it up and add more when needed
• Mulch your garden in the same manner
Mulch also serves as an “off-limits” zone to keep lawnmowers, wheelbarrows, and other equipment from encroaching on and damaging your trees.
Note: The drip line is the area beneath the branches, extending to the outer edge of the canopy.
Tip: Organic mulch naturally adds nutrients to your soil as it decomposes while increasing and protecting your soil’s biodiversity.
5. Fertilize Trees and Plants

You may need to feed your trees. Before doing so, you should have your soil properly tested to measure its nutrient and mineral content, as well as its pH. You can send your soil sample to a university extension lab or a professional laboratory. Your soil test results should reveal:
• Cation Exchange Capacity or CEC (measures soil’s ability to retain elements and nutrients with positive charges or “cations”)
• Base Saturation (this is the distribution of cations in the soil)
• Nutrient and mineral levels and deficiencies
• Soil pH (most trees prefer slightly acidic soil or a pH of 6.1 to 6.9)
What increases soil pH? Lime can be added to acid soils to increase soil pH. Lime not only replaces hydrogen ions while increasing soil pH, it also provides calcium and magnesium to the soil.
What decreases soil pH? Aluminum sulfate and sulfur are commonly used to acidify soil. Easily found at garden supply centers, aluminum sulfate changes soil pH instantly as the aluminum dissolves in the soil.
What do the three numbers on fertilizer labels mean? All fertilizer labels have three bold numbers. The 1st is the nitrogen (N) content, the 2nd is the phosphate (P2O5) content, and the 3rd is the potash (K2O) content.
Fertilizers come in a multitude of combinations and types. Most popular are granular, slow-release fertilizers, which should include the components your soil test identified as deficient for optimum tree growth.
Note: Fertilizing without testing may be detrimental to your trees and shrubs. Too much nitrogen, sulfur, or magnesium may stunt tree growth and disrupt the soil’s biodiversity.
Tip: If you aren’t sure about which laboratory to send your soil sample(s), ask your local ISA certified arborist to have the soil tested for you or ask a nearby nursery which one(s) they use.
6. Remove Weeds from Your Landscape

While there are dozens of chemical herbicides promising miraculous weed control results, you run the risk of causing damage to or outright killing your plants, shrubs, and trees. Consider the following removal methods:
Stop digging! – Weed seeds are practically everywhere, but only seeds at the top of soil get the right conditions to trigger germination. Digging and cultivating activities elevate buried weed seeds to the surface. Dig only when needed and immediately fill the disturbed area with plants or mulch.
Mulch – Mulch regulates soil temperature and deprives weeds of sunlight. Organic mulches can host crickets and carabid beetles, which consume weed seeds.
Deadheading – Cutting back the tops of perennial weeds reduces reseeding and forces them to use up their nutrients. No matter how you choose to deadhead your weeds, chopping them down before they seed will help you keep them from spreading.
Water your plants, not your weeds – Deprive weeds of water by placing drip or soaker hoses underneath the mulch. This method efficiently irrigates plants and leaves nearby weeds dry. Water depriving weeds can reduce weed-seed germination by up to 70 percent.
Pull them out – After rain or a deep watering, get your gloves, a kneeling pad, and a weed disposal container. Use a fishtail weeder or an old salad fork to pry up tap-root weeds, like dandelion, thistle, and dock. During dry conditions, weeds sliced off just below the soil line will die. If your weeder is too large or wide, use an old steak knife to sever their roots, then fill in any open spaces left in your mulch.
Note: Keeping your soil’s biodiversity healthy and maintaining a minimum of 3-inches of organic mulch year round will naturally deter weed growth.
7. Plant New Trees
Early spring is a great time to plant a tree. Both evergreens and deciduous trees will be coming into their growing season and have the time to “harden” new growth before the arrival of the next winter season. Observe the following:
• Determine the proper tree species by your USDA hardiness zone map
• Determine which species is the right tree in the right location
• Have the soil tested and adjusted to the species preferences
• Plant your tree
• Care for your tree
Read this beginners guide to tree planting to learn more about the process and considerations.

Spring Trees
In this article, you discovered seven pro tips to guide you through your tree preparation for the coming growing season.
With just a little knowledge about tree care and easy-to-follow tips, you can all but guarantee a healthy and robust growing season.
Ignoring the basic necessities of your trees will lead to their disease, infestation, decline, and eventual death. Allowing your trees to die in this manner invites the potential for cataclysmic property damage and personal injury when they fall.
Sources:
esf.edu/pubprog/brochure/soilph/soilph.htm
extension.umn.edu/planting-and-growing-guides/watering-established-trees-and-shrubs
extension.umd.edu/hgic/topics/fertilizing-trees-and-shrubs
hgic.clemson.edu/factsheet/changing-the-ph-of-your-soil/
extension.purdue.edu/extmedia/fnr/fnr-506-w.pdf
No comments:
Post a Comment
Note: Only a member of this blog may post a comment.