Tuesday, December 14, 2021

5 Shrub Species for Your Alpharetta Georgia Garden

Sculpted shrubbery for your alpharetta georgia garden

Prevent your garden from looking neglected and ugly. Knowing which shrubs to plant in and around your garden will help protect it from severe weather and keep it looking sharp.

72tree.com gathered the following list of 5 ideal and hardy shrub species for your Alpharetta, Ga garden.

Alpharetta Georgia Gardens

Alpharetta, Georgia, gets approximately 53 inches of rain per year. That’s 15 inches more than the US average at 38 inches per year. This rainfall helps prevent drought and supports plant species growth throughout the year.

On average, Alpharetta sees about 220 sunny days per year. This promotes a healthy environment with ample opportunity for plants, shrubs, and trees to photosynthesize.

Alpharetta is entirely situated in USDA hardiness zone 7b. When selecting plant species for your Alpharetta garden, they should be cold-hardy for zone 7b for maximum growth and health potential.

The following are 5 shrub species selected specifically for Alpharetta, Ga:

1. Ixora Maui red (Ixora coccinea)

Ixora coccinea species for your alpharetta georgia garden

Ixora Maui Red grows as a dwarf, evergreen shrub thriving on heat and humidity. A shrubby, sprawling plant with many clusters of tubular, bright orange flowers displayed on the foliage in shades of bronze to incredible glistening dark shades of green.

While this species is hardy to zones 9 through 11, they can survive zone 7b winter temperatures if sheltered during the cold season.

2. Hydrangea (Hydrangea macrophylla)

Hydrangea macrophylla species for your alpharetta georgia garden

Hydrangeas include over 75 species in their genus and surpass 600 named cultivars native to multiple climates, regions, and countries. Another common name for hydrangea is hortensia. Hydrangeas can grow as climbing vines and trees but are most commonly found growing as a shrub. The plants can reach heights ranging from 1 foot to nearly 100 feet as a vine!

The showy flowers produced by this plant species are what make it so popular. Most put on a blooming display from early spring all the way into fall. The large flowers can come in a wide variety of shapes, colors, and sizes. Hydrangea blooms can be pink, blue, red, white, purple, and green (depending on the mineral content of the soil).

This flowering shrub can grow in partial shade to full sun and will thrive in hardiness zones 3 through 7.

3. Anise (Pimpinella anisum)

Pimpinella anisum species for your alpharetta georgia garden

Star anise is a quickly growing, evergreen shrub Capable of thriving in hardiness zones 7 through 10. Star anise shrubs can be grown as dense hedges or windbreaks, and they can also be pruned as a border plant. If allowed to, star anise will grow to a height of more than 15 feet and a width of over 10 feet. It tolerates both sun and shade but will grow significantly thinner in the shade.

In culinary terms, anise is used as a flavoring agent. It possesses a sweet, aromatic taste that highly resembles the taste of black licorice.

4. Arborvitae (Thuja)

Thuja species for your alpharetta georgia garden

With glistening emerald evergreen foliage and a classic narrow, pyramidal form, the arborvitae is a popular selection for gardeners looking to make a statement in all seasons.

The slow-growing arborvitae is an excellent selection for a specimen or accent tree. It serves well as a hedge tree, has the height to serve as efficient privacy screens, and makes a good foundation plant.

Hardy to zones 3 through 7, this species will add class and a sharpened look to your yard and garden.

5. Boxwood (Buxus)

Buxus species for your alpharetta georgia garden

Boxwood plants are dense, evergreen shrubs frequently planted in elegant and formal landscapes. This species is also popularly utilized in topiary. Boxwoods are grown for their foliage as their flowers lack any significance. Growing a boxwood shrub on your landscape allows you to create a topiary, a formal hedge, a matching border, or a pair of boxwood shrubs to balance out an entryway.

Boxwood is cold hardy to zones 5 through 9 and thrives in the Alpharetta, Ga area with little effort.

Growing Shrubs in Hardiness Zone 7b

In this article, you discovered 5 shrub species that grow well in the city of Alpharetta, Georgia, which is situated in hardiness zone 7b.

Knowing which shrub species to plant in your Alpharetta garden and landscape will help you maintain a sharp-looking and healthy ecosystem thriving year-round.

Haphazardly planting inappropriate species for Alpharetta’s cold hardiness can result in stunted growth, plant failure, disease, and insect infestations exploding over your landscape.

Sources:
extension.uga.edu/publications/detail.html?number=B625&title=Landscape%20Plants%20for%20Georgia
gardeningsolutions.ifas.ufl.edu/plants/ornamentals/ixora.html
gardeningsolutions.ifas.ufl.edu/plants/trees-and-shrubs/shrubs/star-anise-shrubs.html
arborday.org/trees/treeguide/treedetail.cfm?itemID=777
plants.ces.ncsu.edu/plants/buxus/

This article was first published on: http://www.72tree.com/5-shrub-species-for-your-alpharetta-georgia-garden/

Wednesday, November 17, 2021

Crack In Your Tree Trunk?

Cracks in your tree bark after the winter season could cause severe damage to your tree

Have you noticed cracks and splitting in the trunk of your tree? Is your foliage located in a spot with exposure to frigid winters? If so, it could be a frost crack! These appear as a vertical crack along the trunk of your tree. This damage can be dangerous to a tree because it is severe enough to split through the tree.

Luckily, with a few extra care steps throughout the year, you can prevent these and help your trees stay healthy and in one piece! Read on for advice on how to prevent and treat frost cracks.

Frost Crack Causes

These vertical cracks form when a tree trunk is exposed to extreme changes in temperature between winter and summer. The repeated heating and cooling can cause the molecules to slightly expand and contract just enough that a bark crack can form as a reaction to the extreme changes. Below are ways of helping your tree survive the winter months.

Reversing the Damage

If you notice the cracking, should you do anything about it? Not necessarily, because in most cases, the tree will be able to recover on its own through the natural processes of healing.

However, you can help it recover, and prevent a split trunk, by sealing the crack with plastic. The plastic seal protects the opening from potential infections caused by bacteria and pests. Be careful, though! You should remove any wrapping you place on the tree before summer. Otherwise, it may foster infections instead of preventing them.

Frost Crack Prevention Methods

Insulation – Because frost cracks arise from the changing temperature, you can help prevent the tree trunk from cracking by insulating the base.

Insulation includes wrapping the trunk with a thick protective layer. Ideally, you’d want to use something that would keep warmth, like a tarp, burlap, or cloth.

You can also help insulate your tree’s trunk by planting evergreen plants and bushes around the base. Keeping the bottom of the tree lush with plants and bushes will help keep it warm during the winter and prevent deep freezing.

Keep Trees Healthy – A healthy and vigorous tree will be more capable of healing after a crack and more resistant to bark cracking in the first place. Read on to learn ways to keep your foliage healthy.

Every summer, make sure you give the soil a fresh layer of fertilized dirt to mix into the already present substrate. On top of that, layer some mulch or bark pieces to help pack in the new soil. This mulch technique will also work as a form of insulation during the wintertime.

Watering your tree during dry winter periods is very important too. Even when it’s cold out, your foliage will need to have an ample water supply to stay healthy.

Pruning or trimming the foliage can also encourage it to sprout new healthy growth, improving its overall health status. However, you should hire a professional, as it can be dangerous to do it on your own.

Be Careful Where You Put Your Tree – Location plays a massive role in the health of your foliage during wintertime! To avoid having a split trunk, be careful that your tree is not exposed to strong winter winds because this will cause the bark to become even colder and has a higher chance of cracking.

Winter damage occurs on unprotected trees due to winter wind

Shallow and porous soil/substrate is a bad idea because of how important hydration is for your foliage in winter. Stick to locations where the tree’s roots can extend very far downward for more support and a healthier root system.

Choosing a location with a proven water-retaining soil system always works best. These locations already help your tree stay healthy enough to avoid cracks and heal any cracks that it may have in the future!

Trees Prone to Frost Cracks

Like all organisms, trees have adapted to survive in various climates. Some have adapted better than others to areas with intense winters and are less likely to experience a split trunk.

If you are undecided on what tree species to use, here are a few that are less resistant to winters and more likely to experience bark cracks:

• linden

• sycamore

• oak

• walnut

• willow

• maple

As a rule of thumb, the thinner the bark on the tree, the less resistant it is to cracks. In cold climates, choose trees with thick bark like aspens!

Final Thoughts

Frost cracks result from trees going through extreme cold and heat. The slight expansion and contraction of the molecules inside the tree result in the bark cracking on the surface of the tree.

If you see this happening, it is good to prevent infections and pest infestations by wrapping them in plastic. Consider insulating your tree trunk with either burlap, a tarp, or evergreen shrubbery to avoid cracking in general. Keep your tree healthy by fertilizing, watering, pruning, and adding a mulch layer.

If you keep these tips in mind when placing and taking care of your tree, you will be set for it to resist vertical cracks even in the harshest winters!

This article was first published on: http://www.72tree.com/crack-in-your-tree-trunk/

Tuesday, August 24, 2021

Black Walnut Tree Toxicity

Nearly every part of the black walnut tree contains juglone

Prevent the frustration and embarrassment of planting a beautiful garden, only to have it wilt and die within weeks. Knowing how black walnut trees are toxic will help you plant vulnerable species out of their reach.

72tree.com gathered the following information about black walnut tree toxicity, how to prevent it from killing your yard and garden, what plant species are tolerant to them, and how removing the tree may not eliminate its toxicity.

What Is Black Walnut Tree Toxicity?

Black walnut (Juglans nigra L.) is a highly sought-after US native hardwood lumber tree. Black walnut is typically grown as a landscape shade tree and, often, for its edible nuts. While some plants and trees grow well near black walnut, there are many plant and tree species whose growth is adversely affected by this tree.

Black walnut fruit looks similar to the more common walnut but with some toxicity

Black walnut trees produce a chemical called juglone (5 hydroxy-1,4- napthoquinone), which naturally occurs in all parts of the tree. Higher concentrations of this chemical are found in the tree’s buds, nut hulls, and roots. Leaves and stems contain smaller amounts of juglone, which is leached into the soil after they fall. High concentrations of juglone occur in the soil under the tree’s canopy. However, highly sensitive plants can exhibit toxicity symptoms far beyond the canopy drip line. This occurs because decaying roots tend to release juglone.

Other closely related trees also produce juglone but at considerably lower concentrations than black walnut. Rarely will these trees produce or concentrate enough juglone to adversely affect sensitive plants. These trees include:

• English Walnut
• Pecan
• Butternut
• Shagbark Hickory

Juglone is produced by several other tree species including pecan

Note: The relationship between plants in which one produces a substance adversely affecting the growth or health of another is known as “allelopathy.”

Tip: If you consider removing your black walnut to curb the toxic effects of juglone, consider that soil toxicity may persist for several years after removal (while the tree’s roots decay). Complete tree removal (tree, stump, and roots) is recommended for faster soil recovery.

Juglone Toxicity Symptoms

Juglone toxicity symptoms begin to appear either when a black walnut is maturing and its root zone increases in size, encroaching on other sensitive plant or tree roots, or juglone-sensitive plants are placed within the black walnut’s root zone (60 feet or more from a mature black walnut’s trunk). These symptoms manifest as:

• Wilting
• Yellow Leaves (chlorosis)
• Stunted or Slow Growth
• Rapid Decline and Death

As of the publication of this article, there is no known remedy, treatment, or cure for juglone toxicity once a sensitive plant or tree has been affected.

Many plant species are sensitive to juglone

Note: Some highly sensitive plant species that cannot tolerate even the slightest concentrations of juglone can die in a matter of months or even weeks.

Tip: Because juglone toxicity symptoms may be easily confused with other diseases, infestation, or nutrient deficiency problems, it is recommended to hire an arborist to evaluate the landscape and recommend a course of action.

Plant Species Sensitive to Juglone

The following plant species should not be planted in a garden situated within 60 feet of a mature black walnut tree:

Vegetables

• Asparagus (Asparagus officinalis)
• Cabbage (Brassica oleracea var. capitata)
• Eggplant (Solanum melongena)
• pepper (Capsicum)
• potatoes (Solanum tuberosum)
• Rhubarb (Rheum rhabarbarum)
• Tomatoes (Solanum lycopersicum)

Tomatoes are a juglone sensitive crop

Fruits

• Apple (Malus domestica)
• Blackberry (Rubus)
• Blueberry (Cyanococcus)
• Pear (Pyrus)

Popular Landscape Plants

• Azalea (Rhododendron)
• White Birch (Betula papyrifera)
• Ornamental Cherries (Prunus avium)
• Crabapple (Malus)
• Honeysuckle (Lonicera)(some species)
• Hydrangea (Hydrangea macrophylla)
• Lilac (Syringa)
• Mountain Laurel (Kalmia latifolia)
• Rhododendron (Rhododendron)
• Yew (Taxus baccata)

Popular Garden Flowers

• Chrysanthemum (Chrysanthemum)(some species)
• Columbine (Aquilegia)
• Lily (Lilium)
• Peony (Paeonia)(some species)
• Petunia (Petunia)

Petunias are sensitive to juglone

Note: If proximity to a black walnut tree is unavoidable, raised garden beds offer a creative solution. However, the bed must be constructed in a way that minimizes or eliminates tree root penetration. These beds must also be kept free of black walnut leaf litter or nuts.

Juglone Tolerant Plant Species

The following plant species have exhibited tolerance to juglone:

Vegetables

• Lima Bean (Phaseolus lunatus)
• Beets (Beta vulgaris)
• Carrots (Daucus carota)
• Melon (Cucumis melo)
• Onion (Allium cepa)
• Parsnip (Pastinaca sativa)
• Squash (Cucurbita)

Fruits

• Black Raspberry (Rubus occidentalis)
• Cherry (Prunus avium)

Popular Landscape Plants

• Arborvitae (Thuja)
• Daphne (Daphne)
• Forsythia (Forsythia)
• Hemlock (Tsuga)
• Junipers (Juniperus)
• Persimmons (Diospyros virginiana)
• Rose of Sharon (Hibiscus syriacus)
• Wild Rose (Rosa)
• Virginia Creeper (Parthenocissus quinquefolia)

Persimmon species are tolerant to juglone

Popular Garden Flowers

• Begonia (Begonia x semperflorens-cultorum)
• Bergamot (Citrus bergamia)
• Chrysanthemum (Chrysanthemum)(some species)
• Cranesbill (Geranium)
• Shasta Daisy (Leucanthemum × superbum)
• Daylily (Hemerocallis)
• Ferns (Tracheophyta)
• Glory-of-the-snow (Chionodoxa siehei)
• Hyacinth (Hyacinthus)
• Lamb’s-ear (Stachys byzantina)
• Morning Glory (Ipomoea)
• Tulip (Tulipa)
• Violet (Viola)

Tip: When in doubt about a plant’s tolerance to juglone, ask the garden center or nursery attendant for help.

Violet flower species are tolerant to juglone

Are Black Walnut Trees Toxic to Dogs?

Yes. They can be, when moldy (Penicillium spp.), fallen walnuts containing the mycotoxin (Penitrem A) that is poisonous to dogs and other animals that eat the moldy walnuts. Dogs, in particular, can develop convulsions a few hours after eating these moldy walnuts. Hyperthermia, rapid breathing, urination, and dilated pupils may also be seen in affected animals.

Tip: If you suspect that your dog has consumed these nuts, seek immediate veterinary assistance (take a sample of what was consumed with you to the vet’s office).

Killer Black Walnut Trees

In this article, you discovered essential information on black walnut toxicity, protecting your yard and garden space, and how removing the tree may not eliminate the problem.

Planting juglone tolerant plant species and keeping more vulnerable species far from the black walnut tree, you can still create a harmonious ecosystem for your landscape.

Ignoring the juglone toxicity symptoms of your plants, shrubs, and trees can leave you running in circles looking for reasons why your landscape is dying, and nothing you plant will grow.

Sources:
hort.extension.wisc.edu/articles/black-walnut-toxicity/
mortonarb.org/plant-and-protect/tree-plant-care/plant-care-resources/black-walnut-toxicity/#!
extension.purdue.edu/extmedia/ho/ho-193.pdf
csuvth.colostate.edu/poisonous_plants/Plants/Details/69

This article was first published on: http://www.72tree.com/black-walnut-tree-toxicity/

Tuesday, July 20, 2021

Controlling and Removing Tree Suckers

Stressed maple tree growing a watersprout on its trunk

Prevent your trees from being weakened by suckers and watersprouts stealing their water and nutrients. Knowing how and when to remove tree suckers will help you keep your tree healthy and thriving.

72tree.com gathered the following information about tree sucker and water sprout removal, the damages they cause trees, and how to properly control them.

Removing Tree Suckers

Allowing suckers to remain on your tree will only divert water and nutrients from the vegetative and fruiting wood that needs to grow strong and healthy. Suckers should be removed when they appear, and they will grow very quickly.

Suckers grow from the base of the trunk or from roots and will need to be removed manually. Ideally, they should be pruned back to the point where they emerge from a root or base of the tree. Consider the following:

• Using a hand trowel, expose the sucker to the area where it emerged from the root.

• Snip or cut it off at the base with a sharp pair of garden shears (leave the collar, where the tree sucker meets the tree, to help speed wound recovery)

• Cover the cut area (with soil) and allow it to heal

• Repeat this process for any other suckers

Avoid mowing these growths. Mowing activities can cause abnormal growth, and damaged growth can become a vector for disease and infestation.

Tree sucker growing from root flare

Tip: Leaving a stub can make the problem worse by causing multiple shoots to form. You will need to dig to get to where suckers emerge from roots.

Note: Once suckers start developing on a tree, they will usually continue to occur for the rest of that tree’s life and will need to be removed regularly.

Removing Watersprouts

Watersprouts like suckers are fast-growing and tend to grow vertically, either from the trunk or from an existing branch. They, too, divert water and nutrients from the tree, block sunlight and air circulation. Here’s how to remove them:

• Identify watersprouts as being unnecessary growth to be pruned away

• Use pruning shears to cut them from the tree

• Cut them back to their point of emergence from the trunk/branch (again, leaving the collar, where the watersprout meets the tree, to accelerate wound recovery)

• Allow these wounds to heal like other pruning wounds

Tip: leaving a stub when removing watersprouts can make the problem worse by causing multiple shoots to form.

What Causes Tree Suckers and Watersprouts

When trees are stressed or have suffered trauma, they often respond by producing upright shoots called water sprouts and suckers. Here are some of the occurrences that can cause them to grow:

Watersprouts growing vertically from tree branches

• Root Damage
• Root Loss
• Storm Damage
• Branch Loss
• Topping
• Over/Improper Pruning
• Pruning Suckers
• Disease
• Drought
• Infestation
• Mower/Mechanical Damage

Note: Suckers and watersprouts can be a sign of a tree’s aging. Many trees will sucker as they grow old and start to decay or even die.

Water sprouts and suckers grow from dormant buds in the bark and/or roots and are flimsily attached to trees unless allowed to grow for many seasons.

Tip: Once you detect a problem with suckers and watersprouts, hire an arborist to evaluate the health of your tree(s).

Tree Sucker and Watersprout Control

Watersprouts growing on damaged tree trunk

There are products containing Napthalene Acetic Acid (NAA) labeled to control sprouts on certain trees. Research must still be done on their effectiveness with landscape trees.

Products similar to Bonide’s “Sucker Punch” have a water-based paraffin wax emulsion, so once it is applied, it will last for up to 6 months.

Similarly, some herbicides are effective at controlling and suppressing suckers but are not recommended for all plant or tree varieties. Likewise, herbicides applied to suckers can severely harm the tree. Such products should be applied by a certified arborist.

One of the best ways to prevent water sprouts and suckers on your trees is to keep them as healthy as possible with proper care and pruning. If your trees already have multiple sprouts, do your best to figure out (or call in a professional) to find out what is causing the stress and strategize to correct it.

Tree Suckers and Watersprouts

In this article, you discovered information about tree suckers and watersprouts, what damages they can do to your trees, and how to properly remove them.

Knowing why suckers and watersprouts grow on trees will help you determine if there is more severe damage occurring within the tree or what steps should be taken to increase the tree’s vigor.

Ignoring a problem with watersprouts and suckers can make a troubled tree even further from recovery. As time passes, your tree’s water and nutrients can become severely depleted, leading to more tree problems, infections, infestations, and eventual death.

Sources:
extension.unh.edu/blog/can-water-sprouts-and-suckers-be-prevented-trees
newswire.caes.uga.edu/story/5514/Root-Suckers.html
hyg.ipm.illinois.edu/article.php?id=993
hort.ifas.ufl.edu/woody/cleaning.shtml

This article was first published on: http://www.72tree.com/controlling-removing-tree-suckers/

Wednesday, June 23, 2021

9 Small Trees for Landscaping Smaller Yards

Small trees for tiny yards magnolia

Prevent overcrowding and killing your smaller yard with overstory trees. Knowing which trees remain small through maturity will help you create a balanced, long-lived ecosystem for your landscape.

72tree.com assembled the following 9 tree species selections and information to help you select trees that match the size of your landscape and leave room for their roots to properly develop.

1. Japanese Maple

Small trees for tiny yards Japanese maple

Few trees show off their splendor like the Japanese maple in its fall colors. There are numerous ways to use this little tree in your yard. You can plant it as a specimen tree (in a partly shaded spot) or use it as a shade or privacy tree along your property line.

Scientific Name – Acer palmatum
USDA Hardiness Zone – 5 – 8
Soil Requirements – moist, well-drained soil
Optimal Sun Exposure – Full sun to part shade
Color Varieties – burgundy foliage turning red in fall

2. Crape Myrtle

Small trees for tiny yards crape myrtle

Crepe myrtle species are a favorite among southern gardeners and roadway landscapers. (Crepe myrtle is the preferred name in the south). The draw for this plant is that it blooms at a time when most trees are not blooming. Healthy trees will be covered with blooms that last for months during the hottest part of the summer.
Crepe myrtles are deciduous, grow quickly, and will often grow in their multi-stemmed form.

Scientific Name – Lagerstroemia indica
USDA Hardiness Zone – 7 – 9
Soil Requirements – Will grow in nearly all soil types
Optimal Sun Exposure – Full sun to part shade
Color Varieties – white, pink, red, lavender

3. Redbud

Small trees for tiny yards redbud

Desired for its striking pink or white flower display in spring, redbud is an easy-to-care-for small tree with heart-shaped leaves that turn golden-yellow in fall.

Scientific Name – Cercis canadensis
USDA Hardiness Zone – 5 – 9
Soil Requirements – requires well-drained soil
Optimal Sun Exposure – Full sun to part shade
Color Varieties – species ranges from golden-yellow and purple foliage and white to pink flowers

4. Flowering (ornamental) Peach

Small trees for tiny yards flowering peach

The Bonfire Flowering Peach tree is a small ornamental tree with a bold personality. This tree is undeniable when its branches are peppered with fragrant pink blossoms in the spring!” Once the flowers fade, large burgundy, drooping leaves grow in, stealing the show. You won’t get edible peaches from this species, but you will get a fragrant and impressive display of flowers and foliage that will meet your need for drama in the landscape!

Scientific Name – Prunus persica ‘Bonfire’
USDA Hardiness Zone – 5 – 8
Soil Requirements – Prefers moist, acidic soils
Optimal Sun Exposure – Full sun exposure
Color Varieties – dark red leaves and double pink-red flowers

5. Witch Hazel

Small trees for tiny yards witch hazel

Witch hazel trees have highly desirable shaggy, citrus-scented blossoms in a rich yellow, orange, and red shades. Some species bloom in late winter before the leaves open, and others show off in the fall. These are small trees, averaging 10 to 20 feet tall, and are low maintenance. Prune in the early spring if you need to remove damaged portions or shape the plant. 

Scientific Name – Hamamelis
USDA Hardiness Zone – 3 – 8
Soil Requirements – Average or medium moisture and well-draining
Optimal Sun Exposure – Full sun to part shade
Color Varieties – Orange, red, and yellow

6. Crabapple

Small trees for tiny yards crabapples

Plant a colorful display to your landscape with crabapples. There’s a wide range of species available that bear white, pink, and/or flowers. The ‘Prairifire’ species has dark pink flowers, reddish-purple foliage, and is disease resistant. The ‘Centurion’ variety has pink flowers, an upright shape, and great disease resistance. Crabapples are known for producing orange, gold, red, or burgundy fruit.

Scientific Name – Malus
USDA Hardiness Zone – 4 – 8
Soil Requirements – medium moisture, well-drained soil
Optimal Sun Exposure – Full sun exposure
Color Varieties – Flowers in shades of white, pink, and red with orange, gold, red, or burgundy fruit

7. Magnolia Randy

Small trees for tiny yards magnolia randy

If you had space for one flowering tree to plant in your tiny yard, you may find some difficulty choosing, but Magnolia ‘Randy’ would be an excellent one. The beauty of this Magnolia was famously developed as part of the little girl series of hybrid Magnolias developed by the National Arboretum. All bred to be small deciduous low-branched trees growing only to 15 feet tall with oval habits and later spring blooming. ‘Randy’ will give you reddish-purple flowers on the outside and white on the inside. Then there’s the star-shaped flower that might pop up randomly in the middle of the summer for a second bloom.

This species is part of the Little Girl series (‘Ann,’ ‘Betty,’ ‘Jane,’ ‘Judy,’ ‘Pinkie,’ ‘Randy,’ ‘Ricki,’ and ‘Susan’) of hybrid magnolias developed at the National Arboretum in the mid-1950s by Francis DeVos and William Kosar.

Scientific Name – Magnolia ‘Randy’
USDA Hardiness Zone – 4 – 8
Soil Requirements – organically rich, neutral to slightly acidic
Optimal Sun Exposure – Full sun to part shade
Color Varieties – Dark Pink Blooms and green foliage

8. Dragon Lady Holly

Small trees for tiny yards dragon lady holly

Multiple holly species, cultivars, and varieties could be selected for a small space, but the Dragon Lady Holly is an excellent choice for a few reasons. It is widely available, where other dwarf cultivars or uncommon varieties may require special ordering. The Dragon Lady cultivar is a female plant that needs a male for pollination to produce berries. Finally, its conical form requires very little maintenance, and it only grows to heights of about 15 feet or so.  If you want a holly in your small space, this species makes sense.

Scientific Name – Ilex aquipernyi
USDA Hardiness Zone – 6 – 8
Soil Requirements – Acidic, moist, well-drained soils
Optimal Sun Exposure – Full sun exposure
Color Varieties – Green with Bright Red Berries

9. Powder Puff

Small trees for tiny yards calliandra haematocephala

Whether growing it as a large shrub or prune it into a small tree, powder puff will treat you with its fluffy and fragrant red, pink, or white summer flowers. It’s a heat-loving, drought-resistant variety specialized for the warmest areas of California, Texas, and Florida.

Scientific Name – Calliandra haematocephala
USDA Hardiness Zone – 9 – 11
Soil Requirements – Moist, well-drained, fertile soil
Optimal Sun Exposure – Full sun exposure
Color Varieties – red, pink, or white flowers

Small Trees for Tiny Yards

In this article, you discovered 9 tree species for small landscapes that help you avoid overcrowding and root competition.

Planting appropriately sized trees for your tiny yard allows you to develop a hardy and healthy ecosystem for your plants, trees, and shrubs without any of them choking out the other.

When you plant trees that end up dwarfing other plant life, you are robbing your landscape of vitally needed sunlight, soil nutrition, and physical space for all your plants, shrubs, and trees to flourish.

Sources:
extension.unh.edu/blog/how-should-i-plant-and-care-japanese-maple
plants.ces.ncsu.edu/plants/lagerstroemia-indica/
selectree.calpoly.edu/tree-detail/calliandra-haematocephala
plants.ces.ncsu.edu/plants/ilex-x-aquipernyi/
landscapeplants.oregonstate.edu/plants/magnolia-randy
web.extension.illinois.edu/treeselector/detail_plant.cfm?PlantID=195
courses.missouristate.edu/pbtrewatha/Bonfire_Flowering_Peach.htm
uky.edu/hort/Common-Witchhazel

This article was first published on: http://www.72tree.com/9-small-trees-for-landscaping-smaller-yards/

Tuesday, May 25, 2021

5 Best Indoor Fruit Trees for Your Home

Grow and harvest fruit trees in your home

Avoid having to consume pesticide filled fruits, or being limited to what you can grow because you don’t live in a tropical region. Knowing how to grow fruit trees in your home will help you eliminate unhealthy chemical consumption and enable the enjoyment of growing your own fruit.

72tree.com assembled the following growing and care information about five fruit tree species you can successfully grow indoors.

Indoor Fruit Tree Species

The following 5 fruit tree species adapt well to indoor growth without requiring any over-the-top or intensive care requirements:

1. Dwarf Meyer Lemon Trees (Citrus × meyeri)

Dwarf Meyer lemon trees are one of the most popular fruit trees to grow indoors. Like most citrus trees, this species is self-pollinating, dispensing with the need for a second tree to accomplish fertilization.

Grow Meyer lemon trees Citrus x meyeri indoors year round

Fruit – Meyer lemon trees typically bear fruit after 2 or three years, depending on their growing environment. While the trees are self-pollinating, you can increase the crop yield by using a small paintbrush to gently spread the pollen from flower to flower when the tree is in bloom.

Soil Requirements – The most appropriate soil for growing healthy Meyer lemon trees is slightly acidic (between 5.5 and 6.5) and loam (2 parts sand to 2 parts silt to 1 part clay).

Watering – Keep the soil slightly moist without letting it dry out completely. (When watering, note that citrus trees prefer a tepid, lukewarm temperature to freezing cold.)

• Due to the salt content of your tap water, you could inadvertently end up causing marginal leaf scorch or reducing your tree’s ability to absorb water
• Citrus trees prefer ambient to lukewarm water vs. cold or freezing water
• Citrus trees like elevated amounts of moisture in the air, up to 50 percent humidity (typically the upper threshold for a home’s humidity)
• You can simulate this environment by regularly spritzing them with filtered water from a spray bottle

Grow lime trees Citrus aurantifolia indoors

Growing Location – Citrus tree species need sunlight. In fact, 8 to 12 hours of it daily.

• Put your tree in the sunniest window you have, even better if it’s a room with double exposure
• If you have any outdoor space, a few weeks in summer, fresh air will serve your tree well

Note: The same care tips that apply to #1 – Dwarf Meyer Lemons also apply to #2 – Dwarf Key Limes and #3 – Dwarf Orange Trees.

2. Dwarf Key Lime Trees (Citrus aurantifolia)

Dwarf key lime trees are another popular choice for indoor fruit trees (convenient for those who enjoy making key lime pie). This species typically grows from 2 to 4-feet tall, is self-pollinating, and bears fruit within 1 to 3 years.

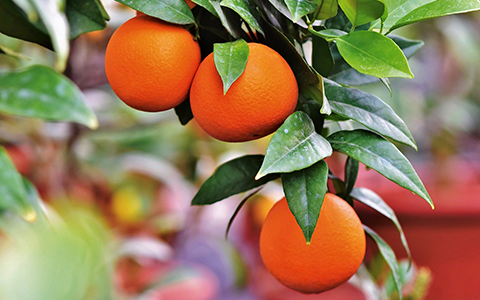
3. Dwarf Orange Trees (Various genus Citrus)

Grow and harvest orange trees indoors

Several sweet orange varieties, including navel oranges(Citrus sinensis), Valencia oranges, Mandarin oranges (Citrus reticulata), and Blood oranges (Citrus sinensis ‘Moro’), can be found on dwarf rootstocks for indoor cultivation.

• These trees will grow from 6 to 12-feet tall
• They are self-pollinating, and will take anywhere from 2 to 4 years before bearing fruit
• This is significant, as orange tree varieties grown from seed can take up to 15 years before bearing fruit.

Observe these additional care tips for dwarf Meyer lemon, Key lime, and orange trees kept indoors:

• Poor drainage can kill citrus trees. They are not tolerant of standing water in any way
• Overwatering can also kill your citrus trees
• Use terra cotta pots that darken when the soil is moist and deep water your trees when the soil is dry, allowing ample saucer space for all of the excess water to run off
• Light to severe chlorosis, drooping leaves, and falling leaves are indications of a nitrogen deficiency (fertilize to compensate)
• During winter months, mist your citrus trees daily or invest in a dedicated humidifier
• Do not expose citrus trees to cold drafts. Opening a door or window for them on a cold day can stress your citrus trees (and all your other plants)
• Stressed plants are susceptible to diseases and pests

#4. Dwarf Banana Tree (Musa acuminata)

Dwarf indoor banana tree musa acuminata

Banana trees are self-pollinating, dispensing with the need for a second tree for pollination.

Fruit – It will take 9 to 15 months before the tree starts flowering, then an additional two to six months before the bananas are ready to be picked.

Soil Requirements – An indoor dwarf banana plant needs rich, humus-like, and well-draining soil. Fertilize it monthly to keep it flourishing.

Watering – They like lots of water due to their enormous leaves, but you’ll want to let the soil dry out thoroughly between waterings. The leaves can be misted to simulate a humid climate.

Growing Location – Banana trees, like most tropical plants, need an abundance of sunlight and humidity.

• Your banana tree should get full sun for 8-12 hours per day
• A southern exposure window is ideal
• Rotate your banana plant often so that all sides are well-exposed to light

Note: Dwarf varieties, such as Dwarf Lady Finger, Super Dwarf Cavendish, or Dwarf Red are especially well suited for containers and can produce fruit much sooner than other varieties, sometimes only 8 to 10 months after planting.

#5. Dwarf Everbearing Mulberry Tree (Morus nigra)

Grow everbearing mulberries indoors

Self-pollinating dwarf Everbearing Mulberry varieties (Morus Alba pendula, Morus serrata, and Morus australis, among others) are the easiest to grow indoors. Spring to summer blooms have these trees producing fruit continually (late spring into summer). 

Fruit – Mulberry tree fruit (looks like a blackberry but slightly smaller) should be picked as soon as it ripens. This tree’s fruit supply ripens over time rather than all at once.

• Starting your tree from seeds may not be the best way to go
• It can take 4 to 10 years for your tree to mature enough to bear fruit
• However, if you take a cutting from a mature mulberry tree, the cutting will be the same age (genetically) as the parent tree
• Using cuttings, you could have berries growing in the first season.

Tip: For cuttings, remove any berries that start to grow the first season. They take energy away from the production of healthy roots. Then, once planted and established, you can harvest ripened berries.

Soil Requirements – Regular, well-drained potting soil will work just fine for this species. Mulberry trees are slow-growing and thrive in spacious pots.

Watering – Mulberry trees should receive the equivalent of 1 inch of rainwater each week for best growth and fruit production. Fruit may drop prematurely if irrigation is insufficient.

Growing Location – The more direct sunlight your mulberry plant gets, the more robust it will grow and the larger berry crop it will produce.

• Mulberries should get around 6 hours of light daily.

Indoor Fruit Trees

While searching for the perfect indoor fruit tree, there are a few things to keep in mind. Consider the following before getting your tree:

Do I have an area (by a window in my home) that gets at least 6 to 8 hrs of sunlight per day?

If yes, this lit location is where you’ll want to grow your fruit trees.

If not, your indoor fruit trees will grow best in the natural light you can give them compensated with a light fixture containing a full-spectrum bulb. These bulbs produce a balance of cool and warm light, replicating the natural solar spectrum.

Do I have a problem with elevated humidity or mold growth in my home?

If yes to either or both, use a dehumidifier to rein in your home’s humidity. Hire a professional mold removal service to clear mold from your home. This will provide healthier air for its occupants and minimize possible mold growth on your indoor plants and trees.

Note: The ideal relative humidity for health and comfort in your home is somewhere between 30-50%. Growing plants and trees indoors will potentially increase your home’s relative humidity.

Are my other indoor plants disease/pest-free?

Before investing in an indoor fruit tree, verify that your existing indoor plants are disease and pest-free. Some common diseases in houseplants include:

• Powdery Mildew
• Root Rot
• Sooty Mold
• Rust

Some common houseplant pests include:

• Thrips
• Aphids
• Spider Mites
• Scale Insects
• Mealybugs
• Fungus Gnats

Tip: Natural pesticides like neem oil or Diatomaceous Earth should be used to eradicate pests and disease from your houseplants before introducing a fruit tree in your home’s ecosystem.

Planting Indoor Fruit Trees Outdoors

Plant your indoors fruit trees outdoors when they outgrow your home

When you decide to give your indoor fruit tree the boot, here’s how to plant it outdoors without killing it:

• Acclimate the tree to outside weather by leaving it outside in increasing intervals throughout spring, summer, and mid-fall (bring it in for the winter and plant it outside the following spring).
• Don’t replant it. Leave it in its pot and protect it from severe weather conditions (especially cold weather).

Note: It may not be possible to plant your indoor tree outside. If winter temperatures in your area drop to or below freezing (32°F), your tree may die if left exposed.

Tip: When you have questions about planting your indoor trees outside, or they present seemingly inexplicable signs of poor health, hire an ISA certified arborist to evaluate them and offer professional guidance.

Growing Indoor Fruit Trees

In this article, you discovered growing and care information for five indoor fruit tree species and when you can expect them to bear fruit.

Growing your own fruit trees indoors gives you a cleaner food option when they bear fruit, cleaner ambient air, and a fantastic conversation piece for friends and family.

Being unable to grow your own fruit leaves you limited and subject to consuming foods exposed to harmful chemicals.

Sources:
extension.umn.edu/house-plants/growing-citrus-indoors
edis.ifas.ufl.edu/publication/mg243
extension.illinois.edu/blogs/rhonda-ferrees-ilriverhort/2018-09-04-go-tropical-ornamental-bananas
extension.iastate.edu/news/yard-and-garden-growing-fruit-trees

This article was first published on: http://www.72tree.com/5-best-indoor-fruit-trees/

Tuesday, April 27, 2021

Elm Tree Diseases Symptoms and Treatments

American elm tree or ulmus americana

Prevent your elm tree from rapid decline and death due to disease. Knowing how to identify and treat elm tree diseases will help you keep them healthy and thriving.

72tree.com assembled the following elm tree disease information, symptoms, and what treatments can help you save them from decline and death.

Elm Tree Disease

The following are some of the more common diseases that affect elm trees (Ulmus) and the treatments used to stop them from killing the trees.

Dutch Elm Disease (DED)

This disease was introduced to the U.S. in the 1930s and has since decimated the American elm (Ulmus americana) population. All native elms and European elms are susceptible, and the disease, 90 years later, still poses a significant threat.

Dutch elm disease is caused by two closely related fungi species (Ophiostoma ulmi and Ophiostoma novo-ulmi), the latter being responsible for most of the disease’s devastation. This fungus species attacks the elm’s vascular system. The tree, in turn, tries to stop the spread of the fungus by producing tyloses (plug-like structures) that block the flow of water and nutrients, contributing to the tree’s demise.

Dutch Elm Disease Symptoms Include:

• Premature leaf drop.

• The first symptom in infected trees usually appears as a small yellow or brown wilting area of foliage referred to as “flagging,” often starting at the edge of the crown.

• Wilting rapidly spreads inward toward the trunk.

• Leaves wilt, yellow, and eventually turn brown.

• Branch death.

• Brown streaking in sapwood (revealed by removing the bark or by cutting a cross-section of the dying branch).

This disease advances very fast. Depending on the health of the tree and time of infection, Dutch elm disease can lead a healthy adult elm tree to its death in a single growing season.

Dutch elm disease symptoms include fast foliage chlorosis and death

Dutch Elm Disease Treatment:

• Extensive pruning of infected areas.

• Remove severely infected trees.

• Burn or bury all infected wood (kills beetle larvae).

• Sever root graphs (connections) with neighboring trees.

• Preemptively treat uninfected trees with pesticides targeting elm bark beetles.

• Sterilize all pruning and maintenance equipment and materials after contact with infected trees.
• Create bait trees by treating them with cacodylic acid, killing the tree, and luring the fungus carrying beetles (this method suppresses brood production, making the beetle more manageable).

• Apply anti-fungal sprays to areas where infected trees are or have been.

• Plant DED resistant cultivars.

Note: If Dutch elm disease is caught early enough, extensive pruning may save the tree.

Multiple DED-resistant American elms and hybrid elm species are currently available and being developed. Some disease-resistant cultivars include:

• Accolade

• Cathedral

• Discovert

• Homestead

• Jefferson

• Morton Glossy

• Morton Stalwart

• New Horizon

• Pathfinder

• Pioneer

• Prospector

• Regal

• Valley Forge

Tip: Hire an ISA certified arborist to accompany or supervise all DED treatment strategies.

Elm Yellows (Formerly Elm Phloem Necrosis)

Elm yellows or phloem necrosis is a fast moving tree disease

Elm yellows is an aggressive disease affecting elm trees that is spread via root grafts or leafhoppers. Also known as elm phloem necrosis, the disease is fast-moving, has no cure, and occurs principally in the eastern United States and southern Ontario.

This disease is caused by phytoplasmas that infect the tree’s phloem (inner bark). This infection quickly kills the tree’s phloem, girdling the tree and stopping its flow of water and nutrients.

Elm Yellows Symptoms Include:

• Root debilitation (root hairs die).

• The phytoplasma infection kills the phloem (causing it to change color and take on a wintergreen-like smell.

• Inner bark tissues exhibit butterscotch or light brown discoloration, usually in streaks.

• The crown will turn yellow and droop all at once.

• Leaf drop and death of branches.

Inner bark tissue discoloration may occur in branches, twigs, and the trunk on DED infected trees, where discoloration caused by elm yellows is more commonly found in the trunk.

Elm yellows symptoms can appear any time during the summer but are most common in mid-to late-summer.

Elm Yellows Disease Treatment:

• There is no cure for this disease. Once a tree exhibits signs of elm yellows, it is highly recommended to remove and destroy the tree. Thus, eliminating inoculum sources from the area.

• Thorough root removal after felling an infected tree.

• Control or management of phloem-feeding insects like leafhoppers and spittlebugs.

• Topical application of pesticides to deter insect feeding.

• Apply anti-fungal sprays to areas where infected trees are or have been.

Plant Asian and European elm species in areas where elm yellows is present. These cultivars exhibit resistance to this disease.

Note: Elm yellows does not move into new areas as quickly as Dutch elm disease, providing a larger window for infected tree removal, preventive treatments, and containment.

Laetiporus root rot (formerly Polyporus sulfureus)

As elm trees age, the damage inflicted by butt and root rot fungi can severely compromise their structural stability. Failure eventually occurs during strong winds or severe weather, often without warning, resulting in severe property or physical damage. Root and butt rot can be caused by one of many wood-decaying fungal pathogens, but one of the more commonly occurring in elm trees is Laetiporus sulphureus.

Laetiporus Root Rot Symptoms Include:

• Canopy dieback.

• Stunted shoots.

• Undersized or pale-colored foliage.

• Premature fall color change

• Clusters of yellow to salmon to orange, shelf-like fruiting structures (conks) that turn white with age form in summer or autumn months on the trunk near the ground and fall off during the winter.

• The conk’s underside has tiny pores in which millions of spores are formed.

• New conks form in the following summer and autumn months. The bark where the fruiting structures form will be slightly depressed and often cracked.

Laetiporus root rot kills elm trees by weakening roots near the root collar

Root and butt rot fungi damage may only be exposed when trees suffer windthrow or windsnap during strong winds or severe weather. In some cases, Root and butt rot symptoms are present but provide little to no information on the depth of decay in the roots and lower trunk.

Laetiporus Root Rot Treatment:

• Root rot, in nearly all instances, is a case for immediate tree removal. Especially when fruiting structures are present at the trunk base or on the root flare.

• Hire an ISA certified arborist to evaluate the infected tree and recommend a course of action.

Note: Tree root diseases can be best controlled by preventive measures. When planting new elm trees, select disease-resistant cultivars, only plant in well-drained soil, and avoid overwatering. Chemicals, like chloropicrin or methyl bromide, don’t cure the disease but can reduce the level of the infection. Such fumigants work best when applied in and around the base of an infected tree or in the hole left behind after tree removal.

What is Killing My Elm Trees?

In this article, you discovered information on some of the more deadly elm tree diseases, the signs they display, and how to treat or control them.

Knowing how to recognize and treat elm tree diseases can help you catch and treat a disease early enough to potentially save your tree.

Ignoring the signs of a diseased elm tree can result in catastrophic damages when that tree falls on your home or causes personal injuries.

Sources:
hyg.ipm.illinois.edu/pastpest/199804g.html
mda.state.mn.us/dutch-elm-disease
mortonarb.org/trees-plants/tree-and-plant-advice/help-diseases/dutch-elm-disease
extension.umn.edu/trees-and-shrubs/dutch-elm-disease-resistant-elm-trees
hyg.ipm.illinois.edu/pastpest/199804g.html
ag.umass.edu/landscape/fact-sheets/elm-yellows
ipm.ucanr.edu/PMG/PESTNOTES/pn74109.html

This article was first published on: http://www.72tree.com/elm-tree-diseases-symptoms-and-treatments/

Thursday, March 18, 2021

7 Spring Tree Care Tips

Spring tree care and maintenance for vigorous growth

Prevent your trees from dying when they should be coming out of dormancy and thriving. Knowing how to care for your trees in the spring will keep them healthy and thriving.

72tree.com assembled the following tips to help you get your trees ready for the spring growing season.

1. Inspect Your Trees

The beginning of spring is the optimal time to inspect your trees. Your deciduous trees will sill be leafless, and your evergreens, well, should be green. During your inspection, look for the following:

• Cankers (dead sections of bark on branches or tree trunks)
• Oozing sap (trees eject sap to cover and protect wounds)
• Signs of infestation (adult beetle exit holes)
• Signs of disease (blackened and curled twigs)
• Structure (odd, crossed, or unwanted growth patterns)
• Prior pruning wounds (showing decay, fungal growth, excessive sap discharge)
• Suckers (these are offshoots from the trunk, branches, and roots that indicate stress and can be signs of a diseased tree)

Tip: Eliminate doubts and potential misdiagnoses by hiring an ISA certified arborist to check your trees, shrubs, and plants.

2. Prune Dead Wood

Spring tree care and maintenance pruning away dead wood

Winter is the best time to prune trees. However, the very beginning of spring offers you a visual indication of wood that needs to be removed. Consider the following:

• Prune out dead branches and twigs (use the “scratch test” green/moist beneath the bark – it’s alive. Brown/dry beneath the bark – prune it off.)
• Carefully prune diseased limbs or branches (look for cankers or discolored bark)
• Remove undesired growth (crossed branches and shape altering growth)
• Prune off and sprouting suckers (these anomalous growths take tremendous energy from the rest of the tree)

When your tree starts to leaf out or bloom, cease all pruning activity. The tree’s energy (stored water and nutrients) is being used for growth.

Note: Make your pruning cut 12-inches toward the trunk from where the limb’s diseased portion begins. If the disease is within 36-inches of the trunk, remove the entire limb.

Tip: Sanitize your pruning equipment (including your gloves) before and after working on a diseased tree.

Visit the link for further information and tree pruning techniques.

3. Provide Water for Your Trees

Spring tree care and maintenance watering for increased health

Out of everything a tree requires for healthy growth, water is the most important. Too little, and the tree will suffer hydraulic failure. Too much, and roots may become diseased, quickly killing the tree. Take the following into account:

• Soil around the tree should be well-drained (doesn’t pool up and stay)
• Soil should be consistently moist to the touch (not wet)
• Avoid all overhead watering or practices that splash water (splashing water is a primary vector for disease transmission)
• Water your tree 2 to 3 times per week
• Deep water your tree once weekly (let the water soak to a depth of 12 to 15-inches, this encourages roots to grow deep)
• Use soaker hoses or buckets to irrigate your trees (buckets with holes drilled in the bottom are great for deep waterings)

Tip: Increase watering frequency during times of drought and decrease it in unusually wet times.

4. Mulch Your Trees and Gardens

Spring tree care and maintenance mulch to regulate soil moisture and temperature

Applying organic mulch to your trees and garden helps regulate both soil temperature and moisture. Here’s how to do it right:

• Apply a 3 to 6-inch layer of mulch to the entire area within the dripline of your trees (needles, wood chips, or compost)
• Keep mulch pulled back 2 to 3-inches from the tree trunk (this avoids excess moisture and insect trouble around the root flare)
• When the mulch compresses, fluff it up and add more when needed
• Mulch your garden in the same manner

Mulch also serves as an “off-limits” zone to keep lawnmowers, wheelbarrows, and other equipment from encroaching on and damaging your trees.

Note: The drip line is the area beneath the branches, extending to the outer edge of the canopy.

Tip: Organic mulch naturally adds nutrients to your soil as it decomposes while increasing and protecting your soil’s biodiversity.

5. Fertilize Trees and Plants

http://www.72tree.com/wp-content/uploads/spring-tree-fertilizer.jpg

You may need to feed your trees. Before doing so, you should have your soil properly tested to measure its nutrient and mineral content, as well as its pH. You can send your soil sample to a university extension lab or a professional laboratory. Your soil test results should reveal:

• Cation Exchange Capacity or CEC (measures soil’s ability to retain elements and nutrients with positive charges or “cations”)
• Base Saturation (this is the distribution of cations in the soil)
• Nutrient and mineral levels and deficiencies
• Soil pH (most trees prefer slightly acidic soil or a pH of 6.1 to 6.9)

What increases soil pH? Lime can be added to acid soils to increase soil pH. Lime not only replaces hydrogen ions while increasing soil pH, it also provides calcium and magnesium to the soil.

What decreases soil pH? Aluminum sulfate and sulfur are commonly used to acidify soil. Easily found at garden supply centers, aluminum sulfate changes soil pH instantly as the aluminum dissolves in the soil.

What do the three numbers on fertilizer labels mean? All fertilizer labels have three bold numbers. The 1st is the nitrogen (N) content, the 2nd is the phosphate (P2O5) content, and the 3rd is the potash (K2O) content.

Fertilizers come in a multitude of combinations and types. Most popular are granular, slow-release fertilizers, which should include the components your soil test identified as deficient for optimum tree growth.

Note: Fertilizing without testing may be detrimental to your trees and shrubs. Too much nitrogen, sulfur, or magnesium may stunt tree growth and disrupt the soil’s biodiversity.

Tip: If you aren’t sure about which laboratory to send your soil sample(s), ask your local ISA certified arborist to have the soil tested for you or ask a nearby nursery which one(s) they use.

6. Remove Weeds from Your Landscape

Spring tree care and maintenance weed removal

While there are dozens of chemical herbicides promising miraculous weed control results, you run the risk of causing damage to or outright killing your plants, shrubs, and trees. Consider the following removal methods:

Stop digging! – Weed seeds are practically everywhere, but only seeds at the top of soil get the right conditions to trigger germination. Digging and cultivating activities elevate buried weed seeds to the surface. Dig only when needed and immediately fill the disturbed area with plants or mulch.

Mulch – Mulch regulates soil temperature and deprives weeds of sunlight. Organic mulches can host crickets and carabid beetles, which consume weed seeds.

Deadheading – Cutting back the tops of perennial weeds reduces reseeding and forces them to use up their nutrients. No matter how you choose to deadhead your weeds, chopping them down before they seed will help you keep them from spreading.

Water your plants, not your weeds – Deprive weeds of water by placing drip or soaker hoses underneath the mulch. This method efficiently irrigates plants and leaves nearby weeds dry. Water depriving weeds can reduce weed-seed germination by up to 70 percent.

Pull them out – After rain or a deep watering, get your gloves, a kneeling pad, and a weed disposal container. Use a fishtail weeder or an old salad fork to pry up tap-root weeds, like dandelion, thistle, and dock. During dry conditions, weeds sliced off just below the soil line will die. If your weeder is too large or wide, use an old steak knife to sever their roots, then fill in any open spaces left in your mulch.

Note: Keeping your soil’s biodiversity healthy and maintaining a minimum of 3-inches of organic mulch year round will naturally deter weed growth.

7. Plant New Trees

Early spring is a great time to plant a tree. Both evergreens and deciduous trees will be coming into their growing season and have the time to “harden” new growth before the arrival of the next winter season. Observe the following:

• Determine the proper tree species by your USDA hardiness zone map
• Determine which species is the right tree in the right location
• Have the soil tested and adjusted to the species preferences
• Plant your tree
• Care for your tree

Read this beginners guide to tree planting to learn more about the process and considerations.

Spring tree care and maintenance planting new trees

Spring Trees

In this article, you discovered seven pro tips to guide you through your tree preparation for the coming growing season.

With just a little knowledge about tree care and easy-to-follow tips, you can all but guarantee a healthy and robust growing season.

Ignoring the basic necessities of your trees will lead to their disease, infestation, decline, and eventual death. Allowing your trees to die in this manner invites the potential for cataclysmic property damage and personal injury when they fall.

Sources:
esf.edu/pubprog/brochure/soilph/soilph.htm
extension.umn.edu/planting-and-growing-guides/watering-established-trees-and-shrubs
extension.umd.edu/hgic/topics/fertilizing-trees-and-shrubs
hgic.clemson.edu/factsheet/changing-the-ph-of-your-soil/
extension.purdue.edu/extmedia/fnr/fnr-506-w.pdf

This article was first published on: http://www.72tree.com/spring-tree-care-tips/

Thursday, February 18, 2021

What To Do with a Tree Stump

Tree stump freshly cut

Prevent losing the opportunity to repurpose your tree stump. Once you have your dying or dead tree removed, leave the stump and transform it into something special.

72tree.com gathered information on what you can do with a tree stump after having the tree removed.

Tree Stump Repurposing and Decor Ideas

When it’s time to cut down your tree, you’ll want to think ahead and determine what to do with the stump. You could have it ground down or removed by the tree service, or you could preserve and repurpose it in your yard. Consider the following:

• How tall of a stump do you want to keep?
• If you are planning to landscape or hardscape, will the stump interfere with or complement your project?

Here are ten ways to creatively repurpose your tree stump:

1 – Plant a Tree in Your Tree Stump

Tree planted in stump

This may seem odd, but when your stump begins to decay in the center, you can plant a sapling or robust outdoors plant right in the stump. Simply cover the roots with nutrient-rich compost and silty soil, water two to three times per week.

This would most likely work best in a stump cut within one to two-feet of the ground. Taller stumps would work for climbing or crawling plants.

2 – Tree Stump Plant Pedestal

Potted plants displayed on tree stump

Showcase your favorite potted plants by placing them atop the stump. You can also use your stump as a location for your indoor plants to get some sun.

The stump height for this use would depend on your preference. The cut across the stump should be as level as possible for maximum stability.

3 – Tree Stump Statue Pedestal

Tree stump used as a statue pedestal

One way to give your garden statue a more organic look is to use your tree stump as its pedestal. You can complement your statue with surrounding plants or climbing vines.

The stump height for this idea will depend on the statue’s weight and your ability to anchor it to the stump. The statue’s stability will also depend on a level cut across the stump.

4 – Tree Stump Backyard Art

Tree stump used to display art in backyard

Your tree stump can be used to display letters, trinkets, figurines, or any outdoor collectibles. You could even place some lawn chairs around the stump and serve up some tea.

The stump height for this use will depend on what you intend to display and how within reach you want it.

5 – Tree Stump Carving Art

Artwork carved into tree stump

If you’re into carving, a tree stump will offer you a “blank canvas” and a chance to show off your creative skills.

Stump height for this project depends on what you plan to carve.

6 – Tree Stump Large Shapes

Large shapes carved out of tree stumps

In addition to carving artwork into a tree stump, you can use the whole stump to carve or cut out large objects like a giant Christmas ornament or an oversized mushroom.

Stump height for this project depends on what you plan to create.

7 – Tree Stump Chair

Seat made from a tree stump

Depending on the stump’s location and diameter, you might benefit from transforming it into a chair.

The stump height for this idea depends on how tall you want the back of the chair to be.

8 – Tree Stump Chopping Block

Tree stump left in place used as a chopping block

Both useful and somewhat ironic, you could turn your tree stump into a chopping block, giving you a sturdy surface to split logs for a wood-burning stove or fireplace.

The ideal height for a tree stump used as a chopping block is between twelve and sixteen inches.

9 – Tall Tree Stump Caricatures

Tree stump carved into statue

Create striking imagery when you have a life-size or larger-than-life caricature carved into your stump, overlooking your yard. If you ever move, cut the stump at ground-level and take your masterpiece with you.

Stump height for this project depends on how tall you want the caricature.

10 – Let Your Stump Decay

Tree stump allowed to decay naturally

If you enjoy seeing the decay process and the different flora and fauna it attracts, your tree stump will be the gift that keeps on giving. You can start or accelerate the decay process by drilling wide holes deep in the stump, filling them with water, and a high-nutrient-content fertilizer.

Stump height for this is at your discretion.

Tree Stump Removal

In some cases, keeping your tree stump after tree removal may not be in your best interest. Take these scenarios, for example:

• If the tree’s roots were buckling your driveway, you may want the stump removed to guarantee root death.
• If your tree is being removed due to severe vascular diseases like oak wilt or anthracnose, keeping the stump may help spread and perpetuate the disease in nearby trees.
• If your tree suffered catastrophic damages from a boring insect infestation, stump removal may be required to prevent subsequent tree infestations.

If you decide to manually remove your tree stump, read How To Remove a Tree Stump Without a Grinder.

Giving a Tree Stump New Life

In this article, you discovered multiple ways to keep and repurpose a tree stump after the tree has been removed.

By keeping your tree stump after tree removal, you gain an opportunity to express your artistic and design-savvy by creating a useful structure or attractive showpiece.

Removing the stump after felling your tree strips you of the opportunity to create something unique with years of durability.

Sources:
ucanr.edu/blogs/blogcore/postdetail.cfm?postnum=11441
munews.mansfield.edu/?p=757
s3.wp.wsu.edu/uploads/sites/2073/2014/03/Landscaping-with-Dead-Trees.pdf

This article was first published on: http://www.72tree.com/what-to-do-with-a-tree-stump/