
Avoid catastrophic accidents and injuries from a poorly constructed treehouse. Knowing how to properly plan and construct a treehouse will help you provide years of fun and learning experiences for your children and their friends.
72tree.com gathered the following essential information, steps, and professional tips on safely constructing a treehouse.
Treehouse Construction
Building a treehouse can provide years of a “second home” for you, your loved ones, and their friends. The following steps and tips will help you build a safe and weather-resistant outdoors retreat:
Step 1 – Select Your Tree(s)
Choose a tree sturdy enough to withstand the weight of your new treehouse and its visitors. Ideally, a tree with a distinct “y” shaped branch will serve you best, but there are other things to consider:
Species: Hardwood varieties (oak, maple, and hickory)
Height: The tree should be tall enough to provide a fun view but should consider the safety of the builder and children as well. A minimum of 6 to 10 feet high is recommended.
Branches: The branches need to be strong and thick enough to bear the structure’s weight.
Quality: Take care to select a tree that is not damaged or ailing in any way. Avoid trees with shallow roots or unstable soil, making them more vulnerable with a weak foundation.

Tip: If you do not have a tree that could support your idea of a treehouse, consider building one on stilts around a tree. You’ll have to significantly modify your blueprints, but you can still build your outdoor retreat.
Step 2 – Design Your Treehouse Blueprint
Your next step is to design the treehouse plans as accurately and as detailed as possible. Developing a treehouse blueprint will help you acquire the right materials during the build.
Measure the intended height from the ground to the platform, then measure how large you want the platform, and finally, measure the circumference of the trunk and branches that will intersect with the treehouse.
The height and platform measurements are crucial to your build. They will ultimately decide the project’s shape and details. Include your ideas for walls, railings, roofing, and ladder. These will provide shelter and safety for the treehouse’s visitors.
Step 3 – Consult an Arborist and an architect
Before moving forward, hire an arborist to evaluate the tree you have selected for your project. Experienced arborists are trained to detect developmental issues, disease, infestations, and other commonly overlooked tree problems and weaknesses.
Find a local arborist at treesaregood.org/findanarborist
Once your tree has a green light from your arborist, contract an architect to review your blueprints and offer any suggestions to increase your treehouse’s stability and safety.
Step 4 – Assemble Construction Material

What Is the best lumber for outdoor projects?
•Cedar is preferred when it comes to outdoor designs, while pine and fir are most commonly selected for outdoor treated wood projects
•Pressure-treated wood is chemically treated using pesticides, fire retardants, etc.
According to your blueprints, purchase the appropriate lumber quantity and size to complete your treehouse and have a few planks to spare (these come in handy for repairs or minor building modifications).
Tip: Verify your measurements before purchasing your lumber.
Referring to your blueprints, determine how you plan to attach and secure your treehouse components. Consider the following:
•Galvanized lag screws and washers
•Galvanized joist hangers
•Galvanized rafter ties
•Nails
•Deck screws
•Pulley for 1/4″ rope
•Tarp
Tip: Galvanized screws, nails, and metal components are zinc coated and have undergone a galvanization process. This process leaves the metal with a protective barrier making it resistant to rust and corrosion.
Step 5 – Treehouse Building Tools

Consider that you are building a small, elevated house. Here are some of the building tools required for this project:
•Hammer
•Saw
•Level
•Square
•Tape measure
•Adjustable wrench
•Cordless drill
•Cordless jigsaw
Other useful tools include:
•Miter saw (cutting lumber to length)
•Table saw (ripping lumber)
•Router (rounding sharp edges)
•Electric sander
Note: A stable ladder or stepladder is vital to preventing overhead lifting and potential injuries.
Step 6 – Lay Out the Wood and Material
Before attaching any treehouse components to your tree or mounted supports, lay out the section of the project to visualize what you are assembling. This will give you the opportunity to make any needed alterations or additions.
Note: This step also allows you to collect any hardware you will need before going to work on it
Step 7 – Secure the Support System to the Tree
Now it’s time to either attach the floor joists to the tree or put your concrete deck blocks and posts in place.
When using the tree for support:
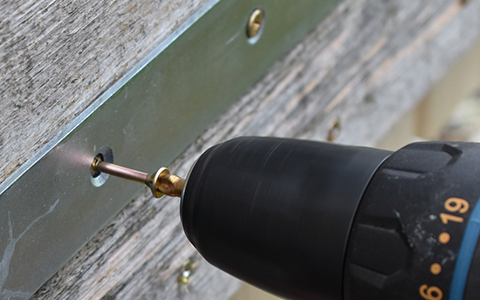
•Pre-drill the tree and lumber before attaching them to one another, as it will make it easier to install and significantly decrease the potential of your boards cracking.
•Once drilled, use an impact wrench to tighten the screws. These lag screws should be at least 6 inches long.
•Now, add the remaining floor joists.
With the joists in place, add joist hangers using your hammer and 1-inch galvanized nails.
When using concrete deck blocks:
•Place your concrete deck blocks around your tree as determined in your blueprint.
•Place 4 x 4 posts on the concrete deck blocks and use scrap lumber to hold them up until they are connected.
•Once posts are on the blocks, connect them using 2 x 8 bands.
•Use a level to make sure they are lined up correctly.

Tip: Whatever height you attach your floor joists on the tree will not change as the tree grows. Tree trunks grow outward by adding layers to their circumference but not upward.
Step 8 – Build Your Platform
To keep your treehouse stable, center the load over the trunk and spread the weight among several branches (if possible).
It will be much easier to build the rest of the treehouse if the floor is level and can support the entire weight of the structure. Consider the following:
•Lay beams across tree branches and shim them until level.
•Run beams between trunks of two trees.
•Cantilever beams out from a single trunk and provide support from above or below.
Tip: Take your time building the platform. Any mistakes here could result in a flimsy or off-centered construction.
Step 9 – Brace Your Platform
Your platform should feel secure and not wobble or shift. If it does, you will need to add extra support to halt this movement by:
•Tightening screws and bolts
•Adding additional support from the trunk
•Making sure joist hangers and rafter ties are properly spaced and installed
Tip: Do not continue building your treehouse until you have firmly secured the platform
Step 10 – Install a Pulley System
A pulley will mostly be for your kids’ enjoyment, but it’s helpful for lifting tools and materials to the platform during construction. Put a pulley in now and hang a basket from it. This will save you from making multiple trips to manually haul your building materials up a ladder.
Step 11 – Build Walls and a Roof
Attach wall supports or framework to your platform (this should be planned out in your blueprints). Remember to give your walls the needed height and strength to support the treehouse’s roof.

If you are using paneling, attach the panels to the frame and cut out your windows and door.
You can temporarily use a tarp held in place with bungee cords for the roof.
Once you have built a fully functional and secure treehouse, attach its permanent ladder and put it to good use.
Municipal Codes and Building Permits
Do you need a building permit?
Maybe. It depends on local laws and the nature of your treehouse. If you’re considering building one that will be visible to your neighbors, discuss it with them in advance to avoid any confusion or problems. Often a municipality only becomes involved after a neighbor complains.
Avoid building near property lines and never build a treehouse where it will infringe on a neighbor’s privacy.
Tip: This is one of the questions you will answer in step 3 with your architect.
How to Minimize Tree Damage
Also, in step 3, work with your arborist to discuss ways to minimize or prevent tree damage during your construction process. Consider the following:
•Consider using ground supports to take stress off the tree.
•Make the least amount of punctures necessary to safely support the treehouse.
•Don’t screw fasteners in too close together (this can significantly weaken that section of the tree). Use bolts spaced at least 18 inches apart vertically and 12 inches apart horizontally.
•Avoid slinging cables and ropes over branches. They can cut through the bark (girdling the branches) as the structure moves.

Note: Any tree bark damage is a potential entry point for infestations and disease.
Building a Treehouse
In this article, you discovered steps, advice, and pro tips on how to safely construct a treehouse for your family’s enjoyment.
Knowing how to properly design and build a treehouse will help you create a stable play place for your loved ones and family friends.
Trying to build a treehouse without planning it out or consulting tree and building professionals can result in catastrophic structural failures and severe injuries.
Sources:
newswire.caes.uga.edu/story/3645/tree-safe-tree-houses.html
glendaleca.gov/government/departments/public-works/indigenous-tree-program/treehouse-guide
cdnc.ucr.edu/?a=d&d=SFC19100828.2.200.11&e=——-en–20–1–txt-txIN——–1