Showing posts with label Tree Removal Alpharetta Ga. Show all posts

Wednesday, March 15, 2023

Armillaria Root Rot Identification, Treatment, and Prevention

Armillaria root rot produces honey mushrooms at an infected tree base

Need help figuring out how to identify and stop root rot from killing your trees, shrubs, or plants? Your ability to quickly identify Armillaria root rot will help you take swift action to eradicate it from your landscape.

72tree.com gathered the following information about the causes, identification, treatment, and prevention of Armillaria root rot.

What is Armillaria Root Rot

Armillaria root rot is a severe tree and woody plant disease. Armillaria can also affect palms, succulents, ferns, and other herbaceous plants. This disease is caused by multiple fungi in the genus Armillaria, also known as shoestring root rot, oak root fungus, honey agaric, or honey fungus.

Note: Armillaria mycelia may live hundreds of years or die within months. Armillaria’s lifespan depends on an available food supply. As long as nourishment is accessible and temperature and moisture are suitable, an Armillaria mycelium network will produce new sporophores (mushrooms) each fruiting season (late summer and fall).

What Causes Armillaria Root Rot?

Armillaria root rot is caused by several species of Armillaria fungus. The disease can occur in many different evergreen and deciduous tree, shrub, and plant species. Armillaria can survive many years in wood debris like old stumps or root systems. New infections typically occur when healthy roots grow close to or graft (inosculate) with diseased roots.

Armillaria Infection Identification

Armillaria root rot causes chlorosis wilting and tree death

Many known species of Armillaria exist in North America and are not easily distinguishable from one another. The most common and pathogenic species to trees (specifically conifers) are Armillaria mellea and Armillaria ostoyae.


Trees show symptoms and signs of Armillaria infection at different rates. Trees under stress, like during the summer heat or drought, are more likely to become infected and show rapid decline symptoms. Young trees may show symptoms and die within months or days compared to older trees, which may show symptoms for years before dying. Symptoms typically appear as the following:

• Dramatically reduced terminal growth
• Yellowing and browning of foliage
• Whitish resin around a tree’s base
• Creamy-white fans of fungus between bark and wood at the root flare
• Brown or black fungal rhizomes (resembling shoestrings) beneath the bark, on the roots, and in the soil
• Large groups of tan-colored mushrooms (honey mushrooms) near decaying wood in late summer and fall
• Sudden death of young trees (often in groups)

Note: An Armillaria-infected tree’s foliage typically wilts, turns yellow, and browns without falling from the tree.

How Does Armillaria Root Rot Spread?

Some species of Armillaria will produce mushrooms near (or on) infected tree roots or trunks. While new infections can result from airborne spores released by Armillaria mushrooms, the most common way this disease spreads is by underground rhizomorph growth originating from an infected tree, shrub, or plant.

Armillaria root rot rhizomorphs spread the disease between hosts

Tip: Infected plants can spread this disease to shrubs and trees with roots in their vicinity (and vice-versa).

Can Armillaria be Treated?

No. Once a host is infected, there is no effective treatment (cure) for Armillaria root rot. The disease can be managed (somewhat) by consistently removing dead trees, shrubs, plants, infected stumps, and entire root systems. Armillaria requires consistent moisture to survive. In large stands or groves, excavation around the root crown can be an effective deterrent but not a cure.

Can a Tree Recover from Root Rot?

Slowing Armillaria root rot in plants, shrubs, and trees is possible by removing affected roots and dead wood if the foliage is in the early stages of root rot or if the decay isn’t widespread. Unfortunately, because digging up larger trees to access decayed or dead roots is virtually impossible, slowing root rot in established trees is very difficult.

There are no chemical controls for honey fungus at present. The only viable option is to dig out the affected plant, shrub, or tree complete with all its roots and burn it.

Which Fungicide is Best for Root Rot Prevention?

Apply any of the most effective fungicides (those with thiophanate-methyl, polyoxin-D, triflumizole, or fludioxonil) preventively to uninfected soil. Once a plant, shrub, or tree is infected with Armillaria root rot, the fungi’s mycelia also contaminate the surrounding soil and are highly resistant to fungicides and other chemical treatments.

Armillaria Root Rot Elimination

Armillaria root rot infected trees plants and shrubs should be incinerated

The only absolute method to eliminate Armillaria root rot is the complete removal and incineration of infected plants, shrubs, and trees, including their foliage, trunks, stems, and roots.

Eliminating this fungus in contaminated soil requires extended desiccation and exposure to sunlight.

Note: If planting in previously exposed soil, select Armillaria-resistant species. Armillaria-resistant tree species include the following:

• Ginkgo (Ginkgo biloba)
• Tulip tree (Liriodendron tulipifera)
• Ash (Fraxinus)
• Cypress (Cupressus)
• Cherry (Prunus avium)
• Crabapple (Malus)
• Eucalyptus (Eucalyptus globulus)
• Holly (Ilex)
• Leyland cypress (Cuprocyparis leylandii)
• Maple (Acer)
• Sweetgum (Liquidambar)

Tip: Hire a certified arborist to help you completely remove infected plants, shrubs, and trees, sterilize contaminated soil, and plant new, resistant species in their place. Find an ISA-certified arborist (or verify one’s credentials) by visiting treesaregood.org/findanarborist.

Armillaria Root Rot

In this article, you discovered crucial information about Armillaria root rot and how to eliminate it from your property.

Knowing how to identify and deal with Armillaria root rot will help you remove and destroy infected specimens and preserve unaffected trees, shrubs, and plants.

Failure to quickly identify and prevent Armillaria root rot from spreading across your property will result in tree, shrub, and plant death, leaving your soil virtually useless.

Sources:
fs.usda.gov/Internet/FSE_DOCUMENTS/stelprdb5187208.pdf
ipm.ucanr.edu/PMG/PESTNOTES/pn74171.html
extension.umn.edu/plant-diseases/armillaria-root-rot
extension.psu.edu/armillaria-root-rot
extension.unh.edu/blog/2022/02/inosculation-making-connections-woods

This article was first published on: https://www.72tree.com/armillaria-root-rot-identification-treatment-and-prevention/

Friday, February 17, 2023

What is Well-Drained Soil

Well drained soil promotes plant shrub and tree health

Tired of pooling water and dying plants, shrubs, and trees on your property? Understanding what well-drained soil is and the crucial role it plays in keeping your landscape alive will help you take action to correct poor soil drainage.

72tree.com gathered the following information about what well-drained soil is, why it is essential to plant life, and what you can do to improve your soil’s drainage.

Well-Drained Soil Defined

Well-drained soil allows water to move through it quickly and not pool. Standing water or saturated soil deprives roots of oxygen and can lead to root rot, disease, and decline (ironically) from hydraulic failure in the plant’s vascular system. Some plants, shrubs, and tree species are adapted to tolerate saturated conditions longer than others but will eventually suffer a similar fate.

Poor Soil Drainage Symptoms

Besides pooling water and soil erosion, plants growing in poorly-drained soil suffer from a lack of oxygen, resulting in root death and the plant’s rapid decline. Other indicators include:

• Stunted or slow growth with yellowing leaves
• Leaf scorch or leaf burn
• Edema (spots and blisters) may appear on stems and leaves
• The plant’s crown may quickly wither and rot

Poor soil drainage is detected when plants wilt and die

Note: Edema is a plant disorder caused by roots absorbing more water than the leaves can transpire (a common problem resulting from poor soil drainage). This excess water ruptures cells and appears as water-soaked patches turning corky and unsightly.

When soils are improperly managed, they can become compacted. This condition can occur during and after construction. Foot and vehicular traffic also compresses the soil pores and limits the oxygen and water that would otherwise move through the soil.

How Do I Know if My Soil is Well-Drained

Besides watching for pooling water and other symptoms, you can test and improve your soil by doing the following:

1 – Dig a hole about 12 inches wide and 12 inches deep
2 – Fill the hole with water
3 – After it completely drains, refill it with water and mark the time
4 – Note how long the water takes to drain

The water level in soil with excellent drainage should drop 1 to 2 inches per hour. Any longer, and you should take steps to improve the soil.

How to Improve Soil Drainage

Soil is composed of sand, silt, and clay particles varying in size. Sand has the largest particle size, and clay has the smallest. When soil contains large sand proportions, it has more pore space and is more sharply drained (similar to a sandy beach). Soil with high clay content has significantly less pore space. Reduced pore space slows water drainage and causes the soil to hold water for longer periods. Consider the following soil structure improvement methods:

Amend the Soil with Compost – Add organic matter to improve drainage in poorly drained soil. Organic matter, like compost, improves soil structure by increasing soil aggregation (soil aggregates are groups of soil particles). The space between these aggregates creates the space required for holding and exchanging air and water.

Spread compost 3 inches thick over the soil surface and work it into the top 10 inches of soil with a shovel, garden fork, or tillage.

Tip: Using a rototiller too frequently breaks down soil aggregates, defeating your soil improvement efforts.

Plant Cover Crops – Cover crops can help significantly improve soil drainage by increasing organic matter, and their roots help break apart or expand compacted soil. Some popular cover crop plant species include:

Ground cover like crimson clover help preserve soil structure

• Alfalfa (Medicago sativa)
• Buckwheat (Fagopyrum esculentum)
• Oat (Avena sativa)
• Winter Rye (Secale cereale)
• Crimson Clover (Trifolium incarnatum)
• Mustard (Brassica napus)

Cover crops are sometimes called “green manure” or “living mulch.” These species can add nitrogen to your soil, improve drainage, and boost fertility (without applying chemical fertilizers).

Aerate the Soil – Aerating can help relieve soil compaction. A core aerator removes soil plugs, leaving holes to loosen the soil, improving drainage, and getting air to roots.

Add Earthworms – Earthworms naturally and quickly improve soil pore size, water infiltration rate, water content, and water-holding capacity. Their burrowing tends to reach over 3 feet in depth, breaking up hardpans and promoting deep soil structure and aggregation.

Note: Soil with healthy earthworm populations drains up to 10 times faster than soil without them.

Well-Drained Soil

In this article, you discovered information defining well-drained soil, why it is essential to plant life, and how you can reverse poor soil drainage.

Recognizing when your soil is not draining properly will help you take prompt action to correct it and keep your plants, shrubs, and trees alive and thriving.

Your misunderstanding of soil drainage can lead to hydraulic failure in your landscape’s plant life, leaving you with diseased, declining, or dead plants, shrubs, and trees.

Sources:
agebb.missouri.edu/agforest/archives/v10n2/gh14.htm
missouribotanicalgarden.org/gardens-gardening/your-garden/help-for-the-home-gardener/advice-tips-resources/pests-and-problems/environmental/overwatering
hortnews.extension.iastate.edu/testing-and-improving-soil-drainage
dpi.nsw.gov.au/agriculture/soils/guides/soil-biology/earthworms

This article was first published on: https://www.72tree.com/what-is-well-drained-soil/

Wednesday, January 11, 2023

5 Self-Pollinating Fruit Trees for Alpharetta Georgia Landscapes

Standalone self pollinating flowering and fruiting trees for alpharetta georgia include peach

Need help choosing standalone fruit trees for your Alpharetta, Georgia landscape? Knowing which fruit tree species self-pollinate will help you choose individual fruit-bearing trees that provide your Alpharetta, Georgia landscape with shade, beauty, and delicious fruit.

72tree.com gathered species and growing information for several self-fruiting trees hardy to Alpharetta, Georgia, landscapes.

What is a Self-Pollinating Fruit Tree?

Most fruit trees are self-sterile for their own pollen (requiring a second compatible tree and a pollen vector). However, self-pollinating fruit trees only need their pollen to self-fertilize and bear fruit, and they can be planted as a standalone tree. As the name suggests, these trees do not require pollen vectors (bees, flies, wasps, etc.). Consider the following self-pollinating fruit trees for your Alpharetta, Georgia, landscape:

1. Pomegranate (Punica granatum)

Standalone self pollinating fruit trees for alpharetta georgia include pomegranate

Pomegranates can be grown as large shrubs or small trees with smooth, evergreen leaves, and showy orange to red flowers. It produces rounded and seeded fruit with a dry outer covering.

Mature Size – Pomegranates reach 10 to 20 feet in height and have a 10 to 20-foot spread.
Soil Needs – This species thrives in loam, sandy, and clay well-draining soil with a 5.5 to 7.2 pH.
Sun Requirement – Full sun (minimum 6 hours daily)
Water Needs – Irrigate every 7 to 10 days during dry conditions. Pomegranate trees require approximately 60 inches of water annually.
Fruiting – Pomegranate trees typically produce a harvest two to three years after planting. Most varieties flower from spring into fall and fruits (set in March or April) will be ready for harvest between August and October.
Hardiness Zone – 7 through 10

2. Peach (Prunus persica)

Standalone self pollinating fruit trees for alpharetta georgia include peach

Peach trees typically grow a rounded crown with upward-reaching branches draped in three to six-inch-long, dark green, deciduous leaves.

Mature Size – Peach trees reach 25 feet in height and have a 25-foot spread (when left unpruned).
Soil Needs – This species thrives in lightweight loamy, well-drained soil with a 6.0 to 6.8 pH.
Sun Requirement – Full sun (minimum 6 hours daily)
Water Needs – Irrigate daily with 35 – 40 gallons during summer months. Peach trees require approximately 36 inches of water annually.
Fruiting – Peach trees typically bear fruit 2 to 4 years after planting. A peach tree may bear fruit from June through August, with some species bearing fruit through September.
Hardiness Zone – 4 through 9

3. Apricot (Prunus armeniaca)

Standalone self pollinating fruit trees for alpharetta georgia include apricot

Apricot trees have an upright growth pattern with a broad canopy. The leaves are ovate with a rounded base, pointed tip, and serrated margin. The tree produces white to pink flowers and fleshy yellow to orange fruit. Apricots are self-pollinating, but planting two different varieties (blooming simultaneously) can result in a significantly larger harvest.

Mature Size – Full-size apricot trees reach 25 feet in height and have a 25-foot spread.
Soil Needs – This species thrives in loamy, well-drained soil with a 6.5 to 8.0 pH.
Sun Requirement – Full sun (minimum 6 hours daily)
Water Needs – Provide your apricot tree with an inch of water every ten to 12 days.
Fruiting – Apricot trees typically bear fruit 3 to 4 years after planting. Blooming in early spring only on two-year or older wood. Fruits ripen and should be harvested from June through August.
Hardiness Zone – 4 through 9

4. Fig (Ficus carica)

Standalone self pollinating fruit trees for alpharetta georgia include fig

The common fig tree is a deciduous, multi-trunk tree with smooth, gray bark and a wide but low, open canopy. This species has large multi-lobed, showy, dark green leaves and produces small, inconspicuous flowers.

Mature Size – Fig trees reach 10 to 30 feet in height with a 20-foot spread.
Soil Needs – Figs prefer moist, well-drained, organically rich soil with a 6.0 to 7.5 pH.
Sun Requirement – Full sun (minimum 6 hours daily)
Water Needs – Fig trees need 1 to 1-1/2 inches of irrigated water or rainfall per week (minimum).
Fruiting – Most fig trees take three to five years before ripening fruit. Figs typically form on new stem growth each year and ripen from May through November.
Hardiness Zone – 8 through 10 (6 and 7 if protected)

5. Persimmon (Diospyros virginiana)

Standalone self pollinating fruit trees for alpharetta georgia include persimmon

The common persimmon is a deciduous tree grown for its beautiful foliage and delicious fruit. When the fruit ripens, they range in color from yellow to red-orange.

Mature Size – Persimmon trees reach 35 to 60 feet in height with a 20 to 30-foot spread.
Soil Needs – Persimmon trees grow best in loamy, well-drained soil with a 6.0 to 6.5 pH.
Sun Requirement – Full sun (minimum 8 hours daily)
Water Needs – Water a persimmon tree for 10 minutes once or twice weekly in the spring and summer. Persimmon trees can withstand short drought periods.
Fruiting – Persimmons are a fall crop typically ripening from early fall through early winter. There are two primary varieties of persimmons (The astringent fruit is consumed when it becomes soft, and the non-astringent fruit is eaten while firm.
Hardiness Zone – 4 through 9

Self-Pollinating Fruit Trees

In this article, you discovered species and planting information for several self-pollinating fruit trees ideal for landscapes in Alpharetta, Georgia.

Knowing which self-pollinating trees to plant in your Alpharetta, Georgia landscape will help you grow magnificent shade trees that provide an abundant annual fruit harvest.

Avoid planting trees that require attention, pollination, or not knowing which self-pollinating species are most suitable for your Alpharetta yard.

Sources:
extension.uga.edu/publications/detail.html?number=C997
sites.redlands.edu/trees/species-accounts/peach/
plants.ces.ncsu.edu/plants/prunus-armeniaca/
hgic.clemson.edu/factsheet/fig/
missouribotanicalgarden.org/PlantFinder/PlantFinderDetails.aspx?taxonid=279917

This article was first published on: http://www.72tree.com/5-self-pollinating-fruit-trees-for-alpharetta-georgia-landscapes/

Tuesday, December 13, 2022

5 Pine Tree Diseases and Treatments

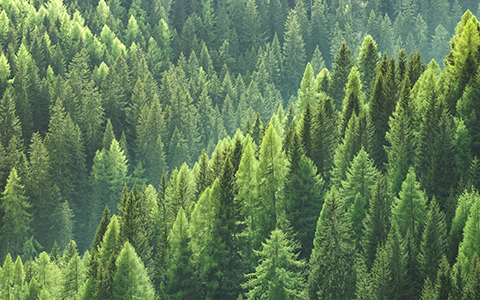
Pine tree diseases attack all pinus species

Keep treatable diseases from infecting and killing your pine trees. Recognizing the signs of disease and taking action to stop them will help you keep your pine trees robust and stable.

72tree.com gathered the following information and tips about pine tree disease signs, treatments, and prevention.

Pine Tree Disease

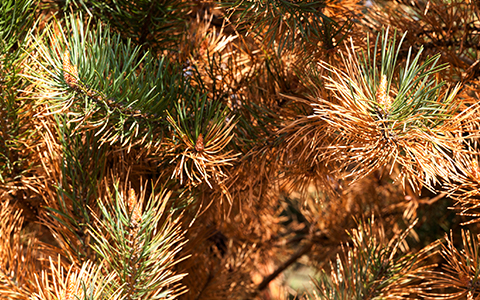
In years with heavy rainfall or severe drought, pine trees may brown in response. Browning is typically caused by the pine tree’s inability to uptake sufficient water to keep its needles fresh and alive. When moisture is overly abundant (and drainage is poor), root rot and other diseases are often the culprits. Consider the following pine tree diseases:

1. Annosus Root Disease (Heterobasidion annosum)

Pine tree diseases include heterobasidion annosum

Heterobasidion annosum is a basidiomycete fungus in the Bondarzewiaceae family. It is considered one of the most economically damaging forest pathogens in the Northern Hemisphere. Heterobasidion annosum is widespread in US forests and is responsible for $1 billion in annual pine tree losses.

Appearance – In some cases, resin flow may appear near the root collar as the tree attempts to defend itself against attack. Diseased pines may show crown thinning and yellowing. In pine trees, the disease is most active in the sapwood, killing tissues and heartwood as it progresses.
Treatment – Carefully remove and destroy infected trees and stumps. Any stumps left in the ground should be treated with borax.
Prevention – This disease typically enters a pine tree stand when spores land on freshly cut limbs or stump surfaces. The fungus grows from the stump into nearby live trees via root grafts or contacts. For prevention, treat stumps with borax whenever thinning in a high-hazard area.

2. Diplodia Tip Blight (Sphaeropsis sapinea)

Pine tree diseases include sphaeropsis sapinea

Diplodia blight, previously called Sphaeropsis tip blight, is a common fungal disease of stressed conifers, most typically pines with needles in bunches of 2's and 3's.

Appearance – Needles of new shoots will remain stunted, turn straw-colored, and will be glued in place from excess resin. Mature needles on branches end up killed by girdling cankers. Sticky, clear-to-white resin is found on dead twigs, the main stem, or branches with cankers.
Treatment – If you previously had problems with Diplodia, consider applying fungicides as the candles are expanding and then two more applications at 2-week intervals (bud break, half candle, and full candle). This typically prevents any spores from being disseminated from infecting the tree’s succulent new growth.
Prevention – Proper tree care, including increased irrigation during drought, pruning, and equipment sanitation are often effective methods for control of Diplodia tip blight and canker, especially when pines are newly infected.

3. Dothistroma Needle Blight (Dothistroma septosporum)

Pine tree diseases include dothistroma septosporum

Pine trees of all ages can become infected. Symptoms are typically first seen at the base of the crown on older needles. Infected needles develop yellow and tan spots and bands, which soon turn red. As the disease progresses, the ends of the needles turn reddish-brown while the needle base oddly remains green.
Appearance – Reddish brown spots or bands appear on needles in the fall. Needle spots girdle the pine’s needles. The needle beyond the band dies and turns brown, leaving the bottom portion of the needle green. Tiny black fungal fruiting bodies will appear in the bands or the needle’s dead areas.
Treatment – A copper fungicide spray is an effective method to prevent needle cast. Other useful fungicides are chlorothalonil and mancozeb.
Prevention – If your trees have a history of Dothistroma needle blight, copper fungicides can protect new needles from infection. Fungicides need to be applied before buds open in the spring.

4. Fusiform Rust (Cronartium quercuum)

Pine tree diseases include cronartium quercuum

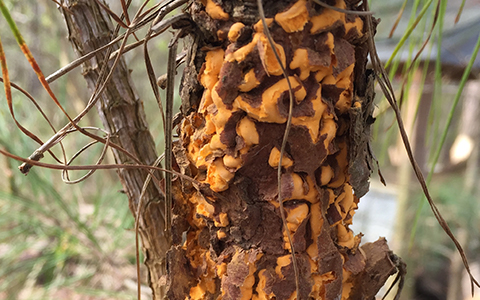
Fusiform rust is caused by a curious fungus that produces five spore stages and requires an oak and a pine tree to complete its life cycle.

Appearance – Fusiform rust is caused by Cronartium quorum f. sp. fusiforme. It produces bright orange spores on southern yellow pines, especially loblolly pine, in springtime.
Treatment – Avoid planting any rust susceptible pine tree species in locations where fusiform rust is or has been an issue. Pruning branch cankers and completely removing diseased branches can help lower potential trunk infection. However, once the trunk is infected, branch pruning is no longer recommended (careful tree removal and destruction is).
Prevention – Disease prevention is best accomplished by planting resistant pine species and treating all oak trees growing anywhere in the vicinity of your pine trees.

5. Needle Rust (Chrysomyxa ledicola Logerh)

Pine tree diseases include chrysomyxa ledicola logerh

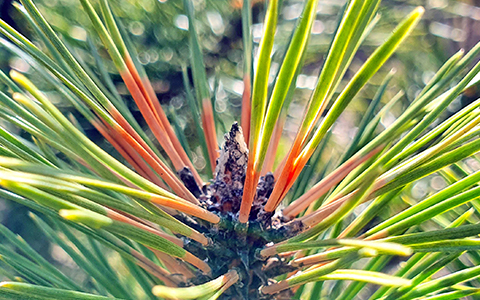
Pine or spruce needle rust is easily identified by pale, white, or orange blisters appearing on infected needles (in summertime). White blisters will appear on the current year's needle growth.

Appearance – Yellow-to-orange spots or bands appear on green needles in spring. In late spring to early summer, tiny, raised, white tubes form on needles breaking open to release powdery, orange spores. These infected needles can remain attached to the tree for several years.
Treatment – Needle rust is considered a minor stress on pine trees and typically requires no management efforts. However, when necessary, the most efficient rust disease control is to carefully prune and destroy affected areas and remove any visible galls (abnormal growths) in late winter or early spring before they can produce spores.
Prevention – Follow these best practices to help prevent spruce needle rust:

• Redirect lawn sprinklers away from pine branches and needles.
• Plant your spruce trees far enough apart to allow good air circulation between them.
• Prune out and destroy wilted or blighted stems and branches.

Note: In most cases, pine needle rust is a cosmetic issue, and no management is needed.

Pine Tree Disease Control

In this article, you discovered essential information and pro tips on identifying, treating, and preventing several pine tree diseases.

Knowing how to identify, control, and prevent deadly pine tree diseases will help you keep your pine trees thriving while stopping these diseases from spreading across your landscape.

Failing to recognize signs of diseased pine trees will lead to their death, potentially causing catastrophic damages and life-threatening injury when they fall.

Sources:
tfsweb.tamu.edu/uploadedFiles/TFSMain/Manage_Forest_and_Land/Forest_Health/Stewardship/Annosum_Root_Disease.pdf
fs.usda.gov/Internet/FSE_DOCUMENTS/stelprdb5299327.pdf
extension.umn.edu/plant-diseases/diplodia-shoot-blight-and-canker
forestry.ces.ncsu.edu/2017/04/so-what-is-the-orange-stuff-on-my-pine-trees/
extension.psu.edu/spruce-needle-rust

Photo Credit: craven.ces.ncsu.edu

This article was first published on: http://www.72tree.com/5-pine-tree-diseases-and-treatments/

Wednesday, October 12, 2022

Growing Coffee Trees in Alpharetta Georgia

Growing coffee trees in alpharetta georgia requires nutrient rich and well drained soil

Skip planting coffee trees in Alpharetta, Georgia for them to only wilt and die. Knowing how and where to plant your coffee trees in Alpharetta, GA will give you a specimen tree worthy of years of conversation and appreciation.

72tree.com gathered the following species and growing information to help you plant, grow, and protect beautiful coffee trees in your yard or garden.

Is Coffee a Plant, Shrub, or Tree?

That depends on how you choose to grow them. Coffee plants are woody evergreens that can grow up to 6 feet and can be groomed to grow as large, sprawling bushes, or as short, robust trees.

Coffee Tree Information

Coffee (Coffea) is a genus of more than 120 species of flowering plants in the Rubiaceae family, mostly native to tropical Africa. Four species are primary coffee sources grown throughout the “coffee belt;” they include Arabica, Robusta, Excelsa, and Liberica. When growing coffee in Alpharetta, Georgia, consider the following species requirements:

Soil Requirement – A healthy coffee plant requires nutrient-rich, well-drained, and acidic soil. The soil also needs to be maintained at a pH level between 4.9–5.6. At these pH levels, the plant can better absorb nutrients, resulting in more coffee cherries and fewer pest or disease-related issues.

Sun Preference – This is a species of understory plants and will not thrive in direct, harsh sunlight. Coffee plants that are exposed to too much sunlight will develop chlorosis and leaf browning.

Water Requirement – Coffee plants need to be watered regularly and will droop when they are under-watered. Keep the soil moist without letting the roots sit in water.

Spacing – Place individual plants 8 feet apart to create a hedge and further apart if you plan on harvesting the beans. You’ll need to leave sufficient room to freely walk around each plant.

Hardiness Zone – Coffee trees are cold hardy to zones 10 and 11 (the Coffee Belt) but can be grown in zones 7 through 9 with proper care and protection in the colder months.

Winter Protection – This species is not frost-tolerant, so freezing temperatures are detrimental to your plant. A coffee tree exposed to temperatures below 30° F (1° C) easily dies. It is better to move the plant indoors (when grown in containers) or well-sheltered or wrapped when grown in the yard or garden.

Harvest Time – Harvest your coffee cherries from October through December. However, depending on the species and weather conditions, you may be treated to a second crop, harvested from April through June.

Note: Proper care will help you maintain and even increase your tree’s output over the years, depending on the variety. The average mature coffee tree can produce 10 pounds of coffee cherries or 2 pounds of beans annually.

Tip: Since coffee trees are so sensitive to colder weather, you may find greater success growing them in containers. This way, when cold or freezing weather approaches, your coffee trees can be moved to a greenhouse, garage, or indoors until warmer weather returns.

How to Process Coffee at Home

Harvesting, processing, and brewing your own coffee beans leaves you in absolute control of the quality, purity, and flavor of your home-grown coffee. The following steps will help you properly harvest, prepare, and brew coffee at home.

Growing coffee trees in alpharetta georgia requires protection from harsh winter weather

Step 1 – Pick ripe coffee cherries – Coffee cherries should be picked at their ripest when they have a dark-red exterior. This allows time for the fruit’s sugars to ferment, resulting in a deep, complex, and sweet cup of coffee when the seeds are roasted.

Step 2 – Remove the beans from the fruit – Soaking the harvested beans in water overnight will loosen the fruit from the bean, facilitating the bean’s removal.

Step 3 – Soak the beans in water for 48 hours – This step will help remove the slimy covering on your beans. They’re ready when they feel rough between your fingers instead of slick. Rinse them off and proceed to the next step.

Step 4 – Thoroughly dry the beans – This step is crucial if you intend to store the beans for any time and prevent mold. Spread the beans out on a flat surface and allow them to sun dry for 2 to 4 days. (If you intend to brew them immediately, skip this step and proceed to step 5).

Step 5 – Removing the parchment from your beans – The parchment is a naturally occurring, papery substance surrounding coffee beans (just like the membrane-like layer enveloping other fruit seeds). Hulling away the parchment is optional since some coffee beans are sold “in parchment” (or “en pergamino”). It depends on your preference.

Step 6 – Roast your beans – You can roast your coffee beans in a stainless steel skillet or pot over medium heat, bake the beans in the oven, or even roast them in an air fryer. Any way you choose, use medium heat, stirring frequently, and avoid burning them.

Step 7 – Grind and brew your coffee – Grind your roasted beans to your preferred coarseness and brew your homemade coffee how you like it.

Note: Traditionally, coffee is harvested by hand in one of two ways: strip picking or selective picking. Strip picking is exactly how it sounds, trees are harvested, “stripping” all the beans from the branches, ripened and unripened cherries. Selective picking is more time-consuming but allows you to harvest only ripe coffee cherries.

Growing Coffee in Alpharetta, Georgia

In this article, you discovered species, growing, and harvesting information to help you grow and cultivate the coffea species in Alpharetta, Georgia.

Properly caring for and protecting your coffee trees can provide your landscape with a unique fruiting plant species that can keep you well-supplied with coffee to grind.

Being ignorant to coffee tree planting and care requirements will lead to their eventual decline and death.

Sources:
blogs.ifas.ufl.edu/charlotteco/2019/06/05/coffee-a-great-ornamental-small-tree-and-maybe-a-bean-or-two/
plants.ces.ncsu.edu/plants/coffea-arabica/
edis.ifas.ufl.edu/publication/HS306

This article was first published on: http://www.72tree.com/growing-coffee-trees-in-alpharetta-georgia/

Wednesday, September 21, 2022

Japanese Blueberry Tree Problems and Solutions

Japanese blueberry evergreen trees can suffer from disease and infestation

Protect your Japanese blueberry tree from fungus, decline, and death. Knowing some of the more common problems your Elaeocarpus decipiens can go through will help you avoid losing your tree to poor health conditions.

72tree.com gathered the following information to help you identify and quickly treat some of the more frequent problems occurring with the Japanese blueberry species.

What is a Japanese Blueberry Tree?

The Japanese blueberry tree (Elaeocarpus decipiens) is a remarkably beautiful, broad-leaved evergreen tree originating from East Asia. Its compact form, lush appearance, and elegant branching pattern make this tree species a sought-after lawn, garden, or street tree with year-round appeal.

Japanese Blueberry trees grow up to 40 feet with a spread of about 30 feet. This allows tree owners to prune and shape the tree however they want. The tree is a fascinating topiary canvas, allowing growers to be creative and build their yards and gardens the way they like.

Note: This evergreen can be grown as a large shrub or tree.

Japanese Blueberry Tree Problems

When it comes to tree problems, Japanese blueberry trees are exceptionally resilient and disease-resistant. The tree’s troubles are minor, but they still require attention to keep them under control. If you’ve spotted any of the problems listed below, quickly take action, as they can all be solved with the appropriate care and attention.

1. Tree Tops Dying Back

There may be several reasons for this damage. Borers can cause mechanical damage to the trunk shutting off the water and nutrients going to the top. Diseases developing beneath the bark can do the same thing. Because the Japanese blueberry is relatively thin-barked, sunburn or sunscald from intense sunlight can kill the trunk in that location and cause this dieback. Human activities around the tree can cause similar bark damage as well.

Boring Insect Solution: For boring insects, the best treatment is prevention. There is little you can do to save the tree once they’ve infested it. You can protect un-infested trees from borer infestation and damage with an insecticide soil drench once a year and an annual checkup from an arborist or trusted tree service.

Sunburn or Sunscald Solution: Again, the best remedy is prevention. If your Japanese blueberry is thinning out or your pruning activities have exposed areas of the bark, you can use white wraps around the trunk, either paper or plastic, as well as white paint to reflect the sunlight and keep the bark from overheating. Avoid pruning your tree too thin.

Human Damage Solution: Avoid vehicle, bicycle, and pedestrian traffic beneath the canopy of your Japanese blueberry. Pruning activities should be done by a professional tree service, arborist, or landscaper (specialized in topiary cutting and care).

2. Chlorosis (Iron Deficiency)

Japanese Blueberry trees are susceptible to chlorosis. This condition occurs when the tree does not get enough iron from the soil. Iron is a mineral required by plants, shrubs, and trees to make chlorophyll. This substance gives leaves their green color and is essential for photosynthesis.

Chlorosis causes a lack of chlorophyll in the tree’s foliage, making it relatively easy to identify. Leaves will begin to lose their green color, turning yellow. Over time, these yellow leaves will fall, and the barren branches left behind will start to die.

Two primary reasons cause Iron deficiency in your Japanese Blueberry trees. The first is a lack of iron in the soil. This, however, is not common. The more likely cause is an inadequate soil pH level.

Japanese Blueberry trees grow best in neutral pH. These trees prefer a soil pH between 6.1 and 7.5. Any higher, and it would be too acidic for the roots to efficiently absorb any Iron from the soil.

Chlorosis Solution: A soil pH test can determine if the pH is the problem. In case it is the pH that is causing the chlorosis issue, the solution is simple. You may have to either increase or decrease your soil’s acidity:

• Use sulfur, compost, or mulch to increase soil acidity
• Apply a material containing a form of lime to decrease soil acidity

Tip: When in doubt about pH testing or adjusting your soil’s acidity, consult your landscaper or arborist on how to proceed.

3. Leaf Rust

Japanese blueberry trees can decline from leaf rust

Leaf Rust is not a lethal affliction and can be easily treated. Leaf rust is caused by the Naohidemyces Vaccinii fungus, this fungal growth results in yellow spots growing on the tree’s foliage. These “spurs” eventually develop into rust-colored blemishes. In addition, leaf rust can stunt your tree’s growth and make it unhealthy if not properly addressed.

Leaf Rust is formed when the fungus grows on the tree’s leaves. For the fungus to develop, it requires a moist environment, and wet leaves are ideal. This is why watering should occur at the soil level around your Japanese Blueberry trees.

Leaf Rust Solution: Once you have identified leaf rust spreading through your tree, you must treat it with an anti-fungal or a fungicide to avoid spreading the fungus any further.

4. Sooty Mold

Sooty mold does not directly harm the tree; this affliction is not too troublesome and can typically be easily resolved. The problem behind sooty mold is that it can make your tree an eye-sore with black patches all over the leaves, and as the black mold accumulates, it blocks sunlight from reaching the leaves and disrupts photosynthesis. Without photosynthesis, the tree will lose its vibrant color and wilt, eventually dying. 

To understand how to fix this affliction, you must first understand what causes sooty mold to form. Sooty mold will only develop on honeydew. Honeydew is a waste product deposited by aphids and other invasive insects that feed on your Japanese blueberry.

A sign that your tree has an aphid problem is the presence of ants trailing up and down the tree, tending to and protecting the honeydew-producing insects. Another sign is bees flying around the leaves for no apparent reason.

Sooty Mold Solution: A quick but temporary solution is to spray your trees with a garden hose, washing away the honeydew and sooty mold buildup.

Neem oil applied to affected areas serves as a natural pesticide, repelling the insects feeding on your tree’s foliage and the ants protecting them.

Ladybugs have a voracious appetite and are extremely effective in eliminating aphids and scale. Ladybugs can be purchased in bulk and released directly on your tree. They will naturally spread throughout your landscape, potentially eliminating the need for any chemical-based pesticide applications.

Japanese Blueberry Tree Care

In this article, you discovered how to identify and treat several commonly occurring problems with your Japanese blueberry trees.

Knowing how to identify tree problems and take swift measures to resolve them will help keep your Japanese blueberry trees flourishing on your property.

Ignoring Japanese blueberry tree problems can quickly lead to severe tree problems, diseases, and infestations that will kill your tree.

Sources:
plants.ces.ncsu.edu/plants/elaeocarpus-decipiens/
hort.ifas.ufl.edu/woody/Pages/eladen/eladen.shtml
public.asu.edu/~camartin/plants/Plant%20html%20files/elaeocarpusdecipiens.html
blogs.ifas.ufl.edu/nassauco/2017/07/13/q-can-tell-japanese-blueberry-tree-can-grow/

Image Source: twitter.com

This article was first published on: http://www.72tree.com/japanese-blueberry-tree-problems-and-solutions/

Thursday, August 11, 2022

Tree-Boring Beetle Description and Prevention

Metallic wood boring beetles are tree killers

Avoid losing your trees to a tree-boring beetle infestation. Knowing how to identify tree-boring beetles and prevent them from destroying your trees will help you preserve and strengthen your landscape’s ecosystem.

72tree.com gathered the following information to help you identify tree-boring beetles, the damage they do to trees, how to treat them, and how to prevent beetle infestations.

Tree-Boring Beetle Damage

Borers tunnel into trees to feed on their inner wood. Symptoms can be slightly different depending on the borer, but in general, these critters create holes in tree bark, leave behind sawdust or sap and cause leaf discoloration and branch dieback, and can ultimately kill the tree. Consider the following:

Emerald Ash Borer (Agrilus planipennis)

Emerald ash borer (EAB), Agrilus planipennis, is an exotic beetle discovered in southeastern Michigan near Detroit in the summer of 2002. The adult beetles feed on ash foliage but cause minor damage. The emerald ash borer’s larval stage is responsible for the damage that leads to the host tree’s death. The larvae’s feeding under the tree bark eventually interrupts the tree’s ability to transport water and nutrients from the roots to the tree’s foliage, causing ash tree decline and death.

The emerald ash borer has decimated over 40 million ash trees in Michigan alone and tens of millions throughout other states and Canada. Small (younger) trees can die as soon as one to two years after an EAB infestation, while more mature infested trees can survive three to four years. Without intervention and preventative measures, an EAB infestation is 100% fatal to the host.

Vulnerable Tree Species – All eastern North American ash species are susceptible to EAB, including green, white, black, blue, and pumpkin ash trees.
Infestation Signs – Thinning and yellowing leaves, D-shaped holes in the bark, and severe canopy and bark loss
Treatment – Injection by a professional pesticide applicator (or a certified arborist) is the best option for trees greater than 48 inches in circumference (15 inches in diameter). Sprayed and poured insecticides are not as effective.
Prevention – It is challenging to prevent an initial EAB infestation of an individual tree. But you can prevent EAB from spreading to other trees. The only way to prevent your ash trees from falling victim to EAB is to treat them. Untreated ash trees are a significant contributor to EAB’s spreading.
Information/Reporting – If you suspect you’ve seen the emerald ash borer or ash tree damage caused by a potential infestation, report it immediately by calling 1-866-322-4512. You can also report your findings online at aphis.usda.gov/aphis/resources/pests-diseases/hungry-pests/Pest-Tracker

Note: You can also report an EAB sighting or infestation by reaching out to your county’s Extension office or a designated state representative found at emeraldashborer.info/reporting-eab.php

Mountain Pine Beetle (Dendroctonus ponderosae)

Wood boring beetles like the mountain pine beetle are responsible for the death of millions of trees

The mountain pine beetle (MPB) is a bark beetle species native to the forests of western North America from Mexico to central British Columbia. It has a hard black exoskeleton and measures approximately 1/4 inch (the size of a grain of rice). MPB is the most aggressive, persistent, and destructive bark beetle in the western United States and Canada. MPB affects pine trees by laying eggs under the bark. The beetles introduce blue stain fungus into the sapwood preventing the tree from repelling and killing attacking beetles with tree pitch (sap).

Vulnerable Tree Species – Ponderosa, lodgepole, white bark, limber, sugar, blue spruce, bristlecone pines, and several other pine species.
Infestation Signs – Signs of MPB infestation include white pitch tubes, running pitch, “sawdust” at the base of the tree, and multiple small emergence holes in the bark. During warmer months, these beetles can kill a tree in two to four weeks.
Treatment – Removal. Cut and destroy infested trees along with a wide buffer strip of healthy trees.
Prevention – The only treatment that can be applied to the tree is preventative. This will protect the tree by killing the beetles before they infest it. Insecticides containing the active ingredients permethrin or carbaryl and labeled for bark beetle control should be done by early June to protect trees from MPB.
Information/Reporting – If you suspect an MPB infestation, hire an arborist to confirm the infestation, begin treatment and removal efforts, and contact local authorities to help contain the beetle’s spreading.

Metallic Wood-Boring Beetle (Buprestidae)

Buprestidae, also called Jewel Beetles, comprise any of some 15,000 beetle species (insect order Coleoptera). These beetles are primarily distributed in tropical regions and are among the most brilliantly colored insects. Buprestidae adult beetles feed on their host tree’s foliage, resulting in little damage to the tree. The larvae of these beetles burrow through the bark, roots, and stems of multiple tree species and woody plants to reach the cambium (water and nutrient delivery system of the tree).

Vulnerable Tree Species – Pine (Pinus), spruce (Picea), fir (Abies), hemlock (Tsuga canadensis), ash (Fraxinus), beech (Fagus), hazelnut (Corylus), apple (Malus domestica)
Infestation Signs – Partially consumed foliage (leaf notches), chlorosis of foliage in sections of the crown, dieback of foliage and stems, frass (sawdust) found on the bark from burrowing activities, D-shaped exit holes in tree bark, suckers and water sprouts growing in the crown, on the trunk, and/or from the roots, woodpecker damage (woodpeckers hunt beetle larvae), squirrel activity (some squirrel species feed on beetle larvae)
Treatment – Due to their larvae’s hidden feeding activities, treating a metallic wood-boring beetle infestation is not always possible and should be evaluated by a certified arborist.
Prevention – Select well-adapted tree species not commonly attacked by wood-borers in your region. Select and prepare suitable planting sites to avoid tree stress, freeze damage, sunscald, windburn, and other common tree stressors.
Information/Reporting – If you suspect a metallic wood-boring beetle infestation, hire an arborist to confirm the infestation, begin treatment and/or removal efforts, and contact local authorities to help contain the beetle’s spreading.

Note: Read more about metallic wood-boring beetles at 72tree.com/metallic-wood-boring-beetles/

Can Trees Recover from Borers?

Wood boring beetles can quickly kill stands of trees

Sometimes. Tree-boring beetles are attracted to trees that are already stressed and injured (pruning wounds are common entry points for first-generation borers). Adding mulch around your tree and providing it with consistent waterings and seasonal fertilization can help it fight off or resist borers while recovering from previous damages.

Note: When you see signs of decline or bark damage (entry/exit holes or woodpecker damage), call a certified arborist to evaluate the situation and recommend a course of action.

Tree-Boring Beetles

In this article, you discovered essential information on identifying a wood-boring beetle infestation, the damages they can cause trees, how to treat and prevent infestations, and who to call for help.

Knowing how to identify, treat, and control tree-boring beetles will help you prevent or stop severe infestations from killing stands of trees on and around your property.

Ignoring beetle infestations can result in the quick death of your trees and property damage if said tree falls on your home.

Sources:
agrilifeextension.tamu.edu/library/landscaping/wood-boring-insects-of-trees-and-shrubs/
nrs.fs.fed.us/disturbance/invasive_species/eab/biology_ecology/host_preference/
fs.usda.gov/Internet/FSE_DOCUMENTS/stelprdb5187520.pdf

This article was first published on: http://www.72tree.com/tree-boring-beetle-description-and-prevention/

Tuesday, July 12, 2022

Eucalyptus Tree Information – Pros and Cons

Eucalyptus trees grow fast and spread quickly

Avoid planting a tree species that’s not well suited for your yard. Knowing the pros and cons of eucalyptus tree species will help you make informed decisions about what to plant in your yard.

72tree.com gathered the following information, pros, and cons of eucalyptus trees and how they affect their surroundings.

Eucalyptus Trees

Eucalyptus globulus Labill is an evergreen aromatic tree in the Myrtle Family (Myrtaceae). This tree species commonly reaches 150 to 180 feet in height and has a diameter of 4-7 feet. This tree has a straight trunk up to two-thirds of its total height and boasts a well-developed crown.

Eucalyptus Tree Foliage

Eucalyptus tree species are evergreens. Unlike other northern hemisphere trees that are deciduous in harsh fall and winter periods, eucalypts have leaves all year. These trees are described as ‘sclerophylls,’ meaning ‘hard-leaved.’ The species’ leaves are thick, leathery, and tough due to lignin and do not easily wilt. When eucalyptus trees are used for privacy screening, this attribute is their greatest pro.

Eucalyptus Tree Stands

A properly functioning watershed has a forest or tree stand with three canopy levels; a lower (understory), middle (middle story), and top or (overstory). With all three canopy levels, the trees can better trap water by slowing rainfall, trapping mist from the air on leaves, which drips into the soil and naturally replenishes the water table below. However, when the stand or forest is composed of eucalyptus, there will only be an overstory canopy level, and the ground will be practically devoid of understory trees and plants.

The leaves and roots of eucalyptus trees inhibit other plants from growing under them due to naturally-occurring chemicals. Having no middle or lower canopies causes soil to easily dislodge and wash downslope through streams and rivers, which can rapidly increase land and soil erosion.

Note: Many plants produce compounds that will inhibit or stop the growth of nearby plants to better compete for nutrients, sunlight, and other vital resources. This is known as allelopathy, and black walnut, maple, pine, and eucalyptus species are some of the better-known examples of tree species that employ this. Allelopathy is a severe con to planting eucalyptus trees on your property.

Invasive Eucalyptus Roots

Since a eucalyptus tree’s lateral roots spread up to 100 feet outward, they are known to grow into ditches, plumbing pipes, and septic tanks, damaging, clogging, and cracking them. In fact, eucalyptus roots penetrating or lifting foundations is a common complaint when this species is planted too close to a home.

If you choose to plant eucalyptus trees, you can limit or prevent some of the dangers associated with its shallow root system by placing root barriers and with proper planting and maintenance. Plant eucalyptus trees so the distance away from utilities, structures, driveways, sidewalks, and roadways is equal to two-thirds the potential mature height of the tree.

Note: Eucalyptus roots will typically encroach on a structure’s foundation only when there is an active water source like a burst pipe or poorly connected drain. This attribute of the eucalyptus species is a severe disadvantage to its planting.

Eucalyptus Tree Dangers

While there are many attractive advantages to the eucalyptus species, there are some downright terrifying disadvantages to having the species anywhere near your property. Consider these eucalyptus species’ cons:

Water – Eucalyptus trees have a terrible reputation as extensive water users and significant contributors to soil depletion. While they do need copious quantities of water, their colossal taproot can find moisture even in the most barren areas. This voracious appetite helps maintain their incredibly rapid growth.

Toxicity – Some homeowners place eucalyptus leaves around their homes for their aroma or will plant eucalyptus in their landscapes. However, eucalyptus plant foliage is toxic to animals and humans if ingested.

Toppling – Eucalyptus trees are prone to falling because of their shallow spreading roots that don’t do an efficient job of anchoring or steadying the tree in loose soil or when an external force places overwhelming pressure against the trunk and branches.

Exploding – Eucalyptus oil gives off flammable fumes, and these fumes can be ignited by lightning, flying sparks, and cinders, causing the tree to explode.

Fireballs – During brush or forest fires, the eucalyptus species releases great quantities of flammable gas that mix with air to produce fireballs full of sparks and embers exploding out in front of the fire.

Note: According to North Carolina State University, eucalyptus foliage and bark are considered poisonous in large amounts. If too much is ingested, nausea, vomiting, and diarrhea can result.

Eucalyptus Tree Uses

Eucalyptus trees are popular worldwide for their fast growth aromatic foliage and beautiful flowers

Knowing the dangers posed by growing eucalyptus trees, it is difficult to believe that anything good can come from this species. Consider the following (surprising) benefits:

• Eucalyptus oil Is naturally antibacterial and anti-fungal
• Eucalyptus vapors can decrease and clear mucus
• Eucalyptus is used for household cleaning
• Eucalyptus soothes and refreshes dry skin on contact
• Eucalyptus is an efficient insect repellant

Note: Topically applied, eucalyptus can offer you a break from everyday aches and pains.

Eucalyptus Trees Species Pros and Cons

In this article, you discovered essential information, pros, cons, and unusual species traits for the incredibly robust eucalyptus tree species.

Knowing the advantages and disadvantages of planting a eucalyptus tree on your property will help you make informed decisions about planting distances and tree safety.

Planting a eucalyptus tree without knowing how to care and its potential for invasive roots can unintentionally cause costly damages to your property.

Sources:
nps.gov/places/eucalyptus-trees.htm
science.org.au/curious/earth-environment/story-our-eucalypts
kqed.org/science/4209/eucalyptus-california-icon-fire-hazard-and-invasive-species
plants.ces.ncsu.edu/plants/eucalyptus/

This article was first published on: http://www.72tree.com/eucalyptus-tree-information-pros-cons/

Monday, May 16, 2022

Parks in Alpharetta Georgia

Parks are found all over Alpharetta Georgia for kids and adults

Keep boredom and lack of exercise from creeping into your lifestyle. Knowing where to go in Alpharetta, Georgia for fun outdoor activities, nature walks meandering alongside rivers and lakes, or simply time to play, you can get out more often and fight to preserve your health.

72tree.com gathered the following location and history information about several open air parks in the City of Alpharetta, Ga

1. Winward Community Park

Parks for kids and adults in Alpharetta Georgia include Winward Park Playground

Photo Credit: alpharetta.ga.us

Location – 6435 Windward Pkwy, Alpharetta, GA 30005

Description – Windward Community Park is a three-acre space nestled along the Windward Parkway corridor close to McGinnis Ferry Road. This new community park opened in June 2020 and features a multi-element playground. You will also find picnic pavilions, walking/jogging paths, swings, restrooms, and open green space.

Hours – This park is open during daylight hours.

Contact Number – 678-297-6123

2. North Park Park

Parks for kids and adults in Alpharetta Georgia include North Park Park

Photo Credit: mapquest.com

Location – 13450 Cogburn Rd, Alpharetta, GA 30004

Description – This 97-acre park includes five tennis courts, two multi-purpose synthetic turf fields, eight softball fields, two playgrounds, Adult Activity Center, a lake, Arts Building, a reflection garden, and a walking trail. Two picnic pavilions can be used for gatherings or celebrations (one is first-come, first-serve and the other is available for rental).

Hours – Sunrise to 10pm

Contact Number – 678-297-6130

3. Webb Bridge Park & Arboretum

Parks for kids and adults in Alpharetta Georgia include Webb Bridge Park

Photo Credit: tripadvisor.com

Location – 4780 Webb Bridge Road, Alpharetta, GA 30005

Description – With nearly 110 acres, this gorgeous park is located off Kimball Bridge Road bordering the city limits. The park’s many amenities include three grass soccer fields, a multi-purpose synthetic field, four baseball fields, four tennis courts, a 1-1/2 mile trail, outdoor fitness equipment, lake, concession stands, playground, and arboretum. The park also features three picnic pavilions for family gatherings and celebrations (both pavilions are available on a first-come, first-serve basis).

Hours – 8:00am to !0:00pm daily

Contact Number – 678-297-6123

4. Rock Mill Park

Parks for kids and adults in Alpharetta Georgia include Rock Mill Park

Photo Credit: tripadvisor.com

Location – 3100 Kimball Bridge Road, Alpharetta, GA 30022

Description – This 20-acre park is situated on Kimball Bridge Road at the access for Alpharetta’s Big Creek Greenway. There are nicely paved, shaded pathways that are great for walking, biking, picnicking, etc. The park also features a small group pavilion for family gatherings and celebrations (the pavilion is available on a first-come, first-serve basis).

Hours – Sunrise to 10pm

Contact Number – 678-297-6123 or 678-297-6130

5. Cogburn Road Park

Parks for kids and adults in Alpharetta Georgia include Cogburn Road Park

Photo Credit: mapquest.com

Location – 12825 Cogburn Road, Alpharetta, GA 30004

Description – Cogburn Road Park is an Alpharetta neighborhood park offering a playground, a .02 mile paved walking path, parking, restrooms, water, and pristine open green space.

Hours – Sunrise to 10pm

Contact Number – 678-297-6106

6. Garrard Landing Park

Parks for kids and adults in Alpharetta Georgia include Garrard Landing Park

Photo Credit: roswellgov.com

Location – 8000 Holcomb Bridge Rd, Alpharetta, GA 30022

Description – The Garrard Landing Park Loop has a smooth gravel/dirt surface. The impressive half-mile segment along the Chattahoochee River is fully shaded and has a wooden observation deck. The rest of the trail finds its way through an open meadow and features a man-made lake, cascading stream, covered bridge, and pond. This loop trail is generally considered an easy route and takes an average of 40 min to complete. This trail is exceptional for bird watching, fishing, and hiking.

Hours – 7am to 9pm

Contact Number – 770-641-3727

7. Big Creek Greenway

Parks for kids and adults in Alpharetta Georgia include Big Creek Greenway

Photo Credit: ajc.com

Location – 3104-3122 Kimball Bridge Rd, Alpharetta, GA 30022

Description – This concrete trail is nearly 9 miles long and gently borders Big Creek parallel to North Point Parkway, from Windward Parkway at Marconi Drive on the north end of the trail to Mansell Road on the south end. This greenway presents the perfect setting for walking, jogging, inline rollerblading, and biking.

Hours – Sunrise to 10pm

Contact Number – 678-297-6123

Backyard Landscaping

While not an official city park, you can create your own private getaway in your own backyard by installing water features, pathways, planting fragrant shrubs and fruit trees, or even building a treehouse. You will need to hire an arborist to evaluate the health of your trees and assess your landscape’s potential to be your private getaway.

Alpharetta City Parks

In this article, you discovered several places in the City of Alpharetta to escape from the hustle and stress of traffic, work, and never-ending responsibilities.

By taking time to visit, walk, or play in one of the many exceptional green spaces in the City of Alpharetta, you can supplement your daily exercise quota, relax and bond with nature, breathe fresh air, and increase your health and wellness.

Choosing to ignore your need to get out in nature and maintain regular physical activities can contribute to weight gain, chronic illnesses and other preventable conditions.

Sources:
alpharetta.ga.us/government/departments/recreation-parks/facilities
tripadvisor.com
yelp.com

This article was first published on: http://www.72tree.com/parks-in-alpharetta-georgia/

Wednesday, April 20, 2022

How To Build a Treehouse in 11 Easy Steps

Building a treehouse requires planning

Avoid catastrophic accidents and injuries from a poorly constructed treehouse. Knowing how to properly plan and construct a treehouse will help you provide years of fun and learning experiences for your children and their friends.

72tree.com gathered the following essential information, steps, and professional tips on safely constructing a treehouse.

Treehouse Construction

Building a treehouse can provide years of a “second home” for you, your loved ones, and their friends. The following steps and tips will help you build a safe and weather-resistant outdoors retreat:

Step 1 – Select Your Tree(s)

Choose a tree sturdy enough to withstand the weight of your new treehouse and its visitors. Ideally, a tree with a distinct “y” shaped branch will serve you best, but there are other things to consider:

Species: Hardwood varieties (oak, maple, and hickory)
Height: The tree should be tall enough to provide a fun view but should consider the safety of the builder and children as well. A minimum of 6 to 10 feet high is recommended.
Branches: The branches need to be strong and thick enough to bear the structure’s weight.
Quality: Take care to select a tree that is not damaged or ailing in any way. Avoid trees with shallow roots or unstable soil, making them more vulnerable with a weak foundation.

Building a treehouse requires careful tree selection

Tip: If you do not have a tree that could support your idea of a treehouse, consider building one on stilts around a tree. You’ll have to significantly modify your blueprints, but you can still build your outdoor retreat.

Step 2 – Design Your Treehouse Blueprint

Your next step is to design the treehouse plans as accurately and as detailed as possible. Developing a treehouse blueprint will help you acquire the right materials during the build. 

Measure the intended height from the ground to the platform, then measure how large you want the platform, and finally, measure the circumference of the trunk and branches that will intersect with the treehouse.

The height and platform measurements are crucial to your build. They will ultimately decide the project’s shape and details. Include your ideas for walls, railings, roofing, and ladder. These will provide shelter and safety for the treehouse’s visitors.  

Step 3 – Consult an Arborist and an architect

Before moving forward, hire an arborist to evaluate the tree you have selected for your project. Experienced arborists are trained to detect developmental issues, disease, infestations, and other commonly overlooked tree problems and weaknesses.

Find a local arborist at treesaregood.org/findanarborist

Once your tree has a green light from your arborist, contract an architect to review your blueprints and offer any suggestions to increase your treehouse’s stability and safety.

Step 4 – Assemble Construction Material

Building a treehouse requires good lumber selection

What Is the best lumber for outdoor projects?

•Cedar is preferred when it comes to outdoor designs, while pine and fir are most commonly selected for outdoor treated wood projects

•Pressure-treated wood is chemically treated using pesticides, fire retardants, etc.

According to your blueprints, purchase the appropriate lumber quantity and size to complete your treehouse and have a few planks to spare (these come in handy for repairs or minor building modifications).

Tip: Verify your measurements before purchasing your lumber.

Referring to your blueprints, determine how you plan to attach and secure your treehouse components. Consider the following:

•Galvanized lag screws and washers

•Galvanized joist hangers

•Galvanized rafter ties

•Nails

•Deck screws

•Pulley for 1/4″ rope

•Tarp

Tip: Galvanized screws, nails, and metal components are zinc coated and have undergone a galvanization process. This process leaves the metal with a protective barrier making it resistant to rust and corrosion.

Step 5 – Treehouse Building Tools

Building a treehouse requires carpentry tools

Consider that you are building a small, elevated house. Here are some of the building tools required for this project:

•Hammer

•Saw

•Level

•Square

•Tape measure

•Adjustable wrench

•Cordless drill

•Cordless jigsaw

Other useful tools include:

•Miter saw (cutting lumber to length)

•Table saw (ripping lumber)

•Router (rounding sharp edges)

•Electric sander

Note: A stable ladder or stepladder is vital to preventing overhead lifting and potential injuries.

Step 6 – Lay Out the Wood and Material

Before attaching any treehouse components to your tree or mounted supports, lay out the section of the project to visualize what you are assembling. This will give you the opportunity to make any needed alterations or additions.

Note: This step also allows you to collect any hardware you will need before going to work on it

Step 7 – Secure the Support System to the Tree

Now it’s time to either attach the floor joists to the tree or put your concrete deck blocks and posts in place. 

When using the tree for support:

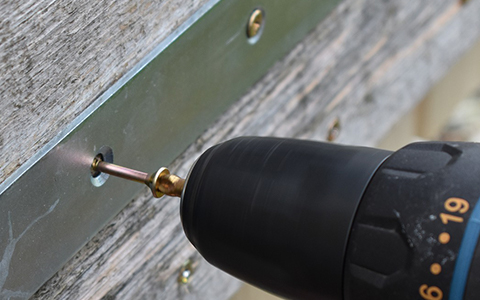
•Pre-drill the tree and lumber before attaching them to one another, as it will make it easier to install and significantly decrease the potential of your boards cracking.

•Once drilled, use an impact wrench to tighten the screws. These lag screws should be at least 6 inches long. 

•Now, add the remaining floor joists.

With the joists in place, add joist hangers using your hammer and 1-inch galvanized nails.

When using concrete deck blocks:

•Place your concrete deck blocks around your tree as determined in your blueprint.

•Place 4 x 4 posts on the concrete deck blocks and use scrap lumber to hold them up until they are connected.   

•Once posts are on the blocks, connect them using 2 x 8 bands. 

•Use a level to make sure they are lined up correctly.

Building a treehouse requires some precision construction and leveling

Tip: Whatever height you attach your floor joists on the tree will not change as the tree grows. Tree trunks grow outward by adding layers to their circumference but not upward.

Step 8 – Build Your Platform

To keep your treehouse stable, center the load over the trunk and spread the weight among several branches (if possible).

It will be much easier to build the rest of the treehouse if the floor is level and can support the entire weight of the structure. Consider the following:

•Lay beams across tree branches and shim them until level.

•Run beams between trunks of two trees.

•Cantilever beams out from a single trunk and provide support from above or below.

Tip: Take your time building the platform. Any mistakes here could result in a flimsy or off-centered construction.

Step 9 – Brace Your Platform

Building a treehouse requires securing connections

Your platform should feel secure and not wobble or shift. If it does, you will need to add extra support to halt this movement by:

•Tightening screws and bolts

•Adding additional support from the trunk

•Making sure joist hangers and rafter ties are properly spaced and installed

Tip: Do not continue building your treehouse until you have firmly secured the platform

Step 10 – Install a Pulley System

A pulley will mostly be for your kids’ enjoyment, but it’s helpful for lifting tools and materials to the platform during construction. Put a pulley in now and hang a basket from it. This will save you from making multiple trips to manually haul your building materials up a ladder.

Step 11 – Build Walls and a Roof

Attach wall supports or framework to your platform (this should be planned out in your blueprints). Remember to give your walls the needed height and strength to support the treehouse’s roof.

Building a treehouse requires attaching walls and a roof

If you are using paneling, attach the panels to the frame and cut out your windows and door.

You can temporarily use a tarp held in place with bungee cords for the roof.

Once you have built a fully functional and secure treehouse, attach its permanent ladder and put it to good use.

Municipal Codes and Building Permits

Do you need a building permit?

Maybe. It depends on local laws and the nature of your treehouse. If you’re considering building one that will be visible to your neighbors, discuss it with them in advance to avoid any confusion or problems. Often a municipality only becomes involved after a neighbor complains.

Avoid building near property lines and never build a treehouse where it will infringe on a neighbor’s privacy.

Tip: This is one of the questions you will answer in step 3 with your architect.

How to Minimize Tree Damage

Also, in step 3, work with your arborist to discuss ways to minimize or prevent tree damage during your construction process. Consider the following:

•Consider using ground supports to take stress off the tree.

•Make the least amount of punctures necessary to safely support the treehouse.

•Don’t screw fasteners in too close together (this can significantly weaken that section of the tree). Use bolts spaced at least 18 inches apart vertically and 12 inches apart horizontally.

•Avoid slinging cables and ropes over branches. They can cut through the bark (girdling the branches) as the structure moves.

Building a treehouse requires protecting the tree from girdling

Note: Any tree bark damage is a potential entry point for infestations and disease.

Building a Treehouse

In this article, you discovered steps, advice, and pro tips on how to safely construct a treehouse for your family’s enjoyment.

Knowing how to properly design and build a treehouse will help you create a stable play place for your loved ones and family friends.

Trying to build a treehouse without planning it out or consulting tree and building professionals can result in catastrophic structural failures and severe injuries.

Sources:
newswire.caes.uga.edu/story/3645/tree-safe-tree-houses.html
glendaleca.gov/government/departments/public-works/indigenous-tree-program/treehouse-guide
cdnc.ucr.edu/?a=d&d=SFC19100828.2.200.11&e=——-en–20–1–txt-txIN——–1

This article was first published on: http://www.72tree.com/how-to-build-a-treehouse-in-11-easy-steps/

Thursday, March 17, 2022

5 Fragrant Shrubs for Your Yard and Garden

Fragrant shrubs for your yard and garden include the majestic honeysuckle

Avoid a barren and boring yard . Knowing which shrubs give off a delightful fragrance will help you plant a yard full of aromatic surprises.

72tree.com gathered the following list of fragrant shrubs to help you balance beauty with aroma when planting in your yard and garden.

1. Jasmine (Jasminum)

Fragrant shrubs for your yard and garden include jasmine

Jasmine is a large deciduous or evergreen vining shrub with a graceful look and an appealing sweet scent.

Sun Requirement – Jasmines need 6 or more hours of daily sun. For species requiring partial shade, they will require 2 to 4 hours of daily sun.
Soil Requirement – Jasmine shrubs need well-drained, moist, and moderately fertile sandy, loamy soil.
Size – Jasmine typically grows to a height of 10 to 15 feet as a tall, semi-vining shrub.
Blooming Season – This species blooms in clusters from spring until mid-fall. The sweet flowers are often cream, white, pink, or yellow.
Fragrance – Jasmine has a floral scent considered rich and sweet.
Hardiness Zone – This species thrives in zone 7 and can sometimes survive in zone 6.

2. Lilac (Syringa)

Fragrant shrubs for your yard and garden include lilac

Lilac is a deciduous shrub with an irregular, rounded outline. The shrub is fast-growing when young but slows considerably with age. Lilac stems are dark gray to brown, and the wood is strong. Leaves on this shrub are dark green to blue-green on top and pale green below.

Sun Requirement – Lilacs need 6 to 8 hours of daily sun. Any less, and they may not bloom.
Soil Requirement – This species grows best in slightly alkaline (6.5 to 7.0 pH), moist, well-drained soil rich in organic matter.
Size – Lilac grows to a height of 8 to15 feet and a spread of 6 to 12 feet at maturity.
Blooming Season – Lilac typically blooms for 2 weeks in mid-spring. However, some varieties bloom in early and late spring.
Fragrance – Lilac is quite different from other species. Its scent is more deeply, and richly floral, similar to rose with subtle hints of vanilla. For those who prefer stronger perfumes, Lilac is a suitable choice.
Hardiness Zone – This species thrives in zones 3 through 7.

3. Gardenia (Gardenia jasminoides)

Fragrant shrubs for your yard and garden include gardenias

Gardenias have glossy evergreen leaves typically arranged opposite each other. The shrub’s tubular flowers are white or yellow and bloom singly or in small clusters. This shrub produces large berry-like fruits with sticky orange pulp.

Sun Requirement – Gardenias need a minimum of four hours of daily sun.
Soil Requirement – This species grows best in acidic (5.0 to 6.0 pH), moist, well-drained soil rich in organic matter.
Size – Gardenias grow 3 to 5 feet tall and wide.
Blooming Season – This species blooms in from late spring until mid-fall. Gardenia flowers are known to last several weeks before wilting.
Fragrance – Gardenias produce significantly fragrant flowers that may change scents during the day. The aroma is often described as a spicy, zesty scent, sometimes with coconut or even peach undertones.
Hardiness Zone – Gardenias thrive in zone 6b.

4. Viburnum (Viburnum)

Fragrant shrubs for your yard and garden include viburnum

Viburnums are large-flowering shrubs, with some varieties reaching up to 20 feet. There are both evergreen and deciduous viburnum varieties.

Sun Requirement – Viburnums thrive in full sun but will grow as well in light to partial shade.
Soil Requirement – This species will do well in moderately fertile, moist, and well-drained soil with a 5.6 to 6.6 pH.
Size – Viburnum grows from 3 to 20 feet at maturity.
Blooming Season – Most viburnums flower in spring.
Fragrance – The flower’s scent is sweet and pervasive with clove-like notes.
Hardiness Zone – Viburnum is hardy to zones 2 through 9.

5. Honeysuckle (Lonicera)

Fragrant shrubs for your yard and garden include honeysuckle

Honeysuckle shrubs are deciduous perennials with oval leaves and clusters of tubular flowers at the branch tips.

Sun Requirement – Honeysuckles need 6 to 8 hours of daily sun. Any less, and they may not bloom as much.
Soil Requirement – This species requires organically rich and well-drained soil. It should be moist but not soggy and should be an acidic to moderately alkaline soil ranging from a 5.5 to 8.0 pH.
Size – A honeysuckle vine can reach an astounding 30 feet in height, while other varieties grow to only 10 feet. It can take 10 years for honeysuckle to reach these mature heights.
Blooming Season – Most varieties will bloom in the spring, but some continue to flower all through summer and into early fall.
Fragrance – Honeysuckle is a pungent, almost thick scent, but it’s fruity with hints of honey and citrus.
Hardiness Zone – Honeysuckle is hardy to zones 5 through 9.

Fragrant Shrubs

In this article, you discovered species and planting information about 5 fragrant shrubs to grow in and around your garden and yard.

Planting fragrant shrubs in your yard and garden adds another dimension to the pleasant experiences you are trying to create around your home.

By not planting fragrant shrubs in your yard and garden, you are squandering an opportunity to add diversity, pleasant aromas, and curb appeal to your home.

Sources:
hgic.clemson.edu/factsheet/jasmine/
plants.ces.ncsu.edu/plants/syringa-vulgaris/
ctahr.hawaii.edu/oc/freepubs/pdf/of-32.pdf
unlgardens.unl.edu/viburnums
naturalresources.extension.iastate.edu/encyclopedia/honeysuckle-invasive-species-profile

This article was first published on: http://www.72tree.com/5-fragrant-shrubs-for-your-yard-and-garden/